Extron NBP 108 D handleiding
Handleiding
Je bekijkt pagina 45 van 73
Network Button Panels • Hardware Features and Installation — NBP 1200C 35
Step 5: Install Modules and a Retractor Bracket
Determine where the modules are to be installed in the Cable Cubby enclosure. Any combination of two modules
can be installed. The modules can be installed on either side of the enclosure and at various heights.
NOTES:
• Ensure that there is enough room above the modules for the Cable Cubby lid to close completely. This
also requires that any retractor brackets be installed as close as possible to the bottom of the enclosure.
• Extron recommends mounting the power module on the left side of the enclosure.
• For any cables that must be connected to modules, feed them up through the table or other furniture
before attaching them to each module.
• Use a screwdriver to secure the modules with the screws.
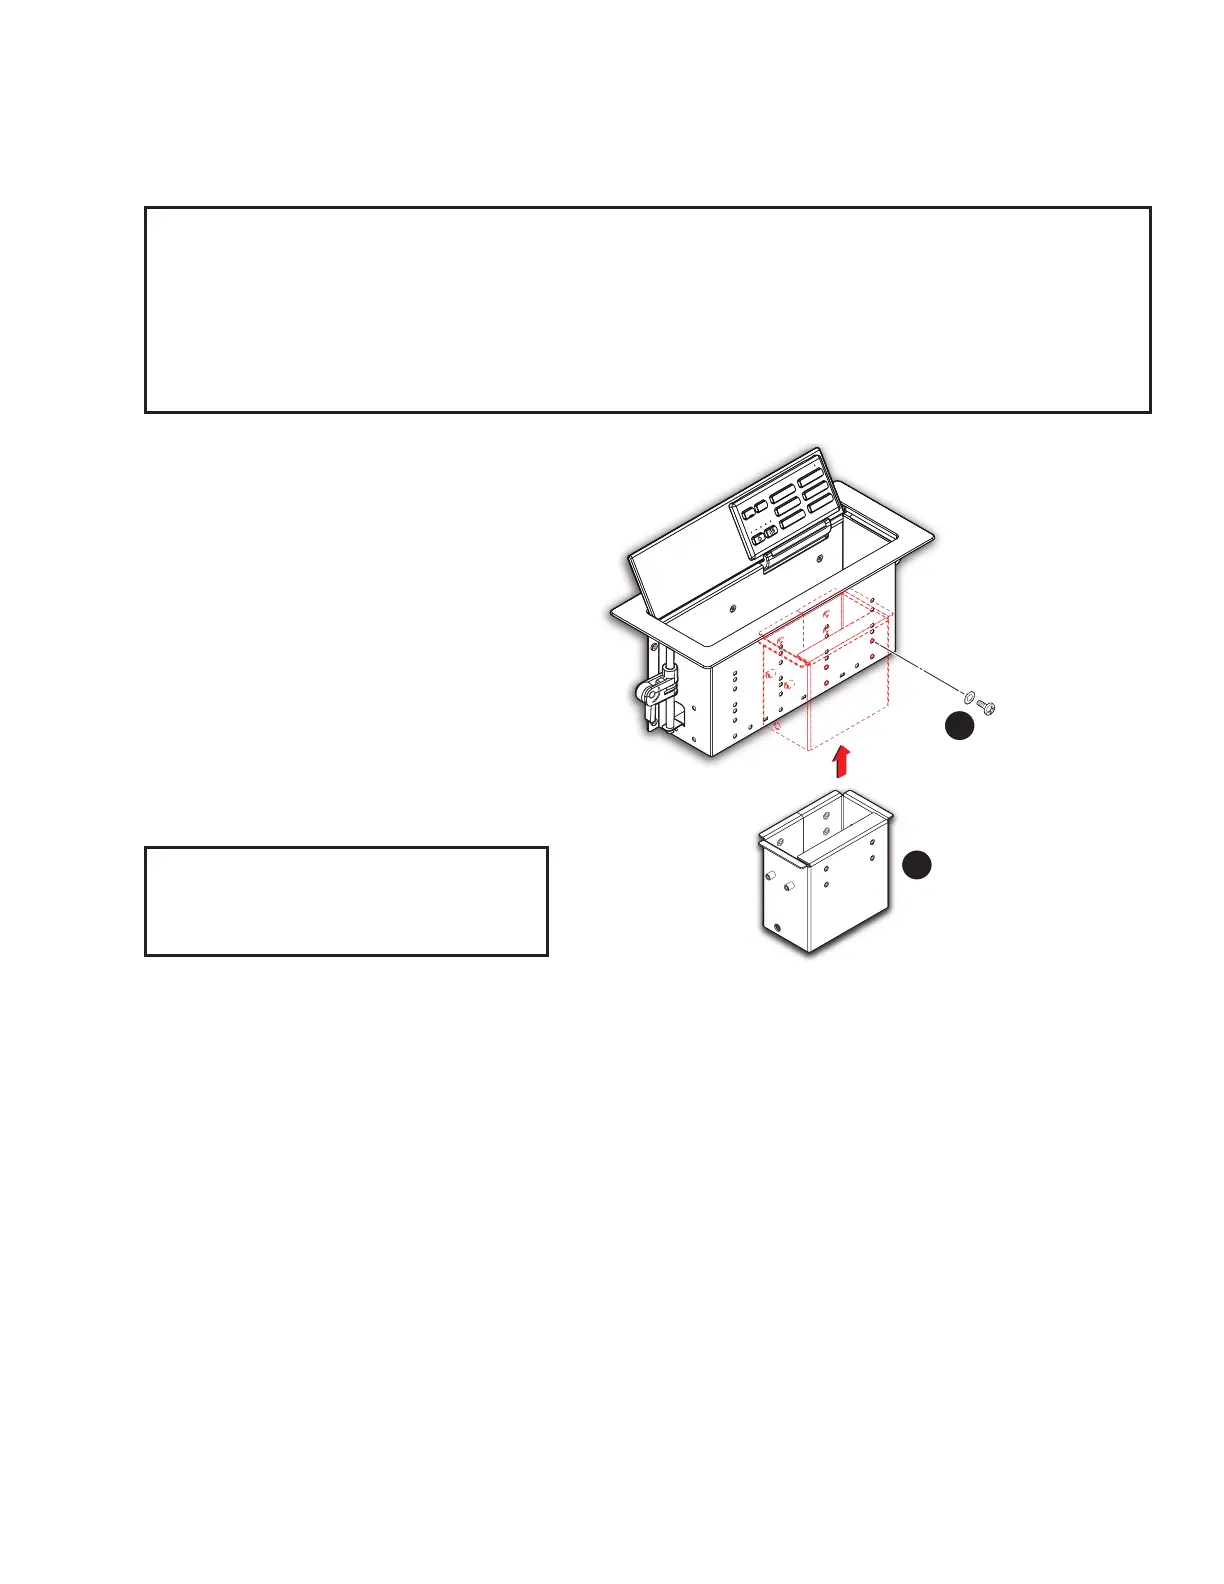
Retractor Bracket
Use the retractor bracket to
mount cable retractors in the Cable Cubby
enclosure. The retractor bracket
accommodates up to three Retractor Series
or Retractor Series XL cable retraction
modules.
The retractors must be purchased separately.
Visit www.extron.com to nd available
retractor models, retractor ller modules, and
optional retractor brackets.
If you require retractors, insert the retractor
bracket as shown in gure 28.
NOTE: Do not mount the retractors in the
retractor bracket until after the Cable
Cubby is mounted (see Step 7: Install
Retractors on page 38.)
Install retractor ller modules in any unused
retractor mounting spaces.
Install the retractor bracket as close as possible to the bottom of the enclosure to ensure that there is sucient
clearance at the top of the retractor inside the CableCubby. If the bracket is installed too high in the Cable Cubby,
the lid will not close due to contact with the retractor module.
For full details on how to install a Retractor, see the Retractor Series Installation Guide, available on the Retractor
Series or Retractor Series XL product page at www.extron.com).
An optional Cable Cubby Retractor Bracket Kit – Double allows two cable retractors to be mounted at the outer
edges of the enclosure with one of the other modules mounted centrally. These brackets must be purchased
separately and they are sold in pairs.
Secure the bracket
using four of the provided
#6-32 pan-head mounting
screws with star washers.
Tighten the screws using
a screwdriver.
Insert the bracket as shown.
e
ON
OFF
PC
LAPTOP
MUTE
MEDIA PLAYER
HDMI 1
HDMI 2
e
21-525-01LF
The bracket may be installed
on the left or right side of the
enclosure and at the
lowest height.
2
1
Figure 39. Installing the Retractor Bracket
39
Rev. D: The following text was added for this user guide per discussion with Chris Steese.
It should be added to the setup guide at the next revision.
Install the retractor bracket as close as possible to the bottom of the
enclosure to ensure that there is sucient clearance at the top of the
retractor inside the CableCubby. If the bracket is installed too high in
the Cable Cubby, the lid will not close due to contact with the retractor
module.
For full details on how to install a Retractor, see the Retractor Series
Installation Guide, available on the appropriate product page at www.
extron.com).
Bekijk gratis de handleiding van Extron NBP 108 D, stel vragen en lees de antwoorden op veelvoorkomende problemen, of gebruik onze assistent om sneller informatie in de handleiding te vinden of uitleg te krijgen over specifieke functies.
Productinformatie
| Merk | Extron |
| Model | NBP 108 D |
| Categorie | Niet gecategoriseerd |
| Taal | Nederlands |
| Grootte | 12926 MB |


