Extron MLC 64 RS VC D handleiding
Handleiding
Je bekijkt pagina 28 van 72
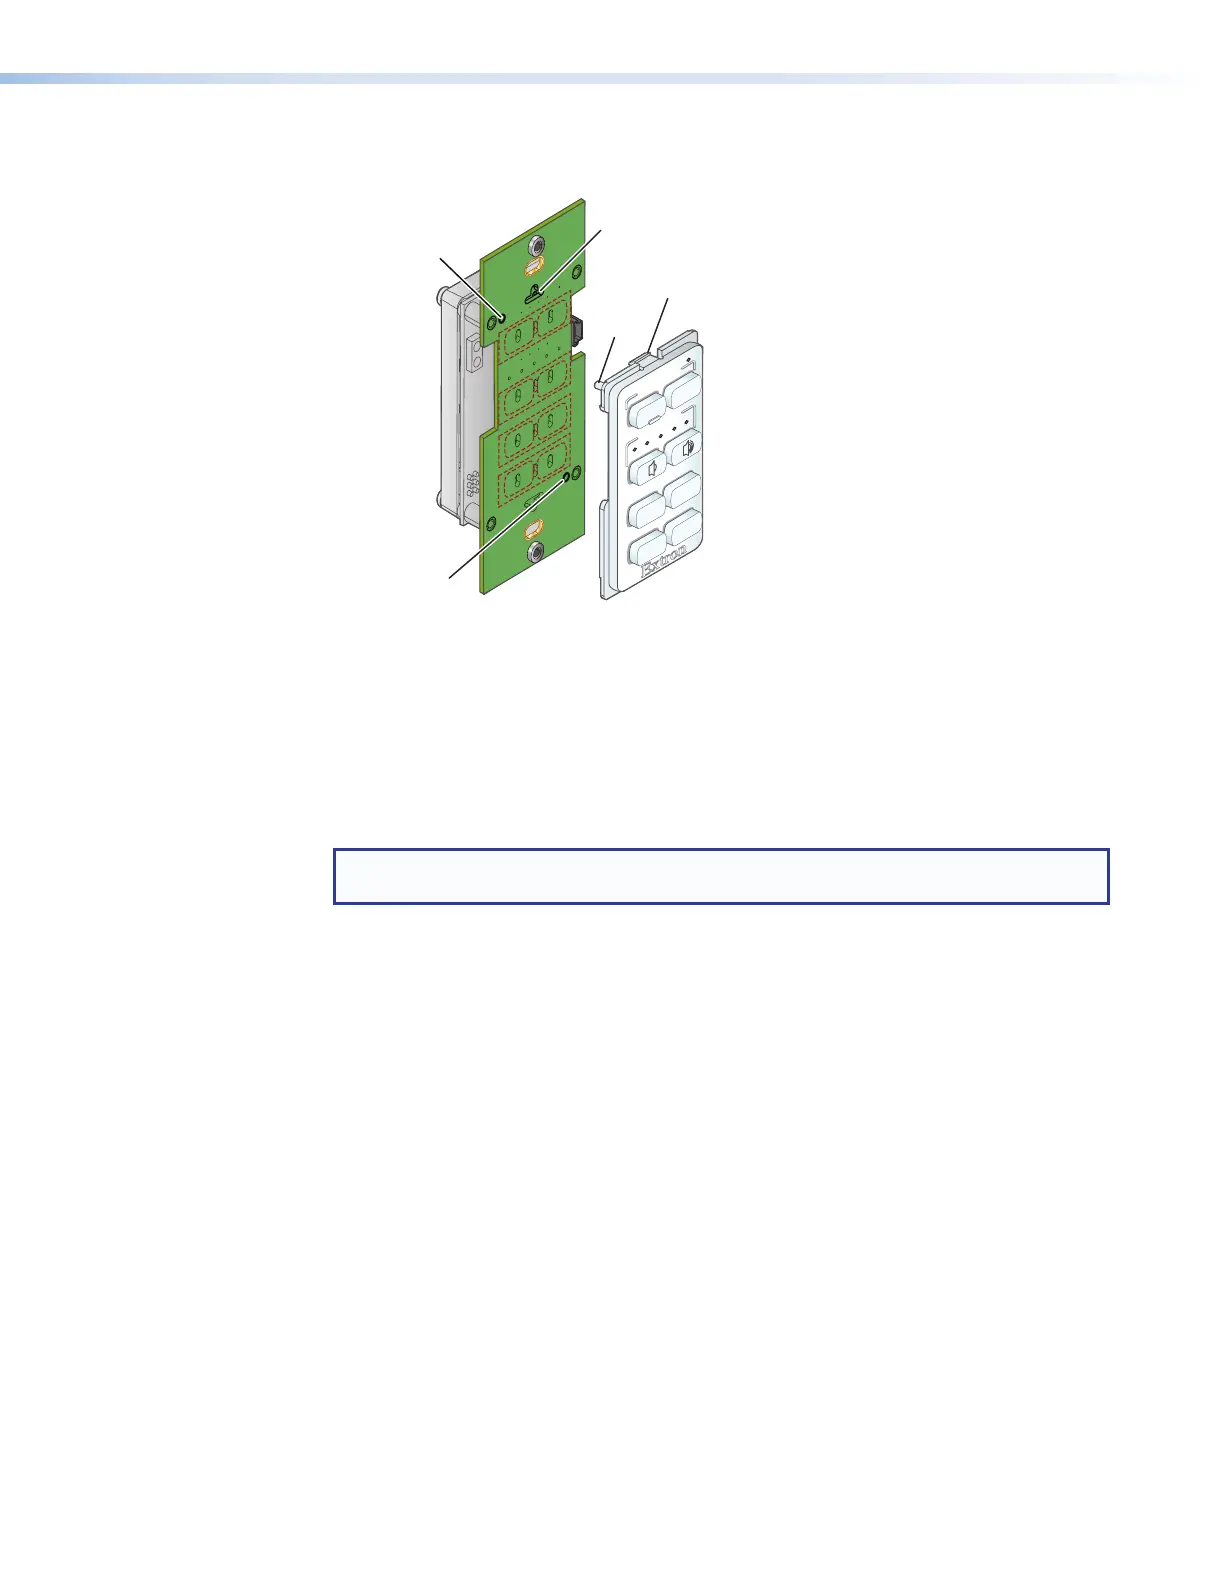
5. Press the faceplate onto the board with the pegs in the holes until the tabs at the top
and bottom of the faceplate snap into their slots on the board (see figure 13).
VOLUME
DISPLAY
OFF
ON
MUTE
LAPTOP
VIDEO
PC
Insert peg
on faceplate
into hole.
Peg
Insert peg
on faceplate
into hole.
Insert tab on faceplate
into slot.
Ta b
Figure 13. Attaching the Faceplate (MLC 60 Series D Models)
Removing and replacing the MLC 64 VCM module knob and faceplate
The MLC 64 is provided with one black and one white VCM faceplate and volume control
knob. You can change the faceplate, knob, or both on the volume control module as
described in the following procedures.
Replacing the MLC 64 volume control knob
NOTE: It is not necessary to remove the faceplate or the board from the wallplate in
order to replace the knob.
1. Rotate the knob to its lowest setting (the dot on the knob should be aligned with the
bottom edge of the volume icon on the faceplate) to line up the notch in the edge
of the knob with the notch in the edge of the hole in the faceplate, enabling you to
access the hex screw on the knob.
2. Insert the small Allen wrench (provided) into the opening created by the two notches,
until it stops.
MLC 60 Series MediaLink Controllers • Features, Installation, and Operation 20
Bekijk gratis de handleiding van Extron MLC 64 RS VC D, stel vragen en lees de antwoorden op veelvoorkomende problemen, of gebruik onze assistent om sneller informatie in de handleiding te vinden of uitleg te krijgen over specifieke functies.
Productinformatie
| Merk | Extron |
| Model | MLC 64 RS VC D |
| Categorie | Niet gecategoriseerd |
| Taal | Nederlands |
| Grootte | 12439 MB |


