EtherWAN EX89000 handleiding
Handleiding
Je bekijkt pagina 2 van 2
EX89000 Managed Switch Installation Guide
Copyright
©
2014 EtherWAN Systems, Inc. Page 2
All Rights Reserved
EX89000 rev. 1.0
12/2/2014
88-370VDC 90-264VAC
− 0 N
+ 88 – 370 L
Earth Ground
The switch also has a relay with these settings:
Setting Relay Settings
Relay normal b ⎯ c CLOSE, c ⎯ a OPEN
Relay alarm b ⎯ c OPEN, c ⎯ a CLOSE
When you apply power, all
Link/ACT
LEDs blink
momentarily, the
Power 1
LED goes ON, and
LEDs for every port connected to a device flash.
6 Front Panel LEDs
LED Color Status
Power 1 Green ON = power on.
OFF = power off.
Alarm Red ON = power failure occurred.
OFF = normal operation (no power failure).
10/100Base-TX, 100Base-FX/BX LEDs
Link/Act Green ON = valid network connection is established.
Flashing = port sending or receiving data.
10/100/1000Base-TX/SFP LEDs
Link/Act Green ON = valid network connection is established.
Flashing = port sending or receiving data.
LED Color Status
SFP Green ON = valid SFP connection is established.
1000Base-SX/LX/BX LEDs
Link/Act Orange ON = valid network connection is established.
Flashing = port sending or receiving data.
SFP Green ON = valid SFP connection is established.
7 Managing the Switch
A.
Connect a PC to an available switch port
using an appropriate cable.
B.
Confirm that the
Link/ACT
LED for the switch
port to which the PC is connected is ON. If
not, choose a different port.
C.
Configure the PC’s TCP/IP settings to use the
subnet
192.168.1.X and subnet mask
255.255.255.0, where X is a number from 2
to 254 other than 10.
D.
In a Web browser address bar, type
http://192.168.1.10 and press Enter.
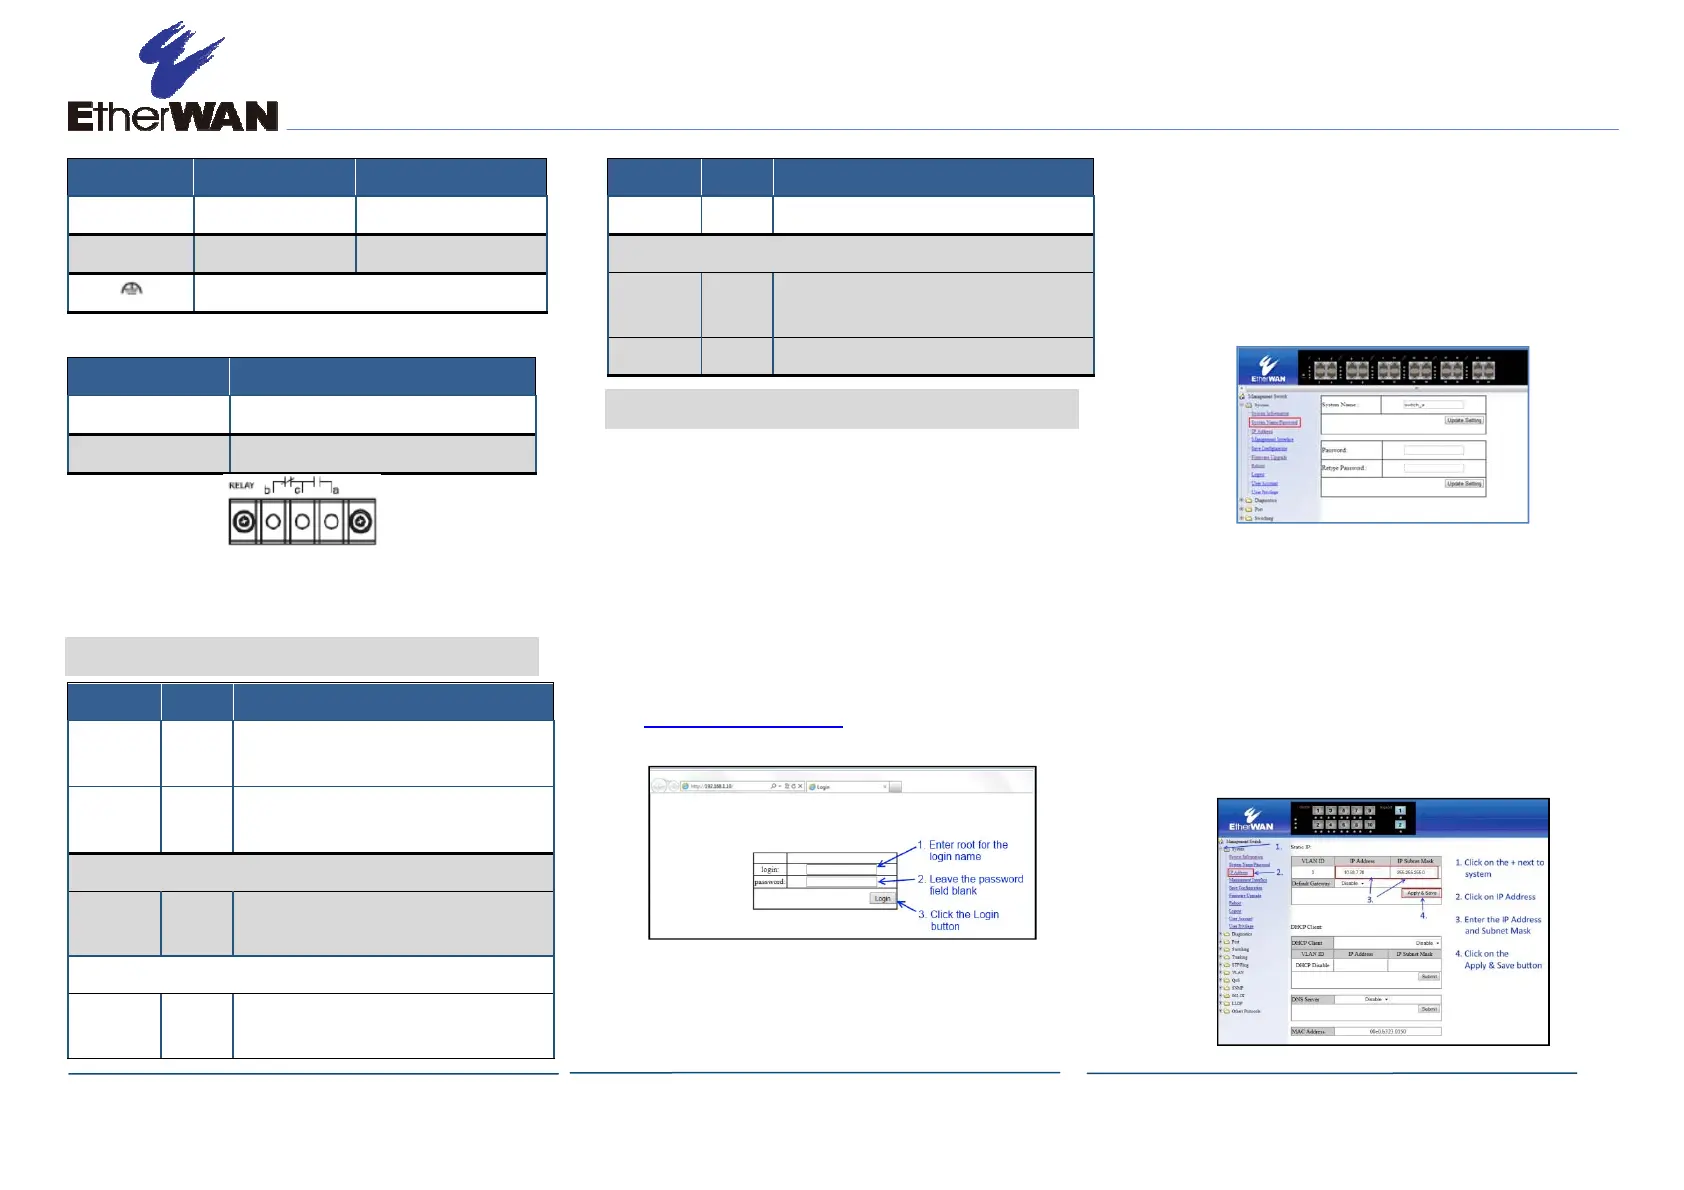
E.
Log in to the management interface:
F.
Change the system name:
- In the left pane, click + next to System,
then click System Name/Password.
- On the right side, click in the System
Name text box.
- Replace the name shown with a name you
want to assign to the switch.
- Click the Update Setting button below
the System Name text box.
G.
By default there is no password assigned to
the switch. To add a password:
- In the page above, click in the Password
text box, enter a password, and retype it
in the Retype Password text box.
- Click Update Setting below the
Retype Password text box.
H.
Change the switch’s IP address and subnet
mask to match the scheme on your network:
Bekijk gratis de handleiding van EtherWAN EX89000, stel vragen en lees de antwoorden op veelvoorkomende problemen, of gebruik onze assistent om sneller informatie in de handleiding te vinden of uitleg te krijgen over specifieke functies.
Productinformatie
| Merk | EtherWAN |
| Model | EX89000 |
| Categorie | Niet gecategoriseerd |
| Taal | Nederlands |
| Grootte | 614 MB |


