Electrolux WH6-8 handleiding
Handleiding
Je bekijkt pagina 19 van 48
Installation manual
19
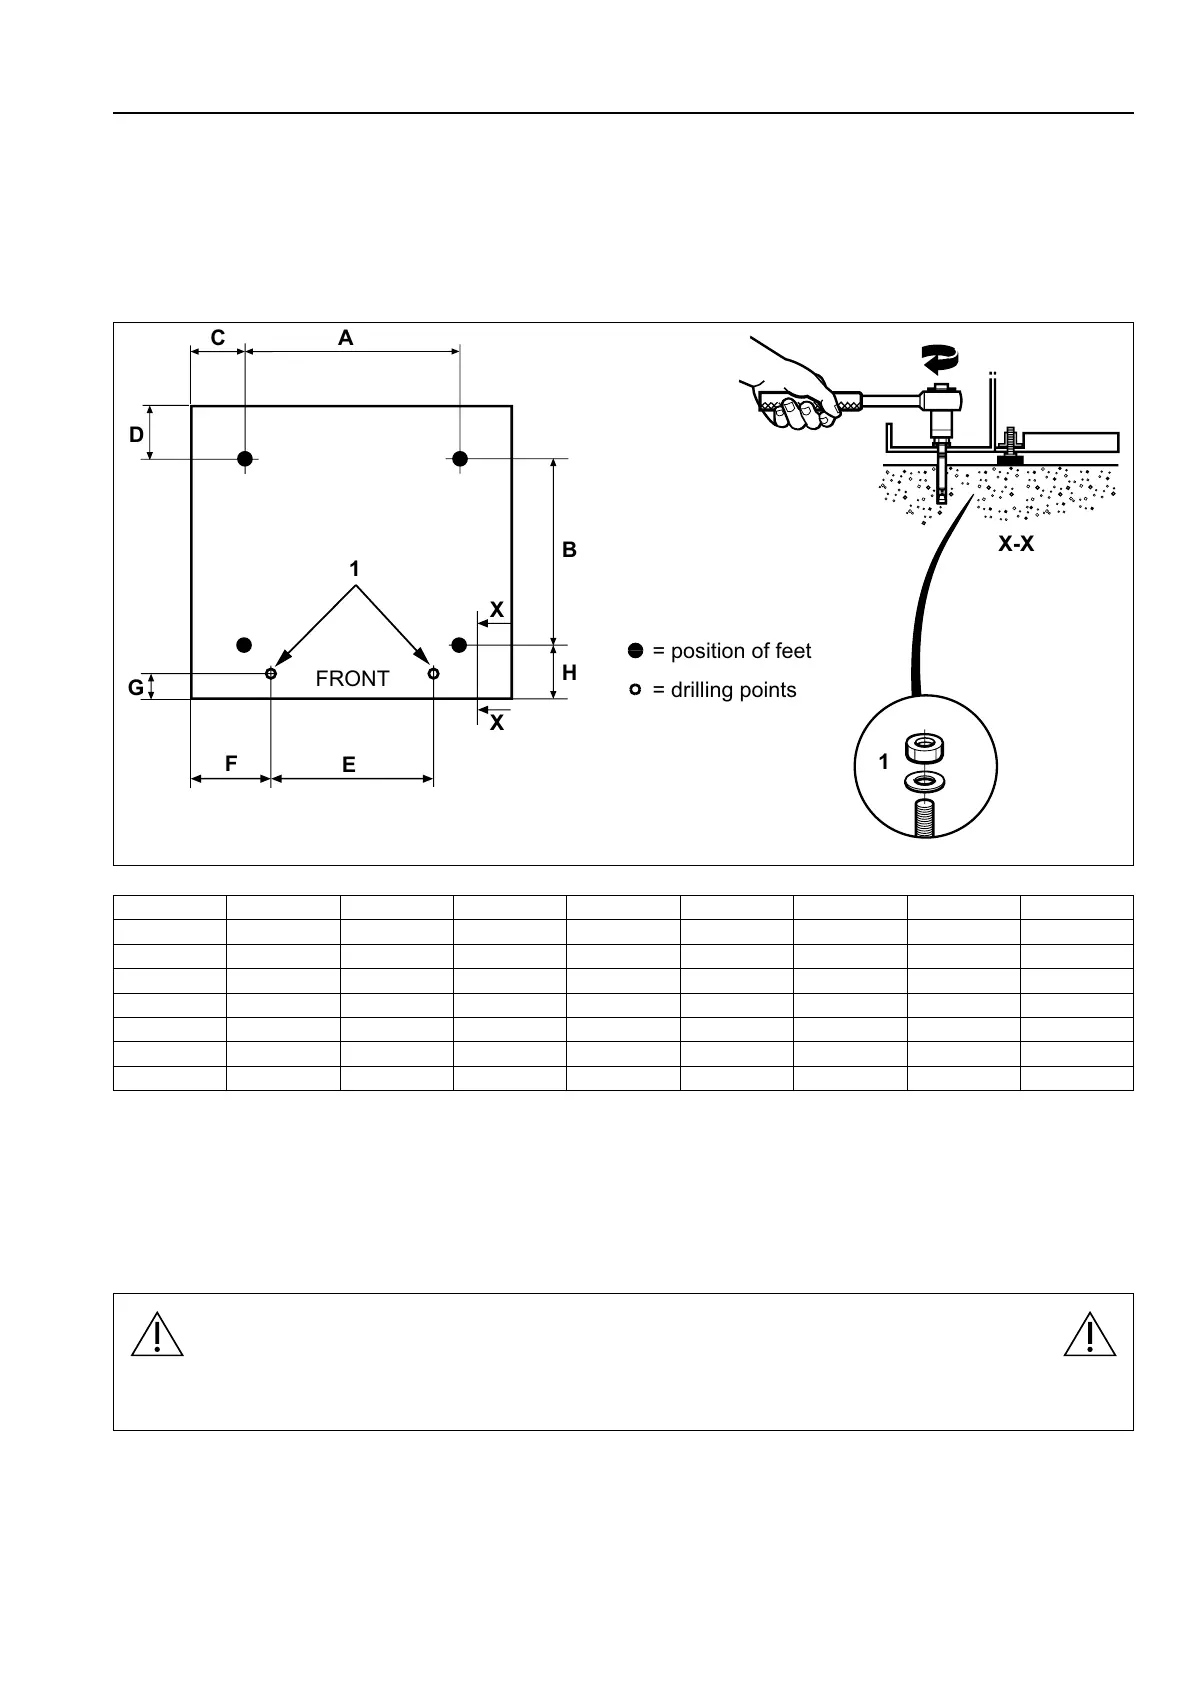
4.4 Mechanical installation
If the machine is not to be mounted on a base the machine must be fastened to the floor with the enclosed expansion
bolts.
The table shows the correct position of feet and drilling points.
WH6–7-WH6–11: Mark and drill two holes (⌀ 8 mm) about 40 mm deep in position (1).
WH6–14-WH6–33: Mark and drill two holes (⌀ 10 mm) about 50 mm deep in position (1).
C A
D
G
F
E
B
H
FRONT
= drilling points
= position of feet
1
1
X
X
X-X
fig.5989C
mm
A B C D E F G H
WH6–7 495 460 110 125 375 170 40 100
WH6–8 495 460 110 125 375 170 40 100
WH6–11 575 465 130 140 455 185 35 95
WH6–14 635 490 135 175 515 195 65 125
WH6–20 715 545 125 205 595 185 65 125
WH6–27 790 615 115 180 670 175 65 125
WH6–33 900 835 60 140 670 175 60 80
Place the machine over the two drilled holes. The holes are at the front of the machine.
Level the machine with the feet of the machine. Screw in the feet as much as possible before starting to level the ma-
chine. This will make the machine stand steadier.
The maximum height adjustment of the feet is 30 mm for WH6–7-WH6–11 and 50 mm for WH6–14-WH6–33.
Insert the expansion bolts (1) into the holes drilled in the floor. Fit the washers and nuts and tighten with tightening
torque 5 Nm.
It is of the upmost importance that the machine is placed in level, from side to side as well as front to rear.
Remount the panels when ready.
Bekijk gratis de handleiding van Electrolux WH6-8, stel vragen en lees de antwoorden op veelvoorkomende problemen, of gebruik onze assistent om sneller informatie in de handleiding te vinden of uitleg te krijgen over specifieke functies.
Productinformatie
| Merk | Electrolux |
| Model | WH6-8 |
| Categorie | Wasmachine |
| Taal | Nederlands |
| Grootte | 4080 MB |


