Elation REBEL Profile handleiding
Handleiding
Je bekijkt pagina 14 van 48
14
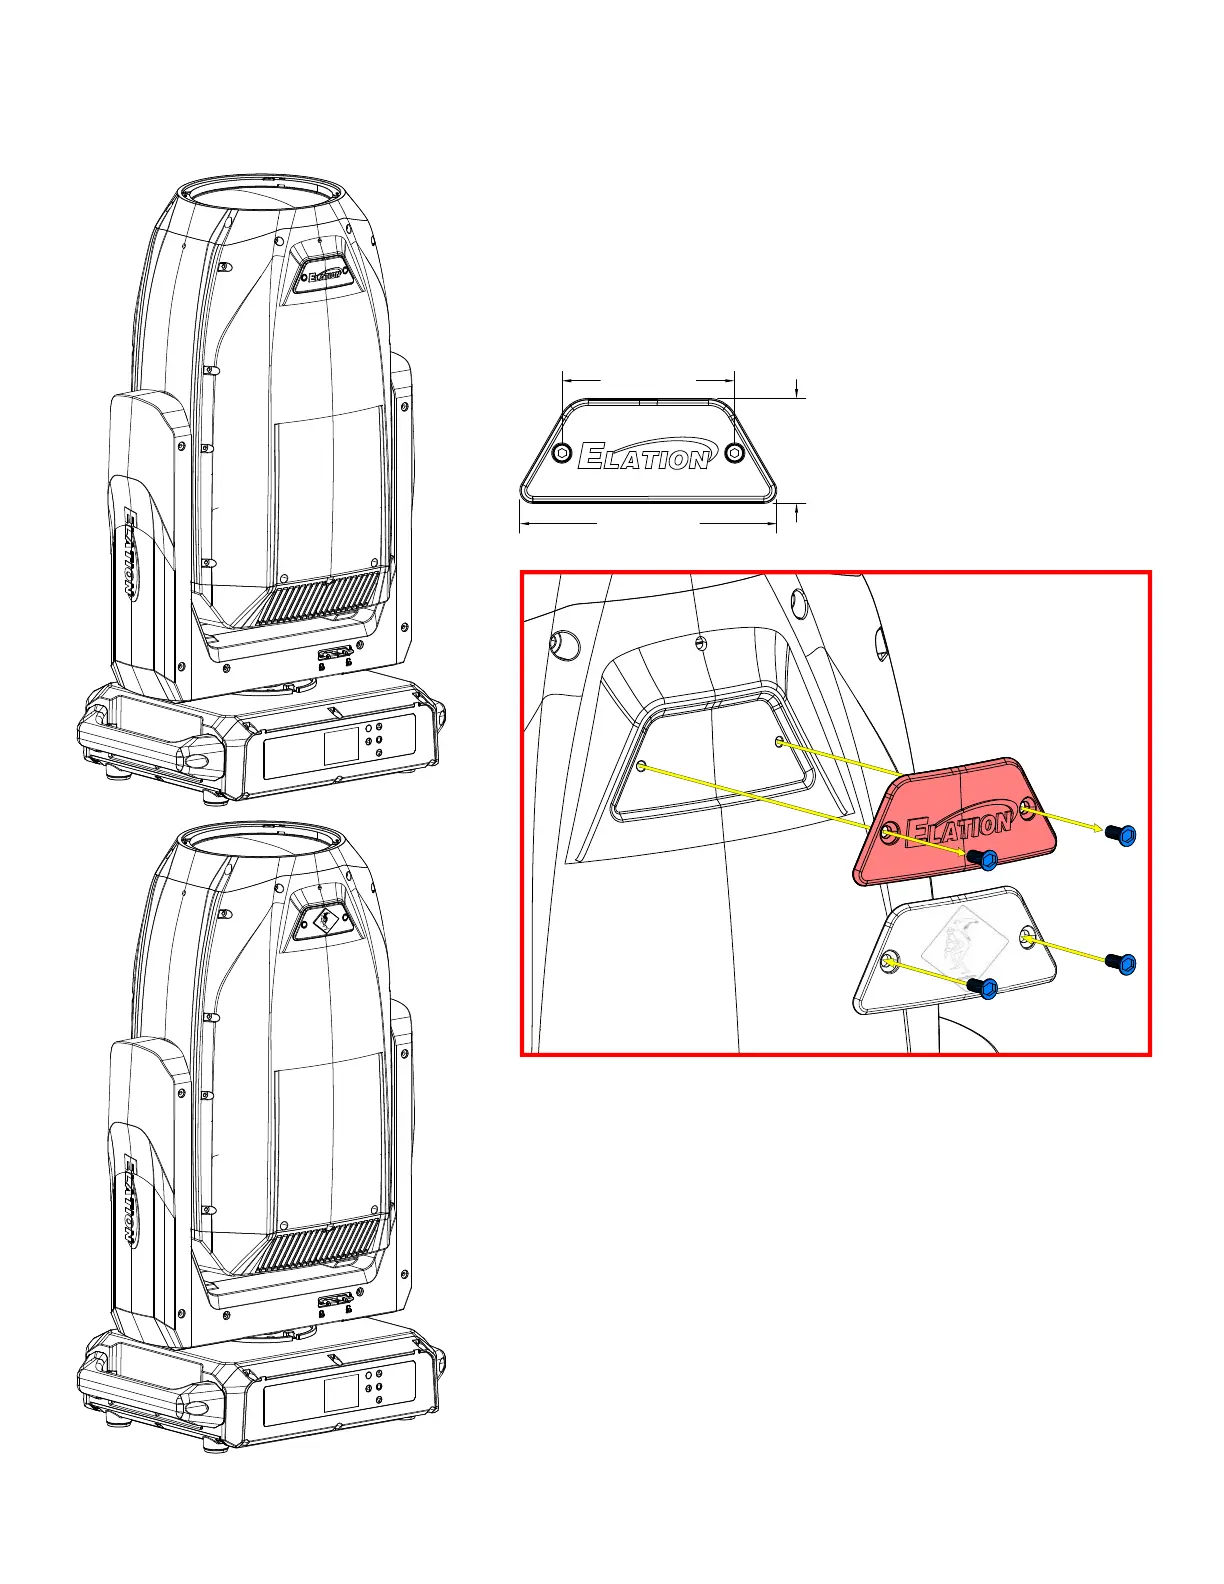
LOGO
PLATE
1.4in. [36mm]
3.45in. [88mm]
2.3in. [59mm]
CUSTOM LOGO PLATE INSTALLATION
To install a Logo Plate, ensure the xture is powered o and disconnected.
Gently screw the new Logo Plate into place, making sure it
is ush and straight. Do not overtighten to prevent damage
to the badge or the xture.
After installation, check that the Logo Plate does not
interfere with any moving parts of the xture. Once
everything looks good, reconnect the power, turn on the
xture, and observe its operation to ensure the badge
installation has not aected functionality. Periodically
check the badge for tightness, particularly after
transportation or if the xture is frequently moved, to
avoid it becoming loose over time.
Locate and remove the existing Elation Logo Plate using
a hex driver by unscrewing the two holding screws. Using
the existing mounting screws, align the screw holes of the
new badge with the mounting holes of the xture.
Bekijk gratis de handleiding van Elation REBEL Profile, stel vragen en lees de antwoorden op veelvoorkomende problemen, of gebruik onze assistent om sneller informatie in de handleiding te vinden of uitleg te krijgen over specifieke functies.
Productinformatie
| Merk | Elation |
| Model | REBEL Profile |
| Categorie | Verlichting |
| Taal | Nederlands |
| Grootte | 7498 MB |


