Handleiding
Je bekijkt pagina 4 van 11
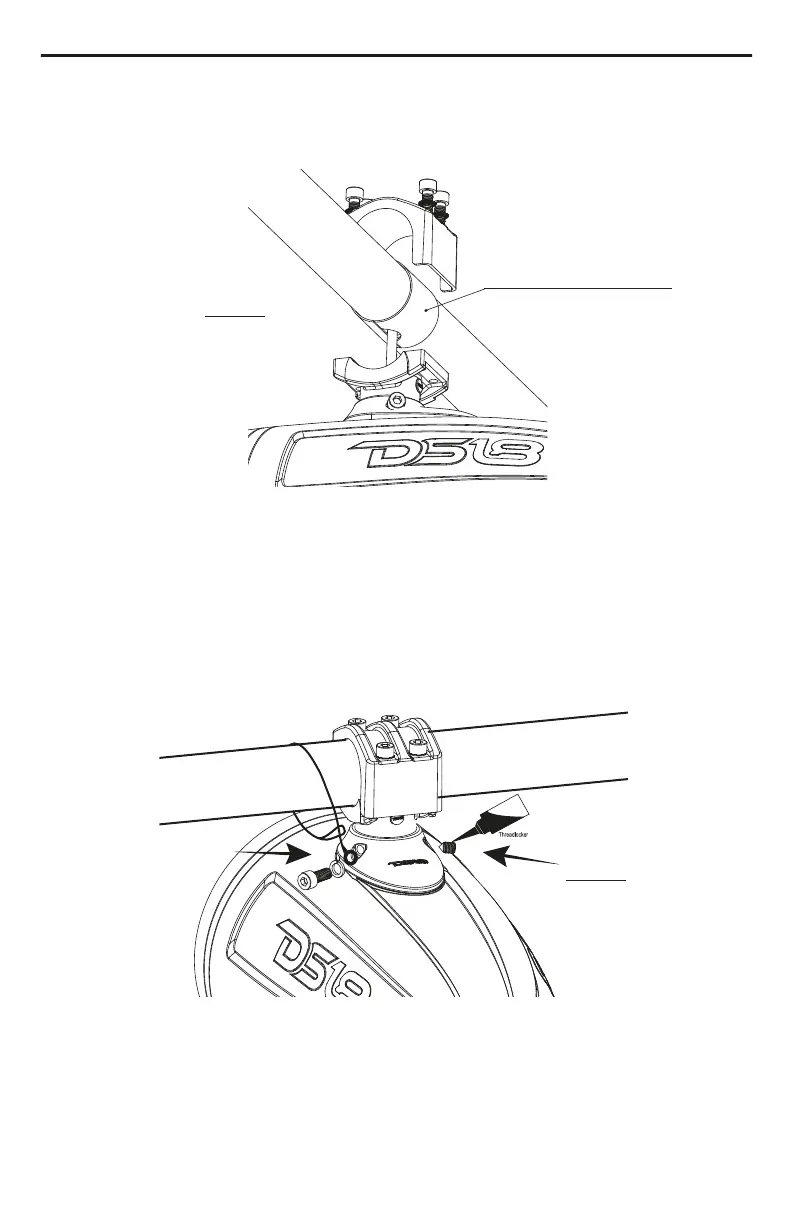
PASO 7
STEP 7
Rubber Pad
Almohadilla de Goma
Step 8: Push the wire into the tube, press on
the rubber pad, and lock the top clamp.
Step 9: Take down the safety rope and hang
it on the pipe, lock the screw gasket safety
rope lifting ring on the clamp base, and apply
screw fastening glue on the screw before
locking.
Paso 8: Empuje el cable en el tubo, presione la
almohadilla de goma y bloquee la abrazadera
superior.
Paso 9: Retire la cuerda de seguridad y cuélgala en
la tubería, bloquee el anillo de elevación de la
cuerda de seguridad de la junta del tornillo en la
base de la abrazadera y aplique pegamento de
fijación de tornillos en el tornillo antes de bloquear.
Step 10: If need be, rotate the speakers for
best dispersion, this easily done by locating
the 6mm & 4mm hex wrench set screw on
the side of the clamp base, rotate the
speaker/enclosure to the desired angle, once
there... locking the screws tight. Avoid
vibration, clamp loose!!!
Paso 10: Si es necesario, gire los altavoces para
una mejor dispersión, esto se hace fácilmente
ubicando el tornillo de fijación de la llave hexagonal
de 6 mm y 4 mm en el lado de la base de la
abrazadera, gire el altavoz / encaje al ángulo
deseado, una vez allí... bloquear los tornillos para
evitar vibración y que se suelte la abrazadera!!!
Step 7: Wrap the rubber pad around the pipe
and align wire out
hole According to the
diagram.
Paso 7: Envuelva la almohadilla de goma alrededor
de la tubería y alinee el orificio de salida del cable de
acuerdo con el diagrama.
INSTALLATION / INSTALACIÓN
3
NXL-x10tpneo
PASO 9
STEP 9
Bekijk gratis de handleiding van DS18 NXL-X10TPNEO, stel vragen en lees de antwoorden op veelvoorkomende problemen, of gebruik onze assistent om sneller informatie in de handleiding te vinden of uitleg te krijgen over specifieke functies.
Productinformatie
| Merk | DS18 |
| Model | NXL-X10TPNEO |
| Categorie | Speaker |
| Taal | Nederlands |
| Grootte | 2558 MB |


