Draper Expert 23313 handleiding
Handleiding
Je bekijkt pagina 2 van 2
3. Use a 16mm spanner (not supplied) to screw the stop
punch fully into the die until tight.
3 Fig.
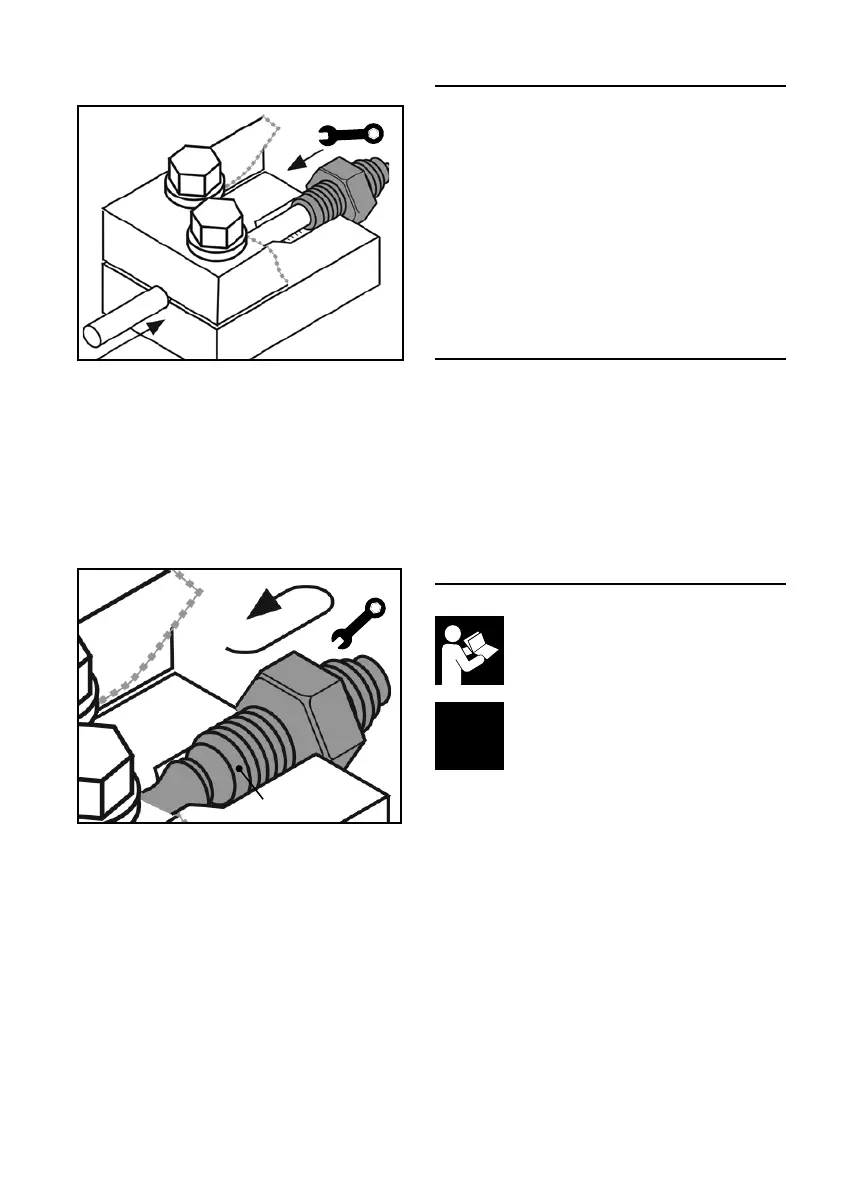
4. Use a 10mm spanner (not supplied) to fully tighten the
locking screws and secure the pipe.
Important: If the locking screws are not suciently
tight, the pipe will move during the aring process and
damage the are.
5. Unscrew the stop punch from the die.
6. Fully screw the 4.75mm DIN punch (B1) into the die until
it is tight.
(B1)
4 Fig.
7. Remove the punch from the die, then loosen the locking
screws and remove the pipe from the tool.
4. Preparing the Brake Pipe
Important: ALWAYS ensure that the brake pipe is correctly
prepared before aring.
• The end of the pipe MUST be cut square.
• The outside edge of the pipe must be champfered by
approximately 0.25mm at 45°.
• The bore of the pipe must be deburred.
• If the pipe is plastic-coated, remove at least 6mm from
the end of the pipe to be ared, ensuring that the pipe is
not scored and that no metal is removed while doing so.
Important: DO NOT use an abrasive cloth on the end of the
brake pipe to be ared.
5. Maintenance and Storage
• Clean the product of dust or debris before and after
each use.
• Replace any punch that shows sign of damage or
excessive wear.
• Before storing the product, wipe it thoroughly with a
lightly oiled cloth to prevent corrosion of the exposed
metal parts.
• Store the product in a clean and dry environment, out of
reach of children.
6. Explanation of Symbols
Read the instruction manual
4.75mm
DIN
Flaring output size
Bekijk gratis de handleiding van Draper Expert 23313, stel vragen en lees de antwoorden op veelvoorkomende problemen, of gebruik onze assistent om sneller informatie in de handleiding te vinden of uitleg te krijgen over specifieke functies.
Productinformatie
| Merk | Draper |
| Model | Expert 23313 |
| Categorie | Niet gecategoriseerd |
| Taal | Nederlands |
| Grootte | 408 MB |


