Draper Expert 23257 handleiding
Handleiding
Je bekijkt pagina 5 van 6
5. OperatingInstructions
5.1AdaptorConguration
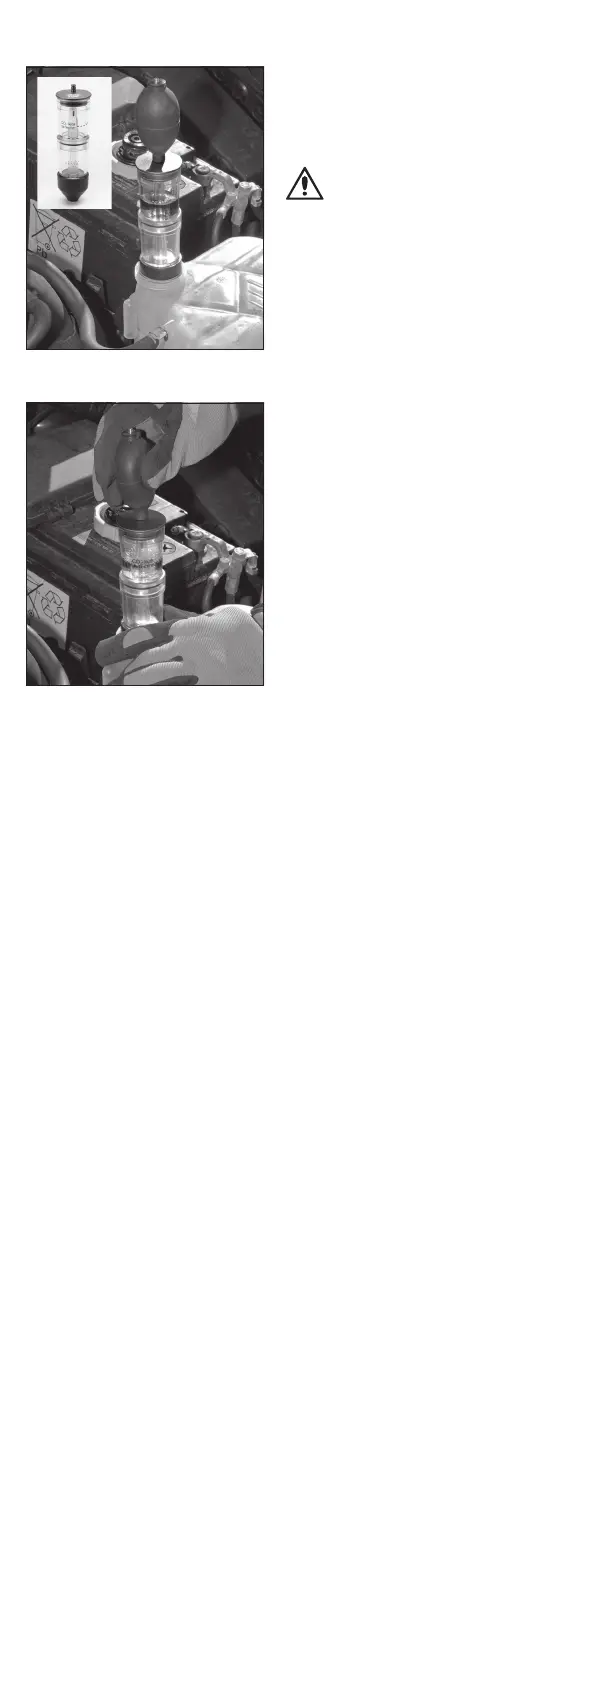
• The tester can be congured to t onto
a header tank or radiator when used
with a radiator cap/header tank
adaptor (not supplied). Fig.1 shows the
Combustion Gas Detector Kit being
used in conjunction with the Draper
Expert Radiator Pressure Test Kit
(Stock No.14455 – sold separately).
When the tube on the lower chamber
(4) is inserted into the brass connector
(5) ensure that the brass ring at the top
of the connector is tightened down so
that it grips the tube. The brass
connector will be a push t onto the
radiator or header tank adaptor.
Push down until it clicks into place.
To release, pull the ring at the bottom
of the brass connector upwards.
• Fill the upper chamber (3) with test
uid to the dotted line.
• Fit the cap (2) onto the upper chamber
and then x the rubber bulb (1) onto
the top of the cap.
• Turn on the vehicle engine and wait for
steam to enter the lower chamber.
• When the steam is visible in the lower
chamber, pump the rubber bulb
several times to draw steam into the
upper chamber. If the uid turns
yellow this indicates the presence of
CO
2
in the coolant and thus possible
damage to cylinder head gasket or
cracked head.
• Alternatively the tester can be used
without the bulb attached. In this
conguration the steam will
automatically pass into the upper
chamber. Take care to keep hands and
face away from any jet of steam being
expelled from the hole in the top of
the cap.
• As soon as the test is complete turn o
the engine and allow the system to
cool. Before removing the tester from
the radiator or header tank, open the
tap on brass connector to allow any
remaining pressurised steam to
escape. Thick gloves must be worn
during this process and when the
tester and connector are removed from
the radiator.
• Remove the upper chamber from the
lower chamber by twisting apart.
Pump the bulb several times to draw
fresh air into the chamber. When the
air mixes with the test uid it should
return to a blue colour and can be
retained for future use in spare bottle,
this uid can be used approx. 3 times.
5.2Hand-heldconeconguration
• Where no adaptor is available a rubber
cone can be tted to the bottom of the
tester as shown in Fig.3. This allows
the tester to be held in place on a
header tank or radiator opening.
WARNING! Thick protective
gloves must be worn when using
the tester in this conguration to
protect the operator from any
escaping steam. Great care
should be taken when placing
the adaptor over the radiator or
header tank opening and also
when removing it.
• Fill the upper chamber (3) with test
uid up to the dotted line.
• Remove the radiator or header tank
cap. Turn on the vehicle engine and
wait for steam to appear. Place the
tester onto the radiator or header tank
opening and hold it down and steady
so that it makes an eective seal
against the opening.
• As soon as the steam appears in the
lower chamber (4) pump the bulb (1) to
draw the steam into the upper
chamber. If the uid turns yellow this
indicates the presence of CO
2
in the
coolant and thus possible damage to
cylinder head gasket or cracked head.
• As soon as the test is complete remove
the tester from the radiator or header
tank (and turn the engine o).
Where there is no more steam
emanating from the radiator or
header tank, replace the cap.
• Remove the upper chamber from the
lower chamber by twisting apart.
Pump the bulb several times to draw
fresh air into the chamber. When the
air mixes with the test uid it should
return to a blue colour and can be
retained for future use.
6. Warranty
Should the tool develop a fault, return the complete tool to your nearest
distributor or contact Draper Tools directly. Proof of purchase must be provided.
If, upon inspection, it is found that the fault occurring is due to defective
materials or workmanship, repairs will be carried out free of charge. This warranty
covers parts and labour for 36 months from the date of purchase. However, if the
tools are hired out, the warranty period is 90 days from the date of purchase.
This warranty does not apply to any consumable parts, batteries or normal wear
and tear, nor does it cover any damage caused by misuse, careless or unsafe
handling, alterations, accidents, or repairs attempted or made by any personnel
other than the authorised Draper Tools repair agent.
Visit drapertools.com/warranty for full details.
Fig. 1
Fig. 2
Fig. 3
Fig. 4
Bekijk gratis de handleiding van Draper Expert 23257, stel vragen en lees de antwoorden op veelvoorkomende problemen, of gebruik onze assistent om sneller informatie in de handleiding te vinden of uitleg te krijgen over specifieke functies.
Productinformatie
| Merk | Draper |
| Model | Expert 23257 |
| Categorie | Niet gecategoriseerd |
| Taal | Nederlands |
| Grootte | 1129 MB |


