Draper 28357 handleiding
Handleiding
Je bekijkt pagina 20 van 28
– 20 –
EN
11. Maintenance and Troubleshooting
21 Fig.
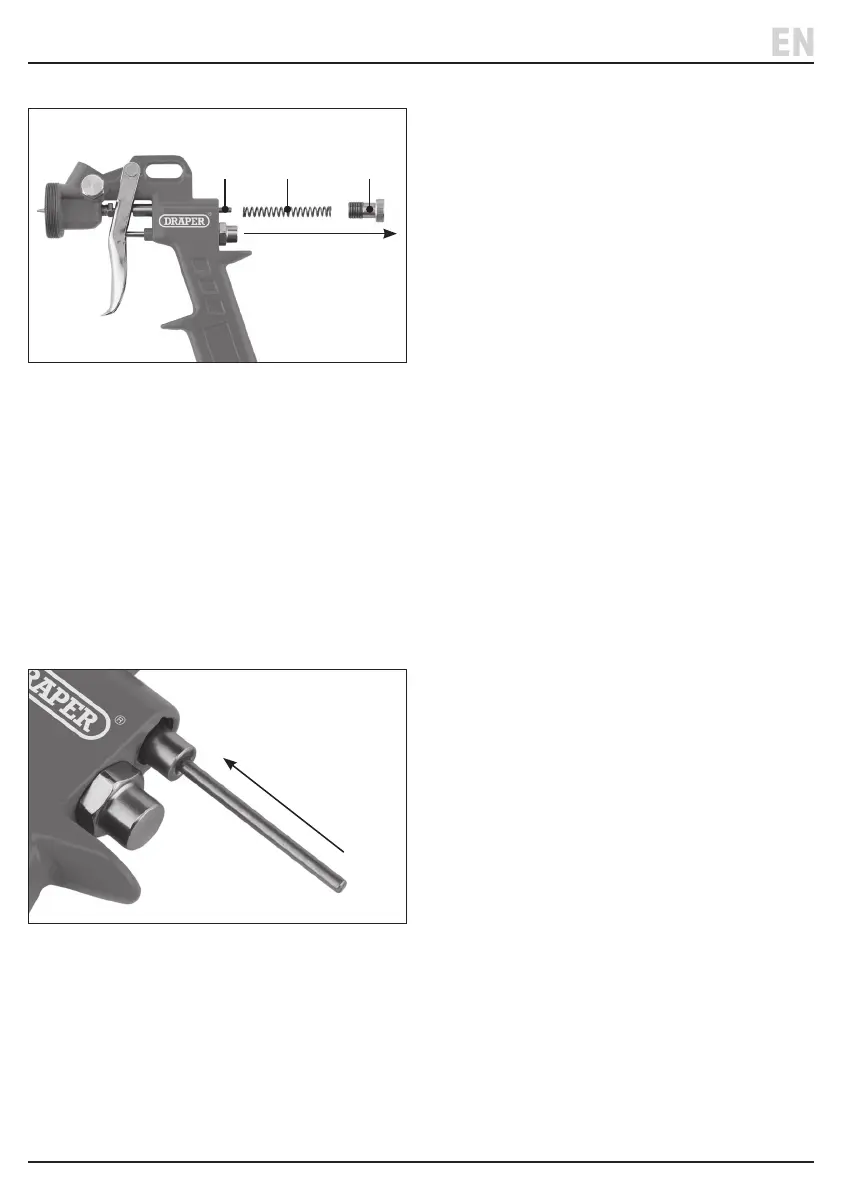
20 Fig.
4. Clean the uid needle and chamber:
a. Rotate the uid control dial (3) anticlockwise until
it comes away from the spray gun body (Fig. 20).
b. Remove the spring (32) and the uid needle (4)
from the chamber via the back of the spray gun.
c. Soak the parts in the solvent and rinse clean.
d. Clean all parts of the uid needle using a soft
brush or cloth.
5. Soak the spray gun body in the solvent, then rinse
and brush it clean.
6. Reassemble the spray gun:
a. Reattach the nozzle head.
b. Insert the uid needle point-rst into the chamber
through the back of the spray gun (Fig. 21).
c. Pass the spring onto the at end of the uid needle
and screw the uid control dial back into both
parts of the dial for a comfortable t.
d. Reattach the air cap and test the trigger to ensure
smooth operation.
11.3 Cleaning the Cleaning Gun
1. Flush and ll the cleaning gun suction cup (13) with a
mild cleaning agent.
2. Attach the suction cup to the cleaning gun body.
3. Squeeze the trigger and discharge the uid until the
suction cup is empty.
4. Rinse out the suction cup and allow it to dry.
11.4 Cleaning the Air Gun and Tyre
Inator
Clean all parts of the air gun and tyre inator using a
damp cloth or soft brush.
11.5 Storing the Tools
When the tools and their accessories are not in use:
• Switch o and disconnect the air line from the tool.
• Clean the tool thoroughly before storage.
• Store the tool in a clean and dry location, out of the
reach of children.
(4) (32) (3)
Bekijk gratis de handleiding van Draper 28357, stel vragen en lees de antwoorden op veelvoorkomende problemen, of gebruik onze assistent om sneller informatie in de handleiding te vinden of uitleg te krijgen over specifieke functies.
Productinformatie
| Merk | Draper |
| Model | 28357 |
| Categorie | Niet gecategoriseerd |
| Taal | Nederlands |
| Grootte | 1425 MB |


