Draper 20529 handleiding
Handleiding
Je bekijkt pagina 10 van 16
– 10 –
7. Setting Up the Vacuum Cleaner
EN
Important: Ensure the vacuum is unplugged from the
power socket before assembling.
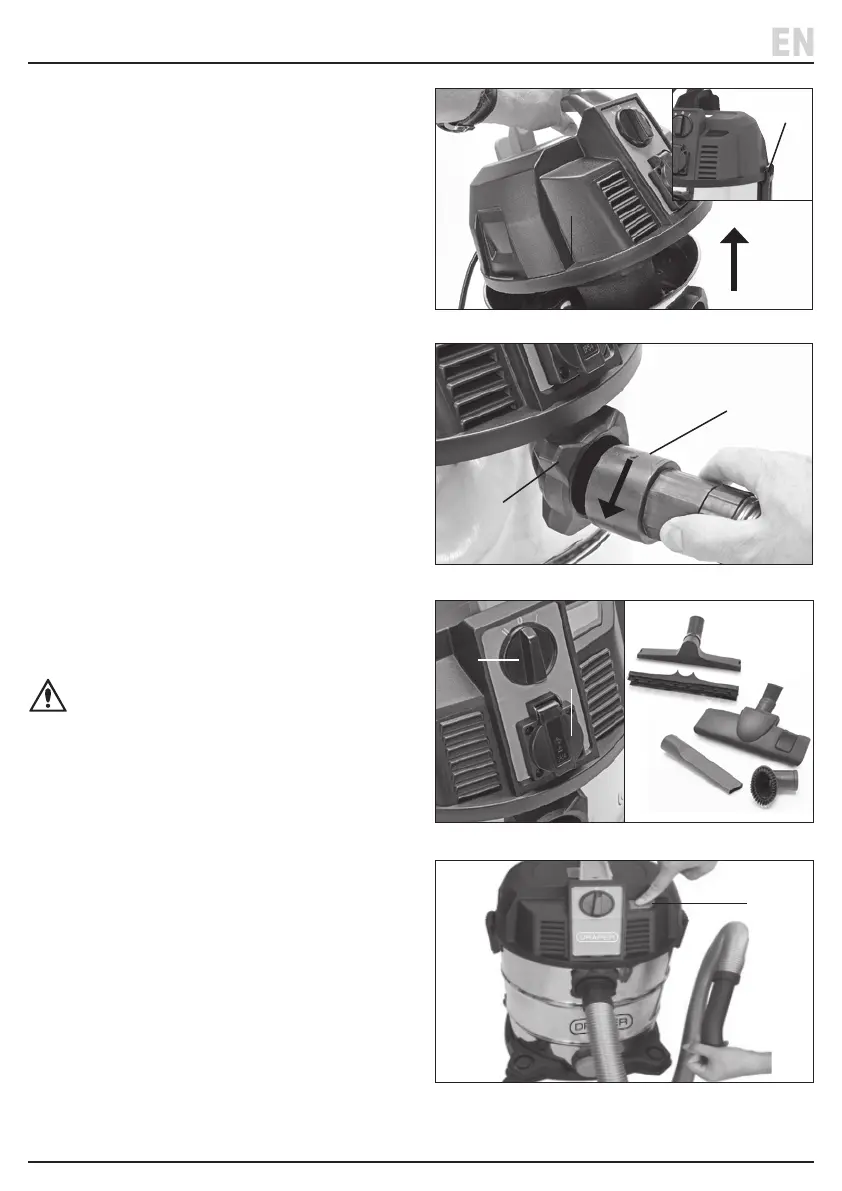
7.1 Setting Up (Fig. 3 & Fig. 6)
1. Release the retaining clips (10) and lift o the power
head (8).
2. Fit the required and correct lter.
− Cloth lter (16) and paper dustbag (18) for dry
vacuuming (refer to Section 8.1). NOT suitable
for wet vacuuming.
− Foam lter (17) for wet vacuuming only (refer to
Section 8.2). NOT suitable for dry vacuuming.
3. Ret the power head (8) and secure using the two
retaining clips (10).
4. Insert the connector end of the hose (12) into the
vacuum port (3). Then push in and turn anticlockwise
to lock in position.
− To remove the hose, turn clockwise and pull out.
5. Fit the required attachment to the end of the hose.
6. Connect to the power supply and turn the ON/OFF
switch (5) to.
− ‘I’ position for normal vacuuming.
− ‘II’ position for connected power tool operation
(refer to Section 8.4)
WARNING! The power tool socket (4) remains
live while the vacuum is plugged into the
manis supply.
7.2 Dust Clearing Button (Fig. 7)
• Press the dust clearing button (9) to clear the cloth
lter of dust build up. Any dust adhering to the lter
is blown and shaken o into the tank.
• To use rst block the end of the hose inlet and then
press the button and release.
Fig. 3
Fig. 4
Fig. 5 Fig. 6
Fig. 7
(12)
(8)
(3)
(9)
(10)
(5)
(4)
Bekijk gratis de handleiding van Draper 20529, stel vragen en lees de antwoorden op veelvoorkomende problemen, of gebruik onze assistent om sneller informatie in de handleiding te vinden of uitleg te krijgen over specifieke functies.
Productinformatie
| Merk | Draper |
| Model | 20529 |
| Categorie | Stofzuiger |
| Taal | Nederlands |
| Grootte | 2955 MB |


