DoorBird A1121E handleiding
Handleiding
Je bekijkt pagina 7 van 72
ENGLISH
7
THIS SIDE UP
4.2 MOUNTING
Lead all cables and wires you want to connect to the device through the mounting housing (for retrofit version:
through the hole in the existing panel).
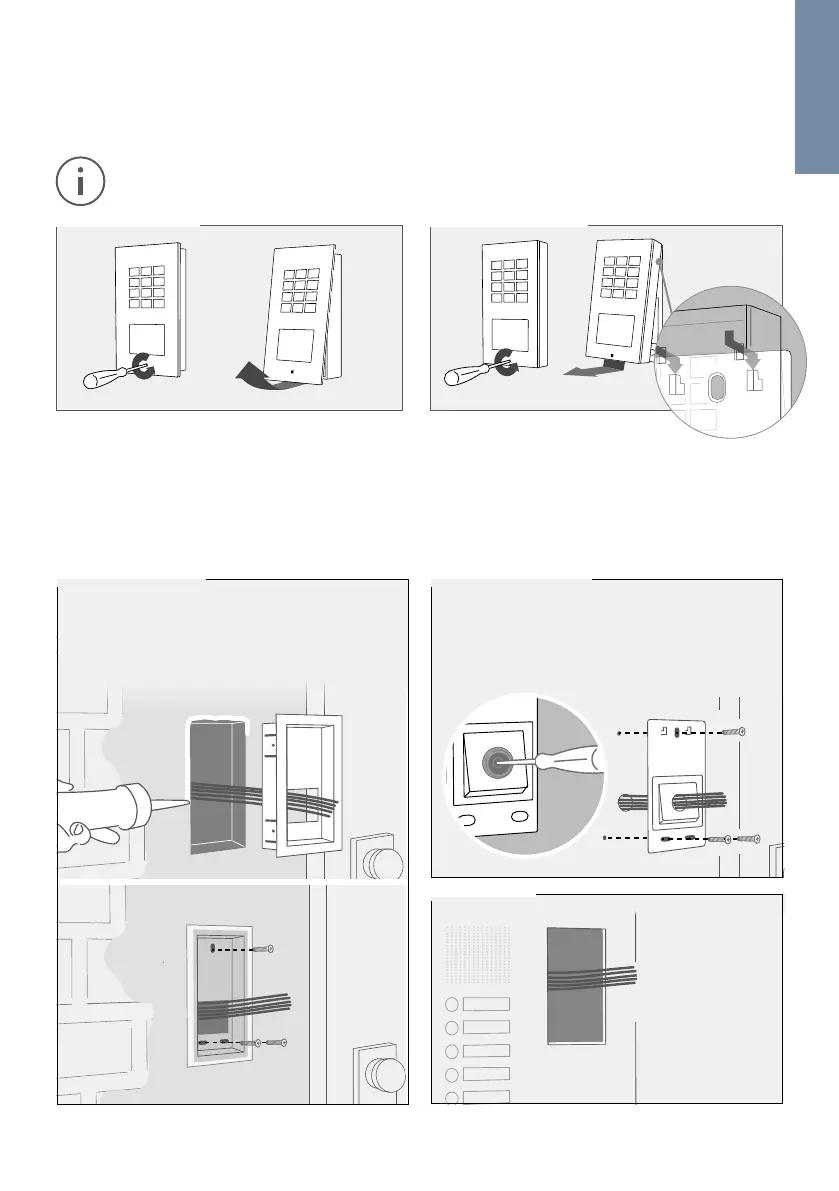
4.1 DISASSEMBLING THE FRONT PANEL
(APPLIES ONLY TO THE SURFACE-MOUNTED AND FLUSH-MOUNTED MODEL)
Remove the front panel with the attached Main Electrical Unit carefully from the mounting housing (backbox)
using the orange (Torx+Pin) screw driver provided.
We have designed the front panel and the safety screw in a way that it cannot be screwed through the
front panel so that is does not fall off / get lost during installation..
Turn the safety screw counter-clockwise until it is loose. Pull the front panel with attached Main
Electrical Unit out of the mounting housing (backbox).
Flush-mounted model Surface-mounted model
Please make sure that the outer frame of the flush-
mounted housing rests on the outside of the wall
and that the edge of the flush-mounted housing
is sealed all around against moisture from the
outside.
Before mounting: Pierce through the middle
of the rubber seal for the cable entry using a
screwdriver.
THIS SIDE UP
Retro Fit model
Surface-mounted modelFlush-mounted model
Bekijk gratis de handleiding van DoorBird A1121E, stel vragen en lees de antwoorden op veelvoorkomende problemen, of gebruik onze assistent om sneller informatie in de handleiding te vinden of uitleg te krijgen over specifieke functies.
Productinformatie
| Merk | DoorBird |
| Model | A1121E |
| Categorie | Niet gecategoriseerd |
| Taal | Nederlands |
| Grootte | 8037 MB |


