Handleiding
Je bekijkt pagina 16 van 56
16
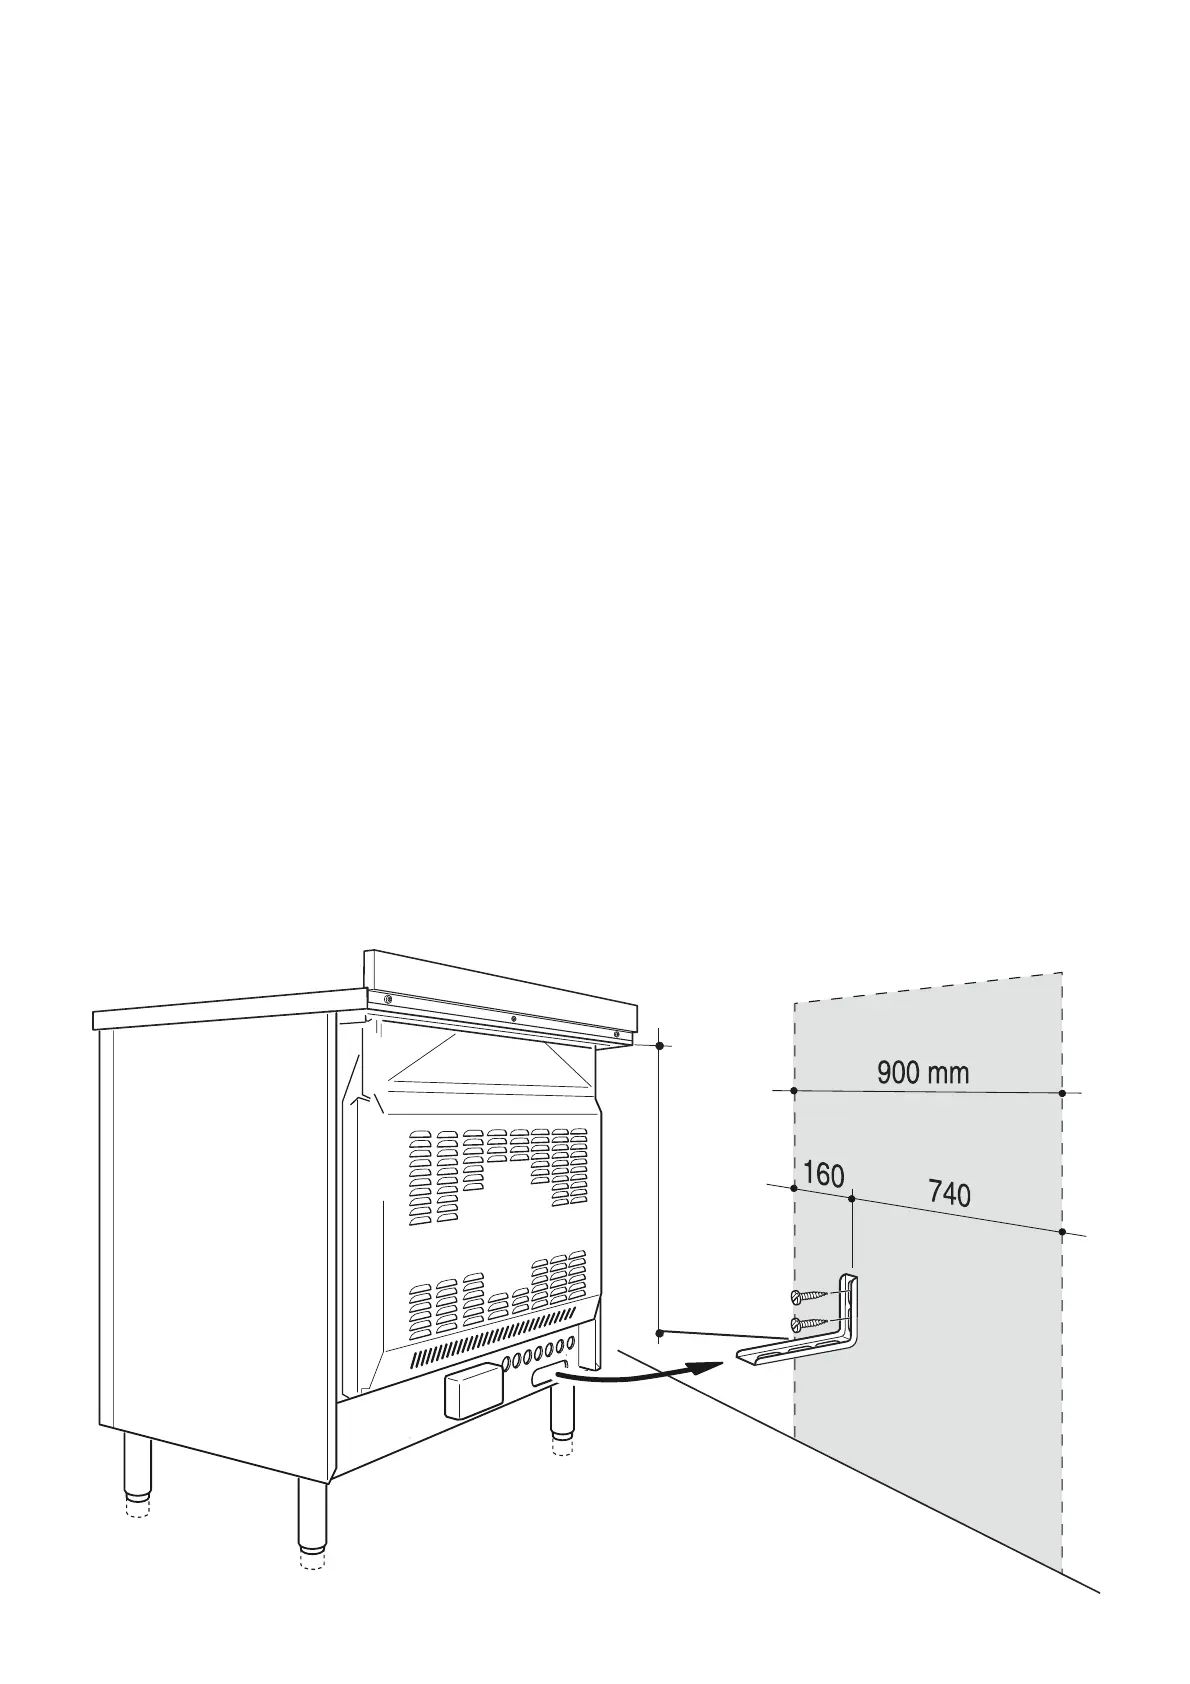
ANTI-TILT BRACKET
:DUQLQJ7KLVDSSOLDQFHPXVWEHUHVWUDLQHGWRSUHYHQWDFFLGHQWDOWLSSLQJE\¿WWLQJD
EUDFNHWWRWKHUHDURIWKHDSSOLDQFHDQGVHFXUHO\¿[LQJLWWRWKHZDOO
7R¿WWKHDQWLWLOWEUDFNHW
1. After you have located where the cooker is to be positioned, mark on the wall the
SODFHZKHUHWKHVFUHZVRIWKHDQWLWLOWEUDFNHWKDYHWREH¿WWHG3OHDVHIROORZWKH
LQGLFDWLRQVJLYHQLQ¿J
2. Drill two 8 mm diameter holes in the wall and insert the plastic plugs supplied.
Important! Before drilling the holes, check that you will not damage any pipes or
electrical wires.
3. Loosely attach the anti-tilt bracket with the 2 screws supplied.
4. Move the cooker to the wall and adjust the height of the anti-tilt bracket so that it can
HQJDJHLQWKHVORWRQWKHFRRNHU¶VEDFNDVVKRZQLQ¿J
5. Tighten the screws attaching the anti-tilt bracket.
6. Push the cooker against the wall so that the anti-tilt bracket is fully inserted in the slot
on the cooker’s back.
Attention!
When sliding the cooker into place pay special attention not to trap the power
supply cable in the stability bracket.
Fig. 1.8
690 mm
Bekijk gratis de handleiding van Delonghi DTR 916 IND2, stel vragen en lees de antwoorden op veelvoorkomende problemen, of gebruik onze assistent om sneller informatie in de handleiding te vinden of uitleg te krijgen over specifieke functies.
Productinformatie
| Merk | Delonghi |
| Model | DTR 916 IND2 |
| Categorie | Fornuis |
| Taal | Nederlands |
| Grootte | 6268 MB |
Caratteristiche Prodotto
| Soort bediening | Draaiknop |
| Ingebouwd display | Ja |
| Breedte | 900 mm |
| Diepte | 600 mm |
| Hoogte | 900 mm |


