Handleiding
Je bekijkt pagina 13 van 25
Disassembly and reassembly 13
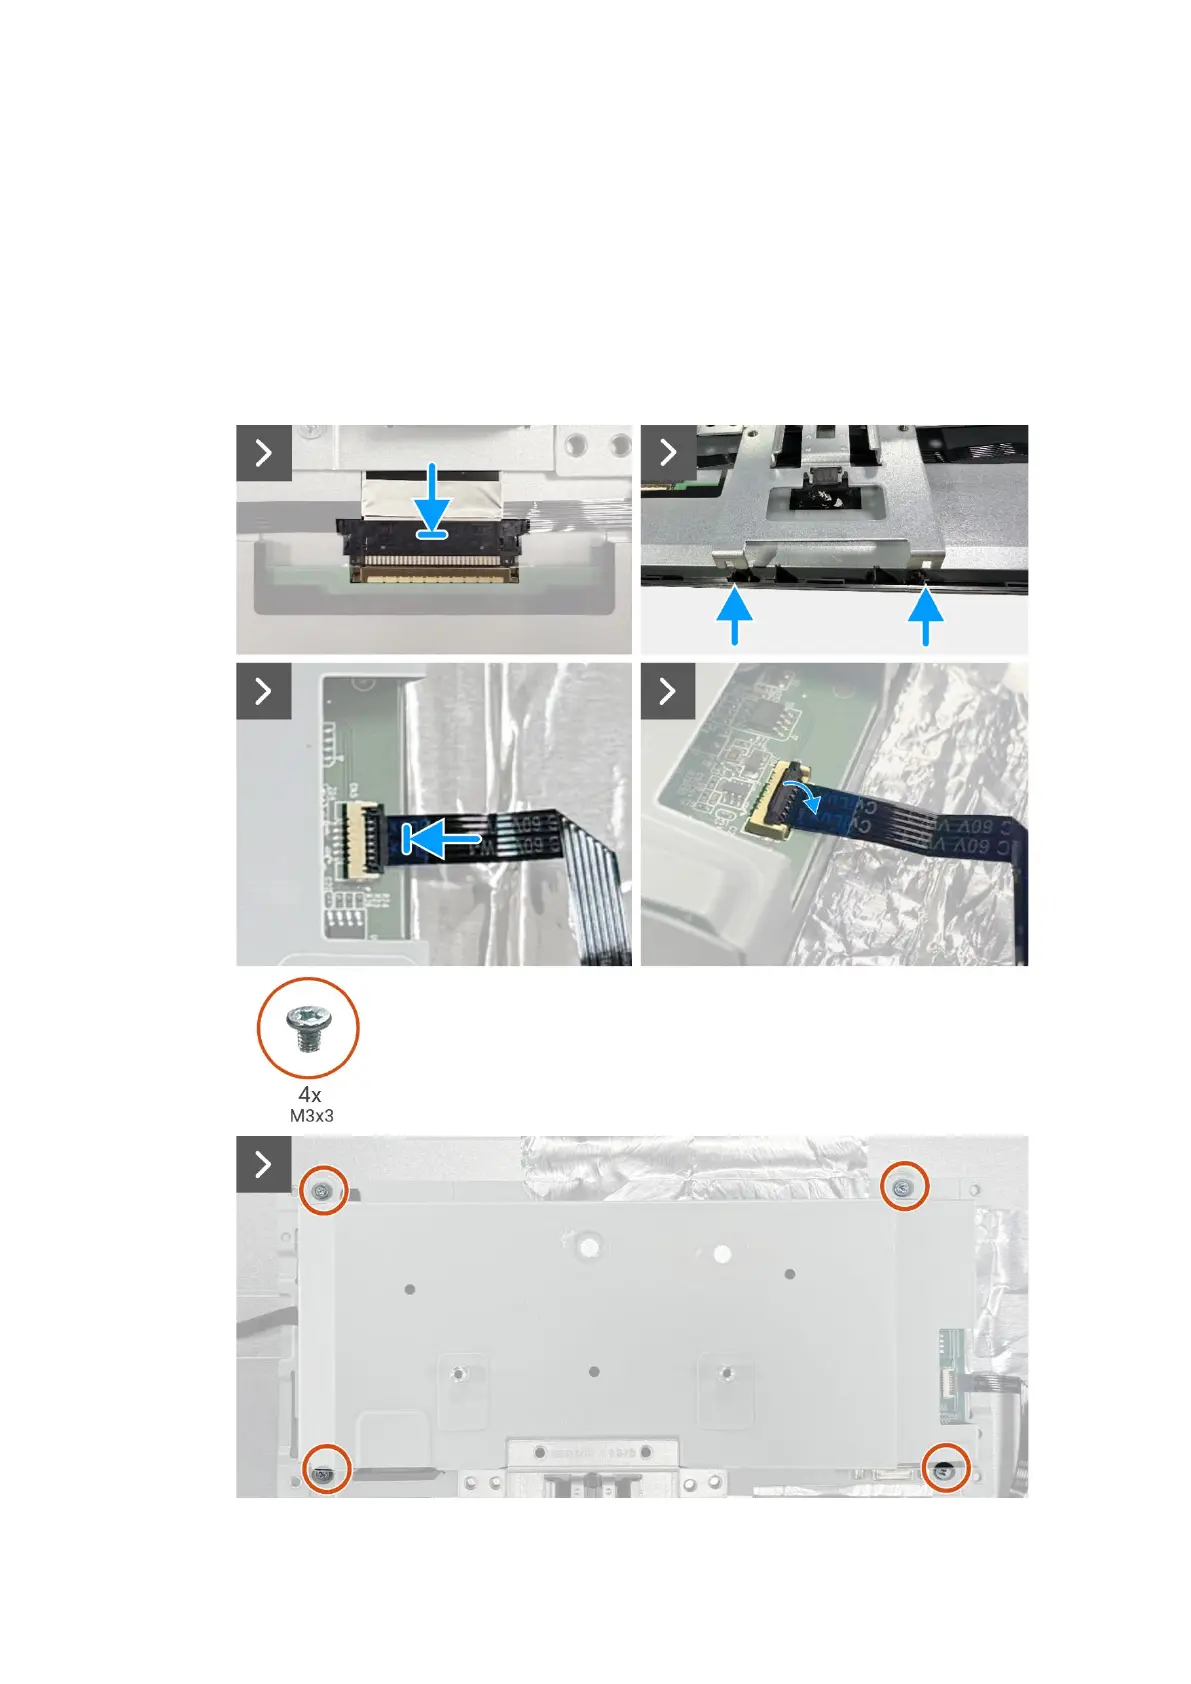
Installing the chassis assembly
Steps
1. Connect the LVDS cable to the connector on the display panel.
2. Position the chassis assembly on the display panel, ensuring the notch on the chassis bracket aligns with the rib at the bottom
of the display middle-frame.
3. Slide the keypad cable into the connector on the interface board and close the latch to secure it in place.
4. Replace the four screws (M3x3) that secure the chassis assembly to the display panel.
5. Adhere the three aluminum foils to the LVDS cable and the chassis assembly.
6. Connect the lightbar cable to connector on the display panel and adhere the tape that secures it to the panel.
Figure 8. Installing the chassis assembly
Bekijk gratis de handleiding van Dell Pro 24 Plus E2425HM, stel vragen en lees de antwoorden op veelvoorkomende problemen, of gebruik onze assistent om sneller informatie in de handleiding te vinden of uitleg te krijgen over specifieke functies.
Productinformatie
| Merk | Dell |
| Model | Pro 24 Plus E2425HM |
| Categorie | Monitor |
| Taal | Nederlands |
| Grootte | 10281 MB |


