Handleiding
Je bekijkt pagina 32 van 140
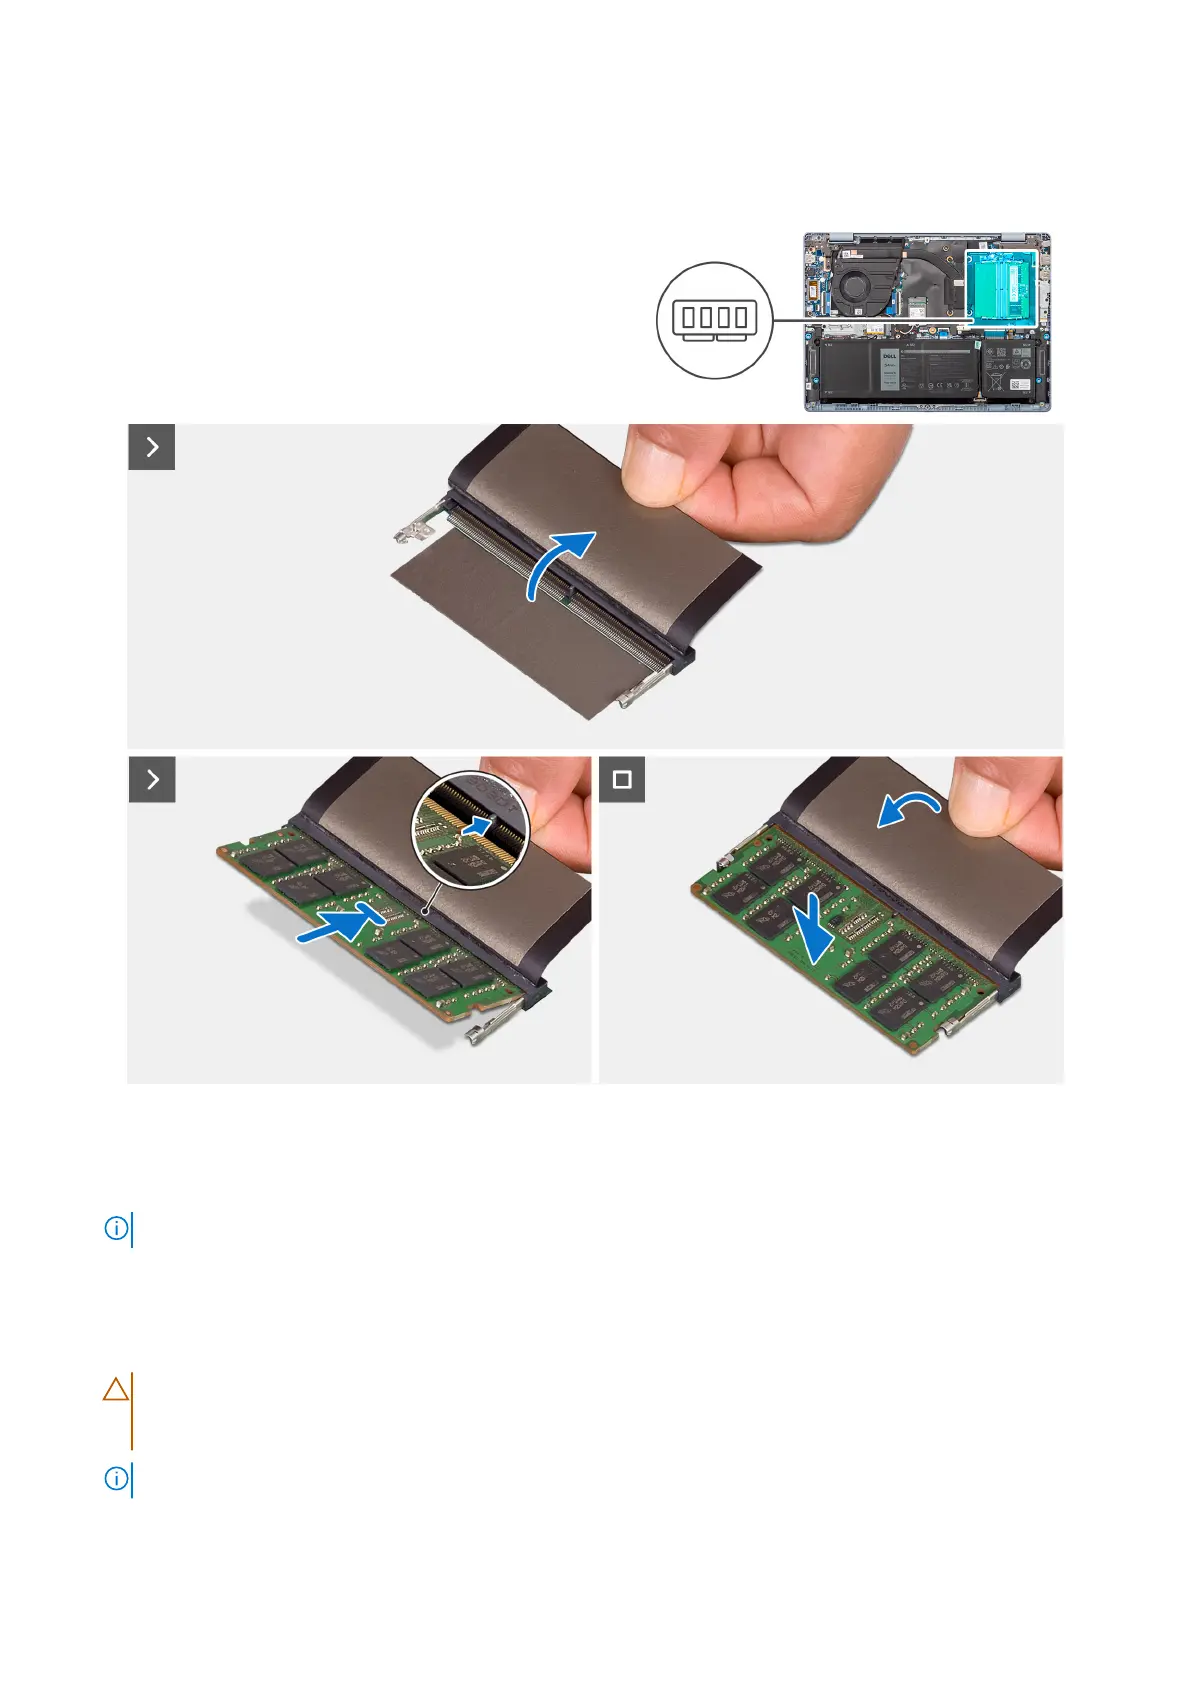
About this task
The following images indicate the location of the memory module and provide a visual representation of the installation
procedure.
Figure 22. Installing the memory module
Steps
1. Lift the Mylar sheet to access the memory-module connector.
NOTE:
This step applies only to computers shipped with an aluminum chassis.
2. Align the notch on the memory module with the tab on the memory-module slot (DIMM1 or DIMM2, whichever is applicable)
on the system board.
3. Slide the memory module firmly into the memory-module slot at an angle.
4. Press down on the memory module until the securing clips firmly click into place.
CAUTION:
To prevent damage to the memory module, hold the memory module by the edges. Do not touch
the components or metallic contacts on the memory module as electrostatic discharge (ESD) can inflict
severe damage on the components. To read more about ESD protection, see ESD protection.
NOTE: If you do not hear the click, remove the memory module and reinstall it.
32 Removing and installing Customer Replaceable Units (CRUs)
Bekijk gratis de handleiding van Dell Pro 14 Essential PV14255, stel vragen en lees de antwoorden op veelvoorkomende problemen, of gebruik onze assistent om sneller informatie in de handleiding te vinden of uitleg te krijgen over specifieke functies.
Productinformatie
| Merk | Dell |
| Model | Pro 14 Essential PV14255 |
| Categorie | Laptop |
| Taal | Nederlands |
| Grootte | 64327 MB |


