Handleiding
Je bekijkt pagina 99 van 149
After the display panel screws have been removed, lift up the bottom side of the panel and slide it downward to release the
display bracket from the slots at the top side of the display back cover. The panel and its support brackets are defined as a
single service part. DO NOT pull the two pieces of elastic tape and separate the brackets from the panel.
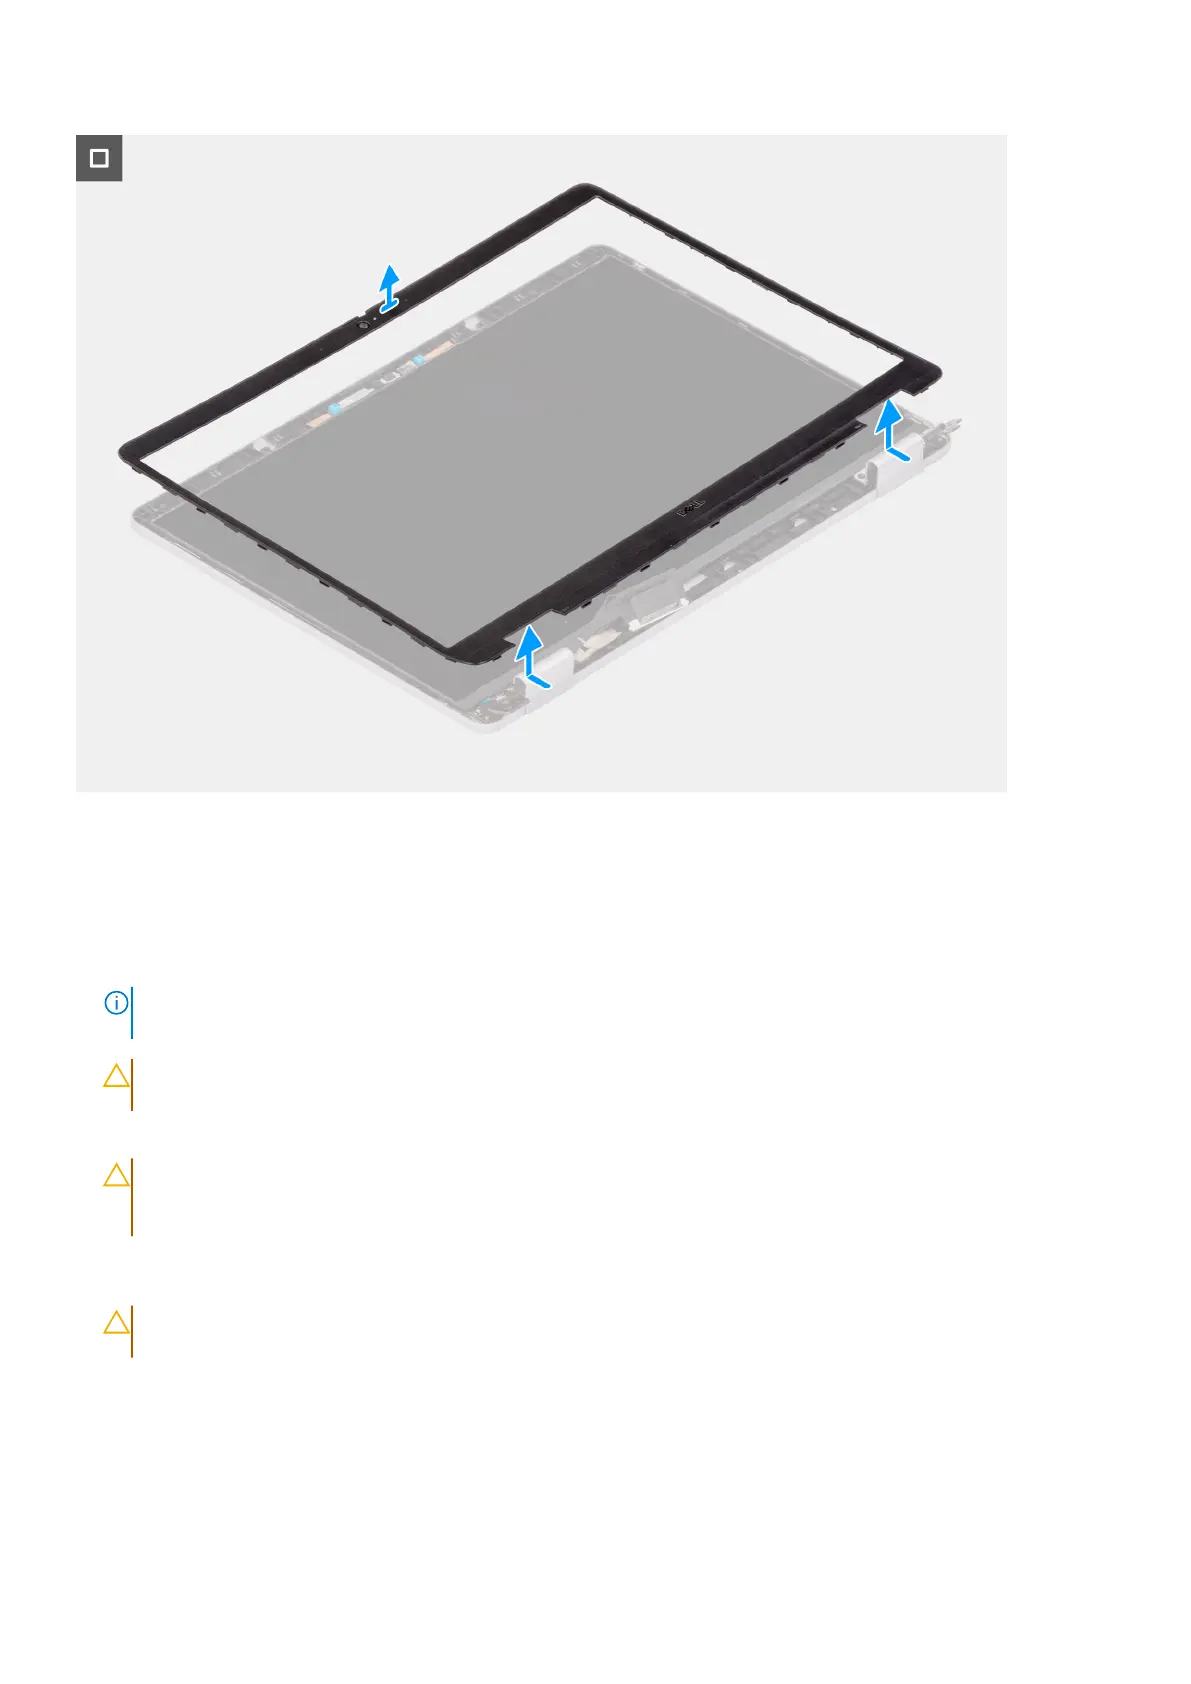
Steps
1. Insert a flat-head screwdriver (maximum width: 4 mm) into the recess on the display bezel near the hinges, and gently apply
pressure to release the bezel at both ends, creating a gap.
NOTE:
The bezel is deformed from this process. This is acceptable because the bezel is defined as a consumable part
and should be replaced with a new one.
CAUTION: Do not use the flat head (slotted) screwdriver to release up the rest of the bezel. Switch to the
plastic scribe to continue releasing along the bezel.
2. Insert the flat end of the scribe into the gap created under the display bezel.
CAUTION:
When inserting the scribe into the bezel, keep it parallel to the display. Pressing it downward can
damage the display. Do not use the flat head (slotted) screwdriver to release up the rest of the bezel. Switch
to the plastic scribe to continue releasing along the bezel.
3. Keeping the scribe parallel to the display, carefully slide it along the bottom edge of the bezel to release the adhesive and the
lower side.
CAUTION:
Do NOT lift the scribe up vertically as that damages the LCD. Slide the scribe horizontally to
release the adhesive and release the bezel up.
4. Insert the scribe diagonally into the hinge section to release the adhesive near the portion of the bezel above the hinge.
5. Insert the scribe into the corner of the display bezel near the hinge. Keeping the scribe parallel to the display, carefully slide
the scribe along the edges from one corner to the other (right to left or left to right). As you do this, use your fingers to help
with releasing the bezel from the clips and adhesive.
6. Lift the display bezel from the display assembly.
Removing and installing Field Replaceable Units (FRUs)
99
Bekijk gratis de handleiding van Dell Pro 13 Plus, stel vragen en lees de antwoorden op veelvoorkomende problemen, of gebruik onze assistent om sneller informatie in de handleiding te vinden of uitleg te krijgen over specifieke functies.
Productinformatie
| Merk | Dell |
| Model | Pro 13 Plus |
| Categorie | Laptop |
| Taal | Nederlands |
| Grootte | 55186 MB |


