Handleiding
Je bekijkt pagina 83 van 149
Prerequisites
If you are replacing a component, remove the existing component before performing the installation process.
About this task
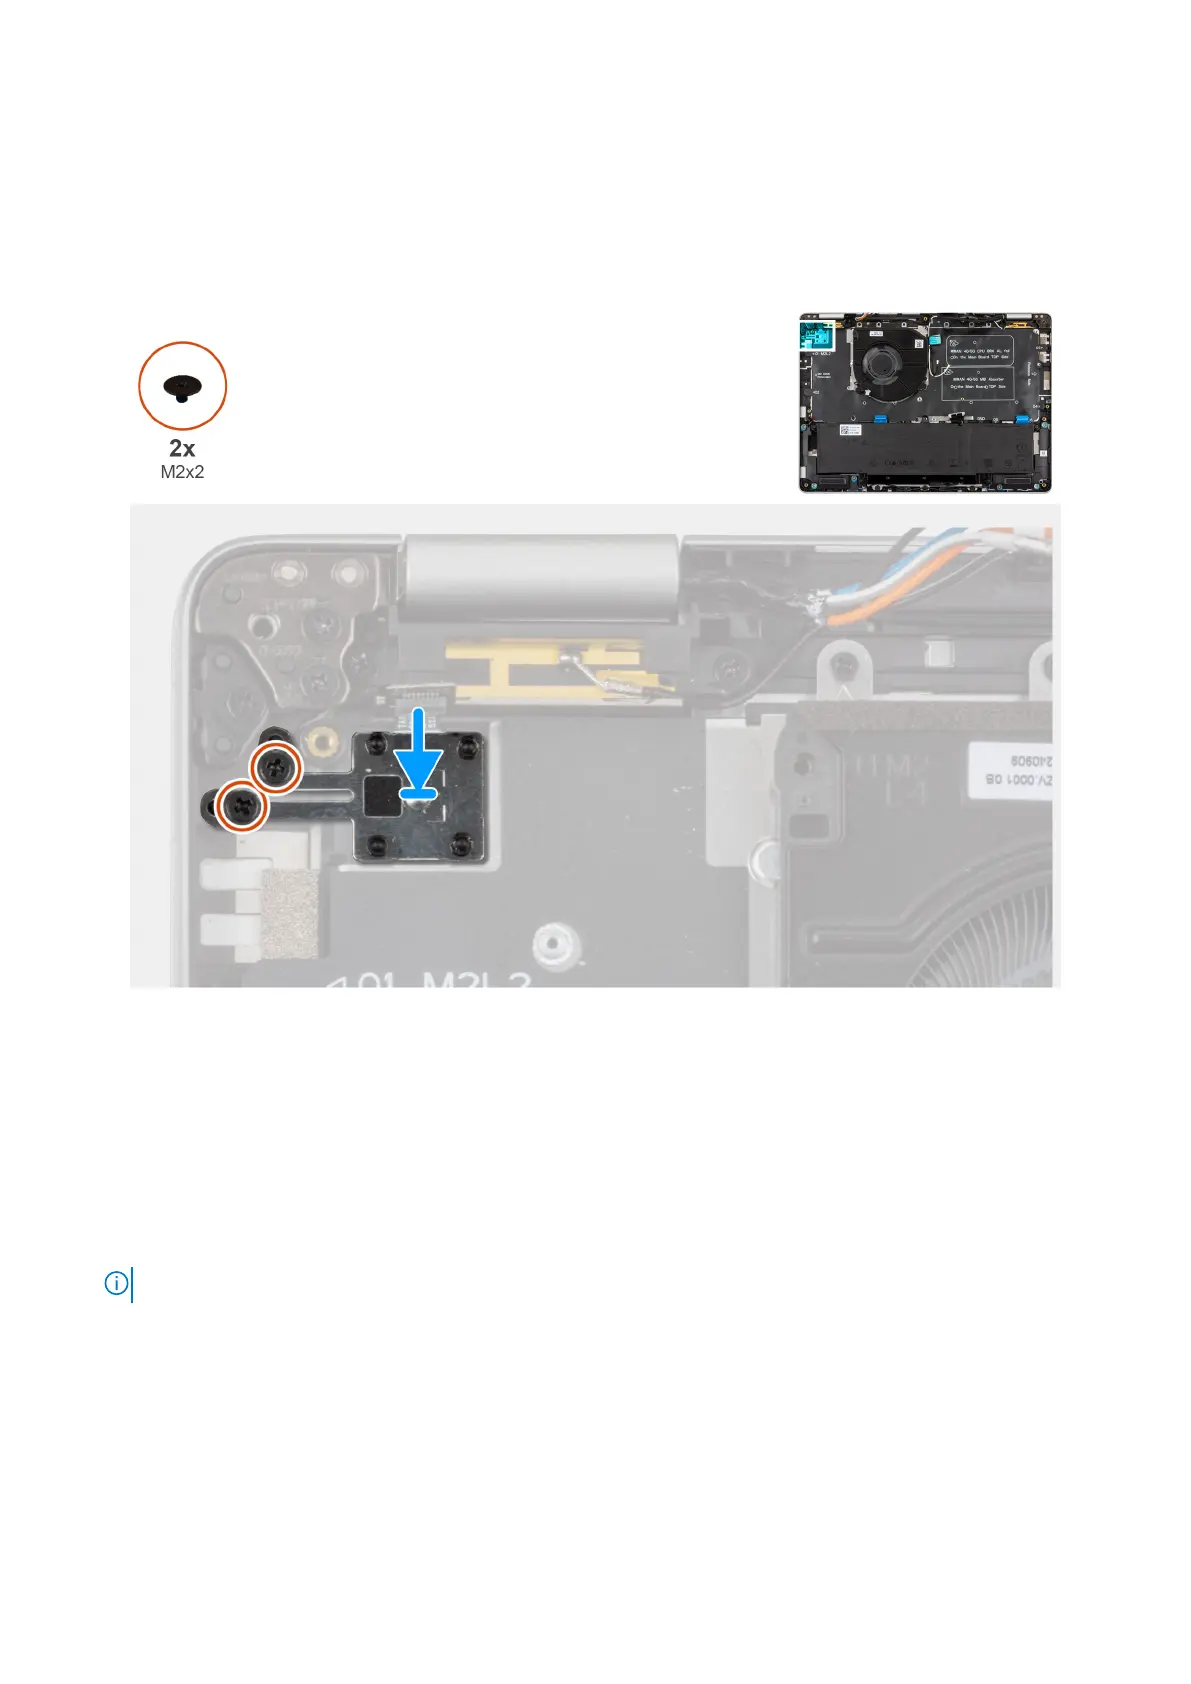
The following images indicate the location of the power button with optional fingerprint reader and provide a visual
representation of the installation procedure.
Figure 39. Installing the power button with optional fingerprint reader
Steps
1. Align and place the power button on the palm-rest assembly.
2. Replace the two (M2x2) screws to secure the power button to the palm-rest assembly.
Next steps
1. Install the I/O board.
2. Install the system board.
NOTE: The system board can be removed and installed with the heat sink to preserve the thermal bond.
3. Install the display assembly.
4. Install the fan.
5. Install the 5G WWAN card.
6. Install the M.2 2230 or M.2 2280 SSD, as applicable.
7. Install the battery.
8. Install the base cover.
9. Install the SIM card (optional).
10. Follow the procedure in After working inside your computer.
Removing and installing Field Replaceable Units (FRUs)
83
Bekijk gratis de handleiding van Dell Pro 13 Plus, stel vragen en lees de antwoorden op veelvoorkomende problemen, of gebruik onze assistent om sneller informatie in de handleiding te vinden of uitleg te krijgen over specifieke functies.
Productinformatie
| Merk | Dell |
| Model | Pro 13 Plus |
| Categorie | Laptop |
| Taal | Nederlands |
| Grootte | 55186 MB |


