Handleiding
Je bekijkt pagina 78 van 149
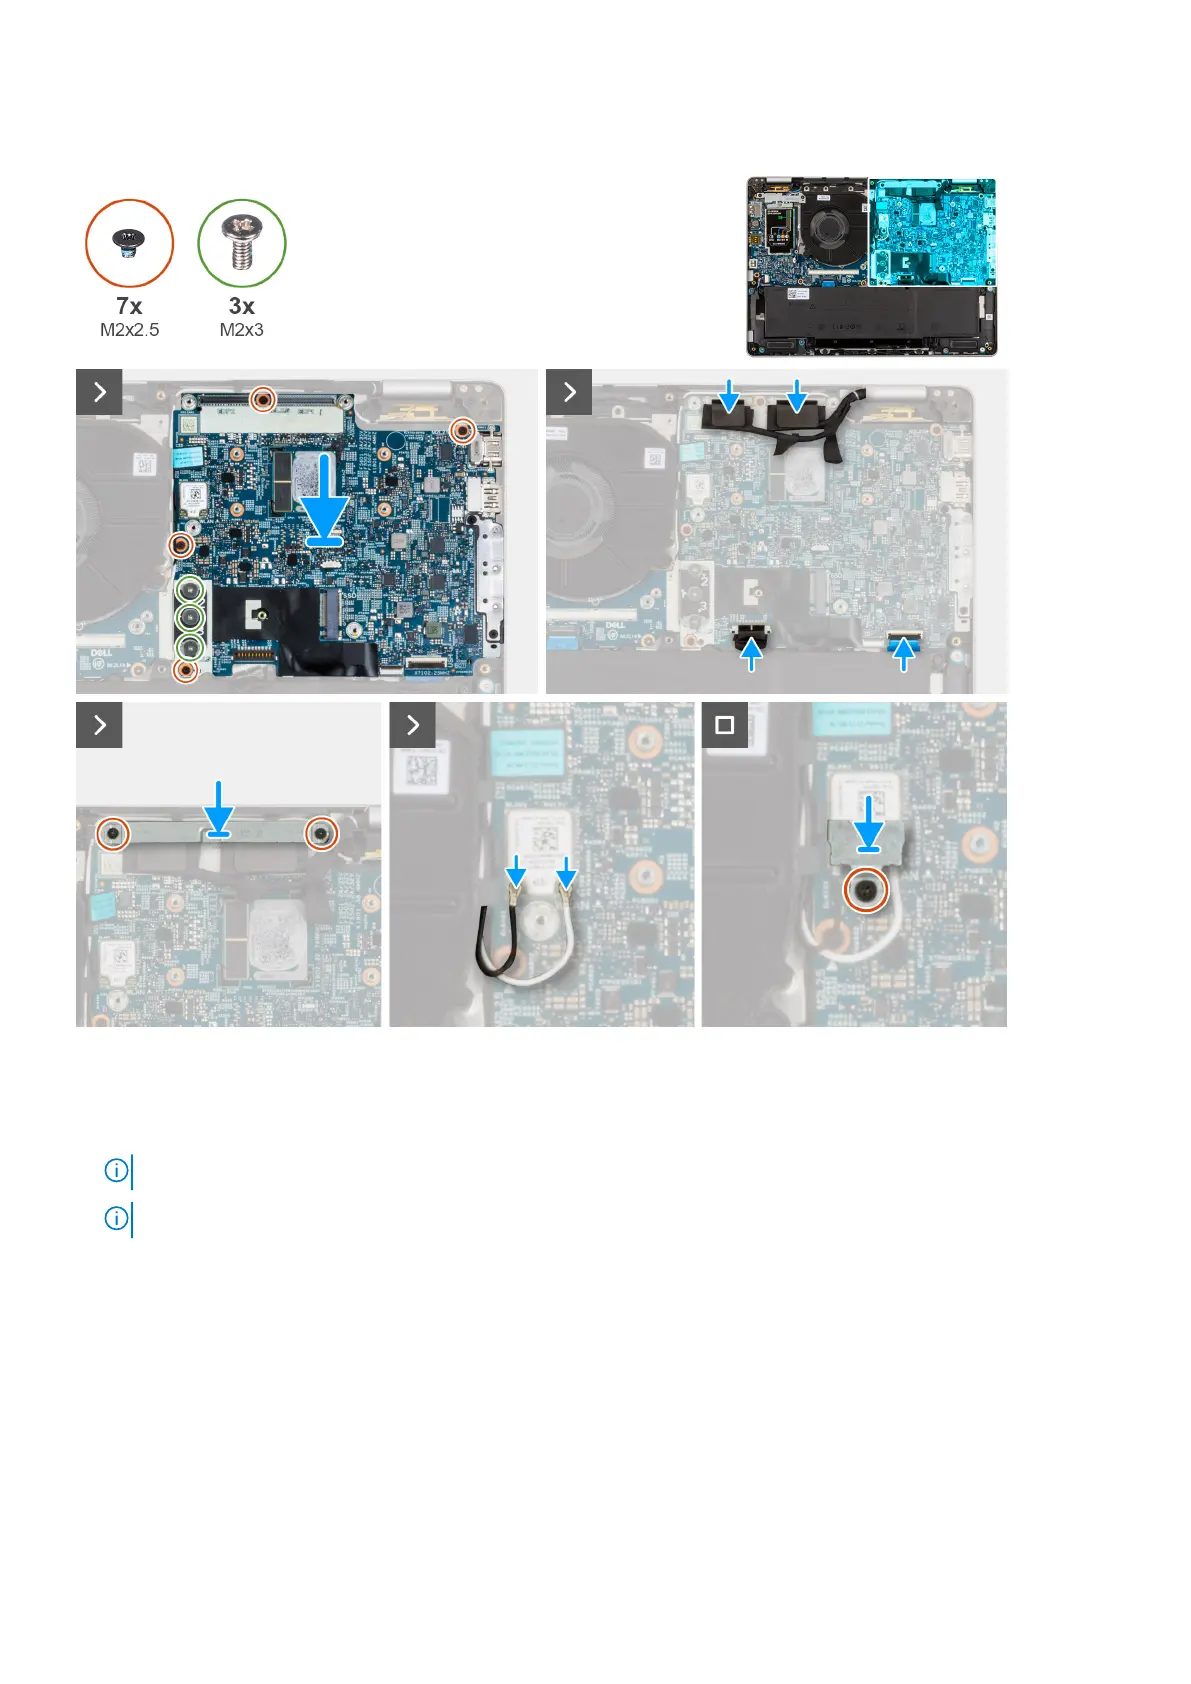
Figure 35. Installing the system board
Steps
1. Align and place the system board on its slot on the palm-rest assembly.
2. Replace the three screws (M2x3) that secures the system board to the I/O board.
NOTE: Loosen the captive screws in the reverse sequential order mentioned on the heat sink [ 3 > 2 > 1].
NOTE: The number of screws varies depending on the configuration ordered.
3. Replace the four screws (M2x2.5) that secure the system board to the palm-rest assembly.
4. Connect the sensor board-cable to the connector on the system board.
5. Connect the display cable and camera cable to the display cable connector (LCD1) on the system board.
6. Route the display cable through the routing guides on the system board.
7. Adhere the black flap near the antenna cables and cover the sensor board-cable.
8. Place the display-cable bracket over the display cable.
9. Replace the two screws (M2x3) that secure the display-cable bracket to the palm-rest assembly.
10. Place the WLAN bracket on the palm-rest assembly.
11. Replace the screw (M2x2.5) that secure the WLAN bracket to the palm-rest assembly.
12. Connect the WLAN cable to the palm-rest assembly.
78
Removing and installing Field Replaceable Units (FRUs)
Bekijk gratis de handleiding van Dell Pro 13 Plus, stel vragen en lees de antwoorden op veelvoorkomende problemen, of gebruik onze assistent om sneller informatie in de handleiding te vinden of uitleg te krijgen over specifieke functies.
Productinformatie
| Merk | Dell |
| Model | Pro 13 Plus |
| Categorie | Laptop |
| Taal | Nederlands |
| Grootte | 55186 MB |


