Handleiding
Je bekijkt pagina 100 van 155
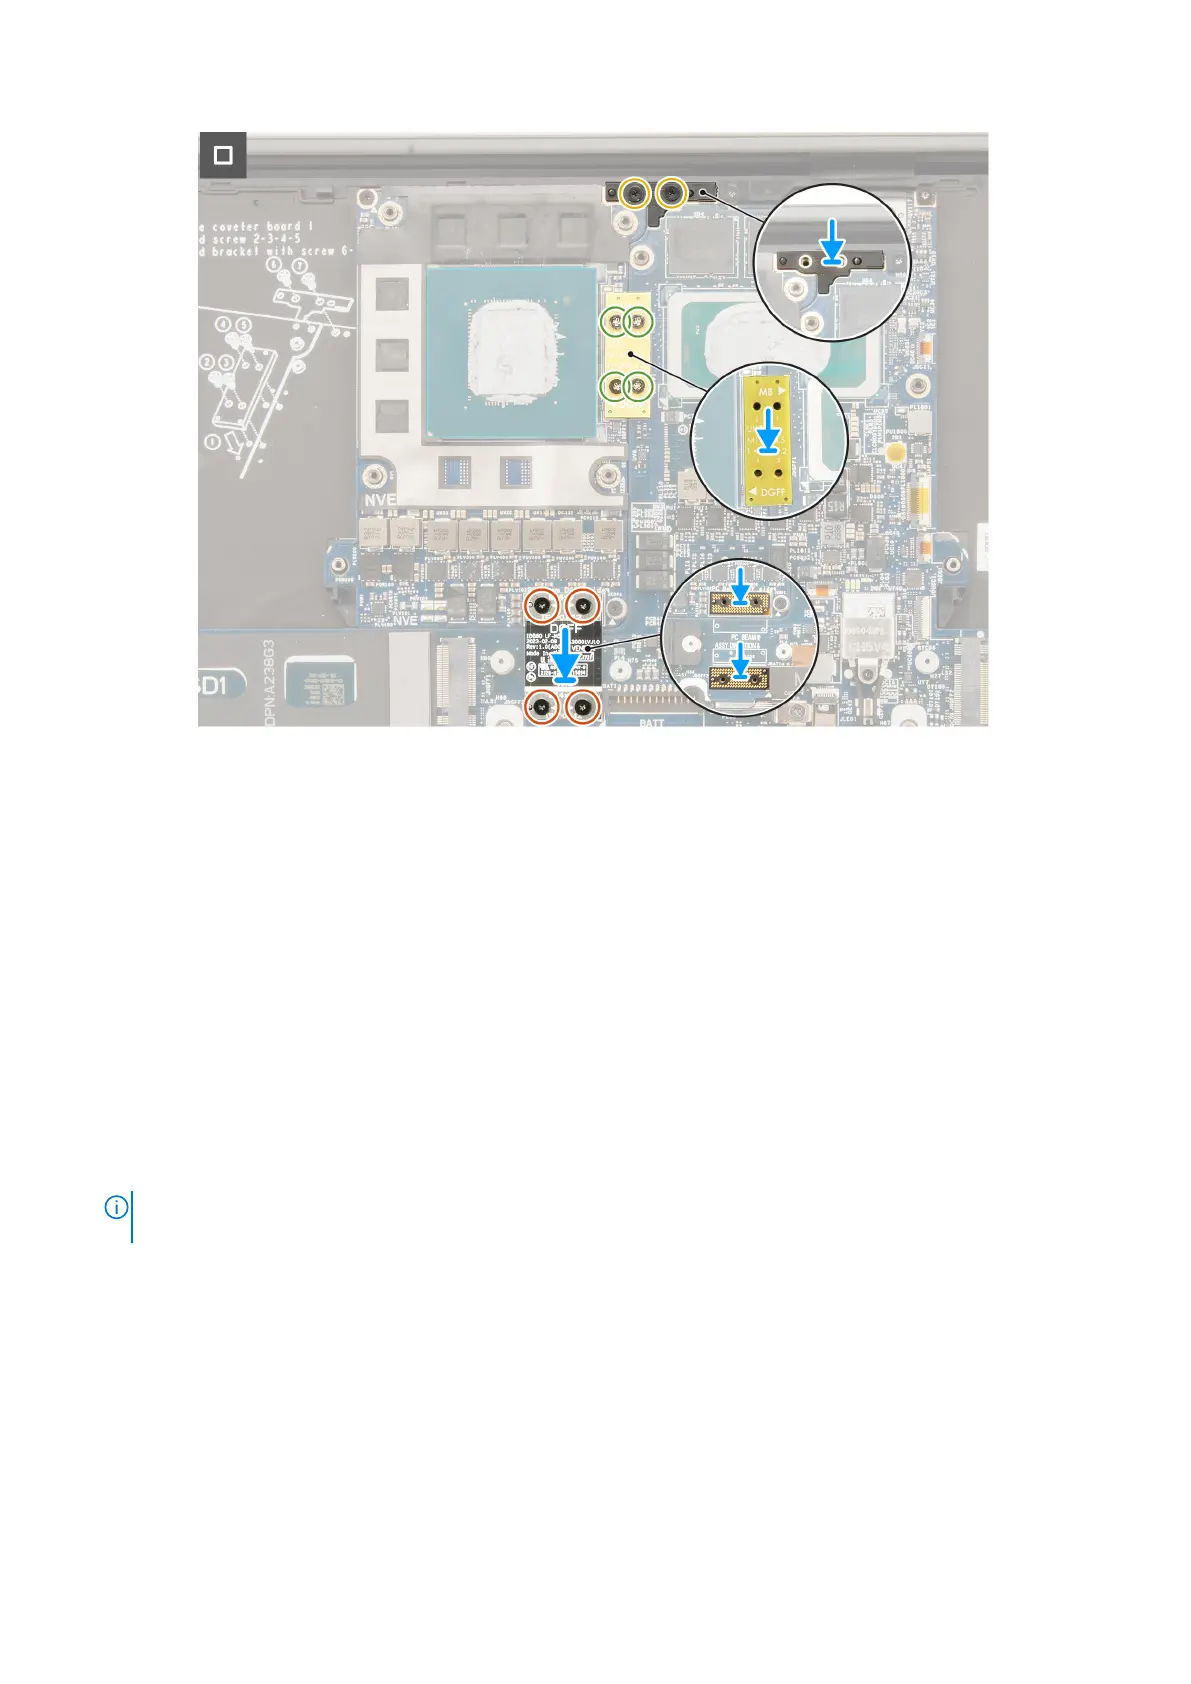
Figure 66. Installing the system board
Steps
1. Align and place the system board on the palm-rest assembly.
2. Replace the nine screws (M2x4) to secure the system board to the palm-rest assembly.
3. Align and place the PC-bridge bracket on the system board.
4. Replace the two screws (M2x4) to secure the PC-bridge bracket in place.
5. Connect the power button with fingerprint reader FPC cable, right speaker cable, front LED FPC cable, and left speaker
cable to the connectors on the system board.
6. Adhere the SD-card daughterboard FPC/USH and SD-card daughterboard FPC cable and Haptics touchpad FPC cable on
the palm-rest assembly.
7. Connect the Haptics touchpad FPC cable to the connector on the Haptics touchpad module.
8. For computers shipped with a USH module, connect the USH and SD-card daughterboard FPC cable to the connector on
the USH and SD-card daughterboard.
9. For computers shipped without a USH module, connect the SD-card daughterboard FPC cable to the connector on the
SD-card daughterboard.
10. Align and place the display-FPC interposer board on the system board.
NOTE:
The pins on the interposer board are fragile. Avoid contact with the pins on the board. When handling the board,
lift and hold the board from the edges or the sides.
100 Removing and installing Field Replaceable Units (FRUs)
Bekijk gratis de handleiding van Dell Precision 5690, stel vragen en lees de antwoorden op veelvoorkomende problemen, of gebruik onze assistent om sneller informatie in de handleiding te vinden of uitleg te krijgen over specifieke functies.
Productinformatie
| Merk | Dell |
| Model | Precision 5690 |
| Categorie | Laptop |
| Taal | Nederlands |
| Grootte | 67669 MB |


