Handleiding
Je bekijkt pagina 17 van 70
Steps
1 Remove the screw (M2x3) that secures the M.2 thermal shield to the palm-rest assembly.
2 Lift and remove the M.2 2280 thermal shield o the M.2 2280 solid-state drive.
NOTE: A thermal shield is only present on PCIe M.2 cards.
3 Slide and remove the M.2 2280 solid-state drive from the M.2 card slot on the system board.
Installing the M.2 2280 solid-state drive
Prerequisite
If you are replacing a component, remove the existing component before performing the installation procedure.
About this task
NOTE: This procedure applies if you are installing a M.2 2280 solid-state drive.
NOTE: Depending on the conguration ordered your computer may have up to two M.2 cards installed. Supported
card congurations per M.2 card slot:
• M.2 2230 solid-state drive + 2230 mounting bracket
• M.2 2280 solid-state drive
NOTE: For PCIe, NVMe solid-state drives a thermal shield is required for optimal heat dissipation and is installed in
your computer when these congurations are ordered. If these congurations are installed After Point-of-Sale
(APOS), contact Dell support for the thermal shield.
NOTE: Before replacing the M.2 card take note that there are two M.2 card slots present on your computer, for:
• the left card slot PCIe, NVMe and SATA AHCI cards are supported.
• the right card slot only PCIe, NVMe cards are supported.
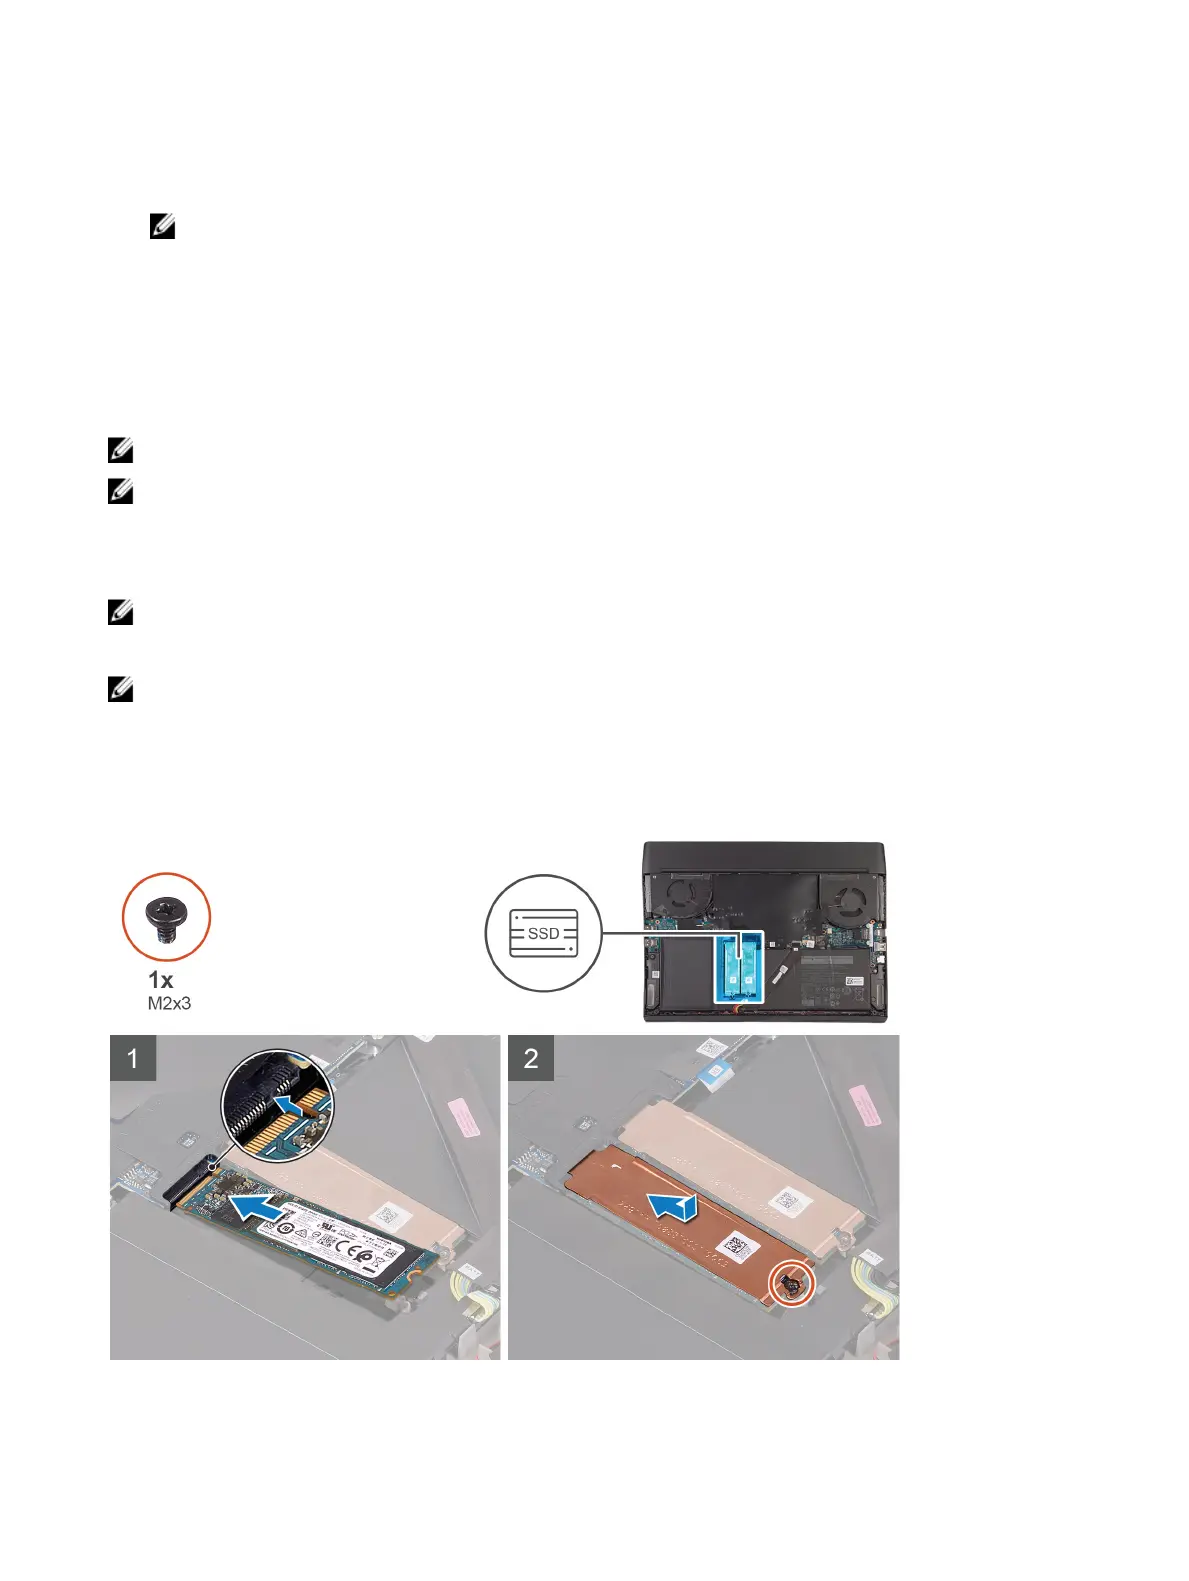
The following image indicates the location of the M.2 2280 solid-state drive and provides a visual representation of the
installation procedure.
Steps
1 Align the notch on the M.2 2280 solid-state drive with the tab on the M.2 card slot on the system board.
17
Bekijk gratis de handleiding van Dell Alienware m15 R2, stel vragen en lees de antwoorden op veelvoorkomende problemen, of gebruik onze assistent om sneller informatie in de handleiding te vinden of uitleg te krijgen over specifieke functies.
Productinformatie
| Merk | Dell |
| Model | Alienware m15 R2 |
| Categorie | Laptop |
| Taal | Nederlands |
| Grootte | 36660 MB |


