Handleiding
Je bekijkt pagina 62 van 99
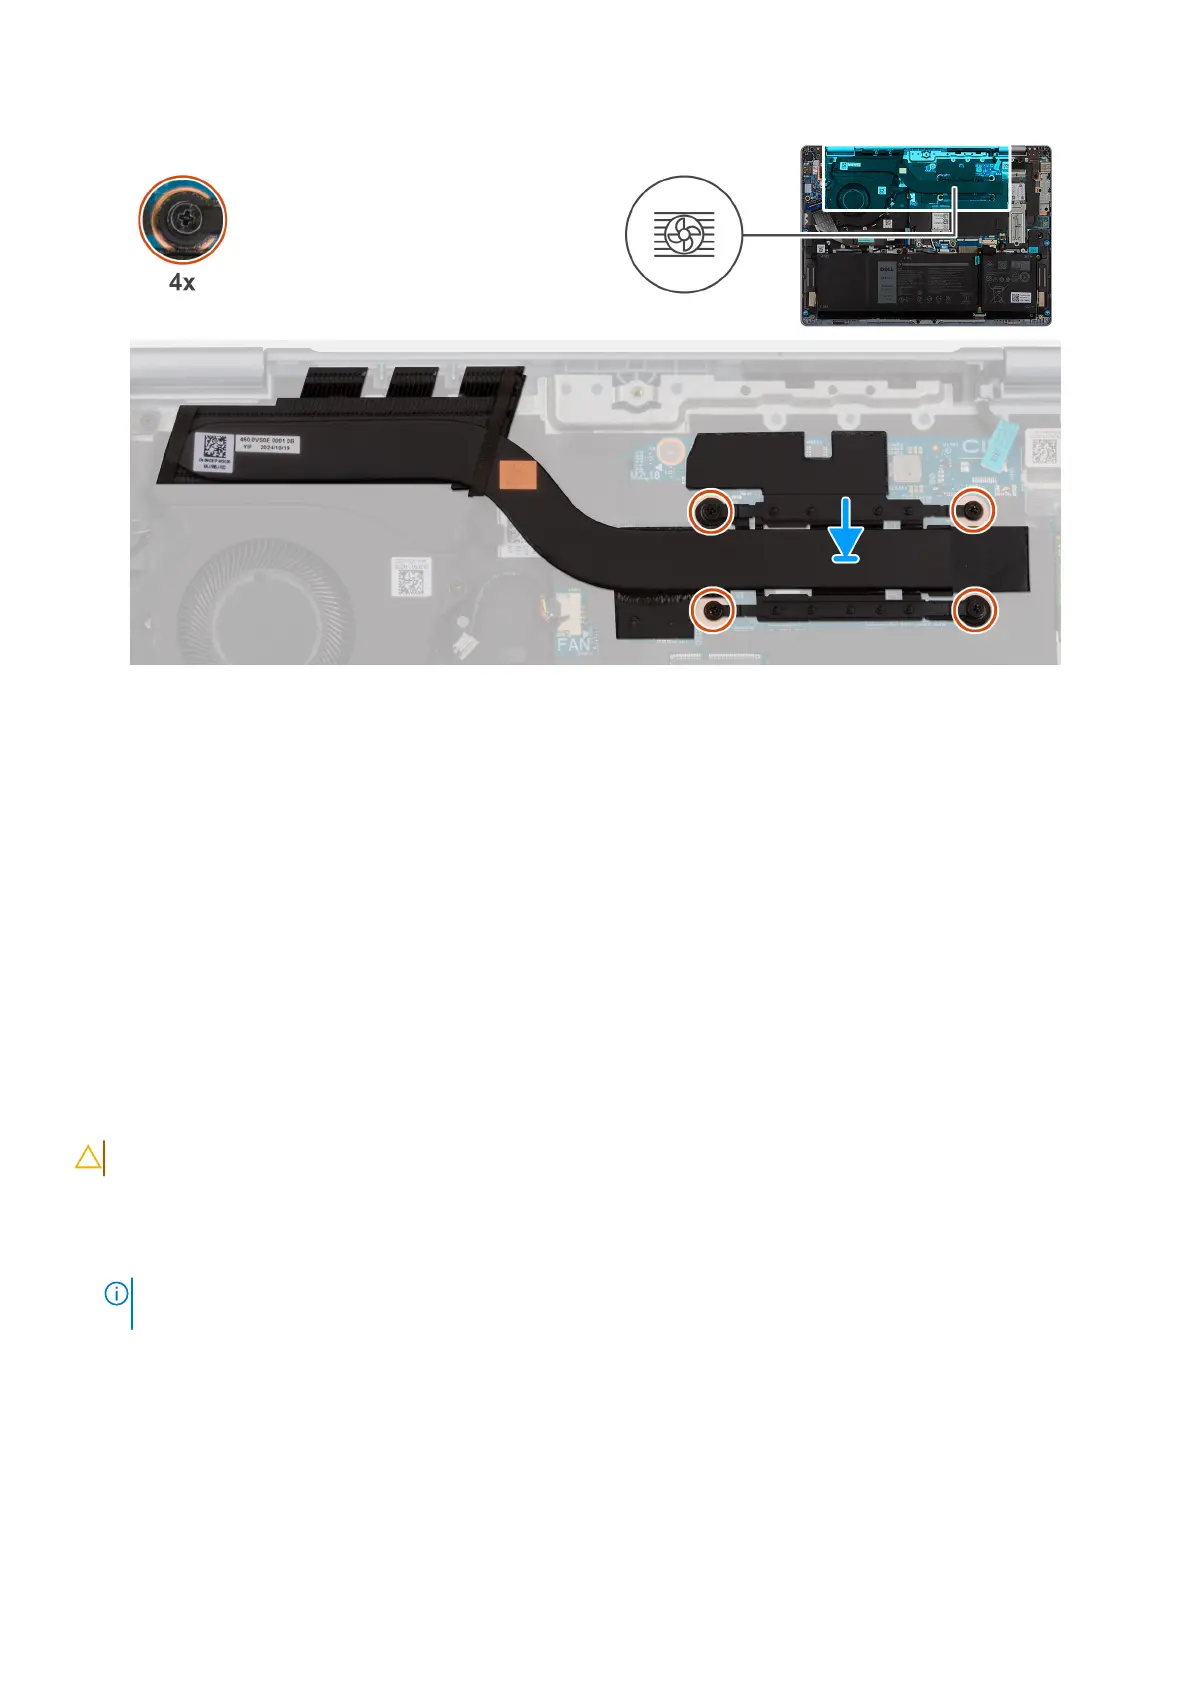
Figure 37. Installing the heat sink
Steps
1. Place the heat sink on the system board.
2. Align the captive screws on the heat sink to the screw holes on the system board.
3. In sequential order (1, 2, 3, 4), tighten the four captive screws that secure the heat sink to the system board.
Next steps
1. Install the base cover.
2. Follow the procedure in After working inside your computer.
System board
Removing the system board
CAUTION: The information in this section is intended for authorized service technicians only.
Prerequisites
1. Follow the procedure in Before working inside your computer.
NOTE:
Ensure that your computer is in Service Mode. For more information, see step 7 in Before working inside your
computer.
2. Remove the base cover.
3. Remove the battery.
4. Remove the M.2 2230 solid state drive.
5. Remove the wireless card.
6. Remove the heat sink.
7. Remove the display assembly.
62
Removing and installing Field Replaceable Units (FRUs)
Bekijk gratis de handleiding van Dell 14 Plus DB14250, stel vragen en lees de antwoorden op veelvoorkomende problemen, of gebruik onze assistent om sneller informatie in de handleiding te vinden of uitleg te krijgen over specifieke functies.
Productinformatie
| Merk | Dell |
| Model | 14 Plus DB14250 |
| Categorie | Laptop |
| Taal | Nederlands |
| Grootte | 38915 MB |


