Datapath Hx4 handleiding
Handleiding
Je bekijkt pagina 6 van 33
Quick Start Guide
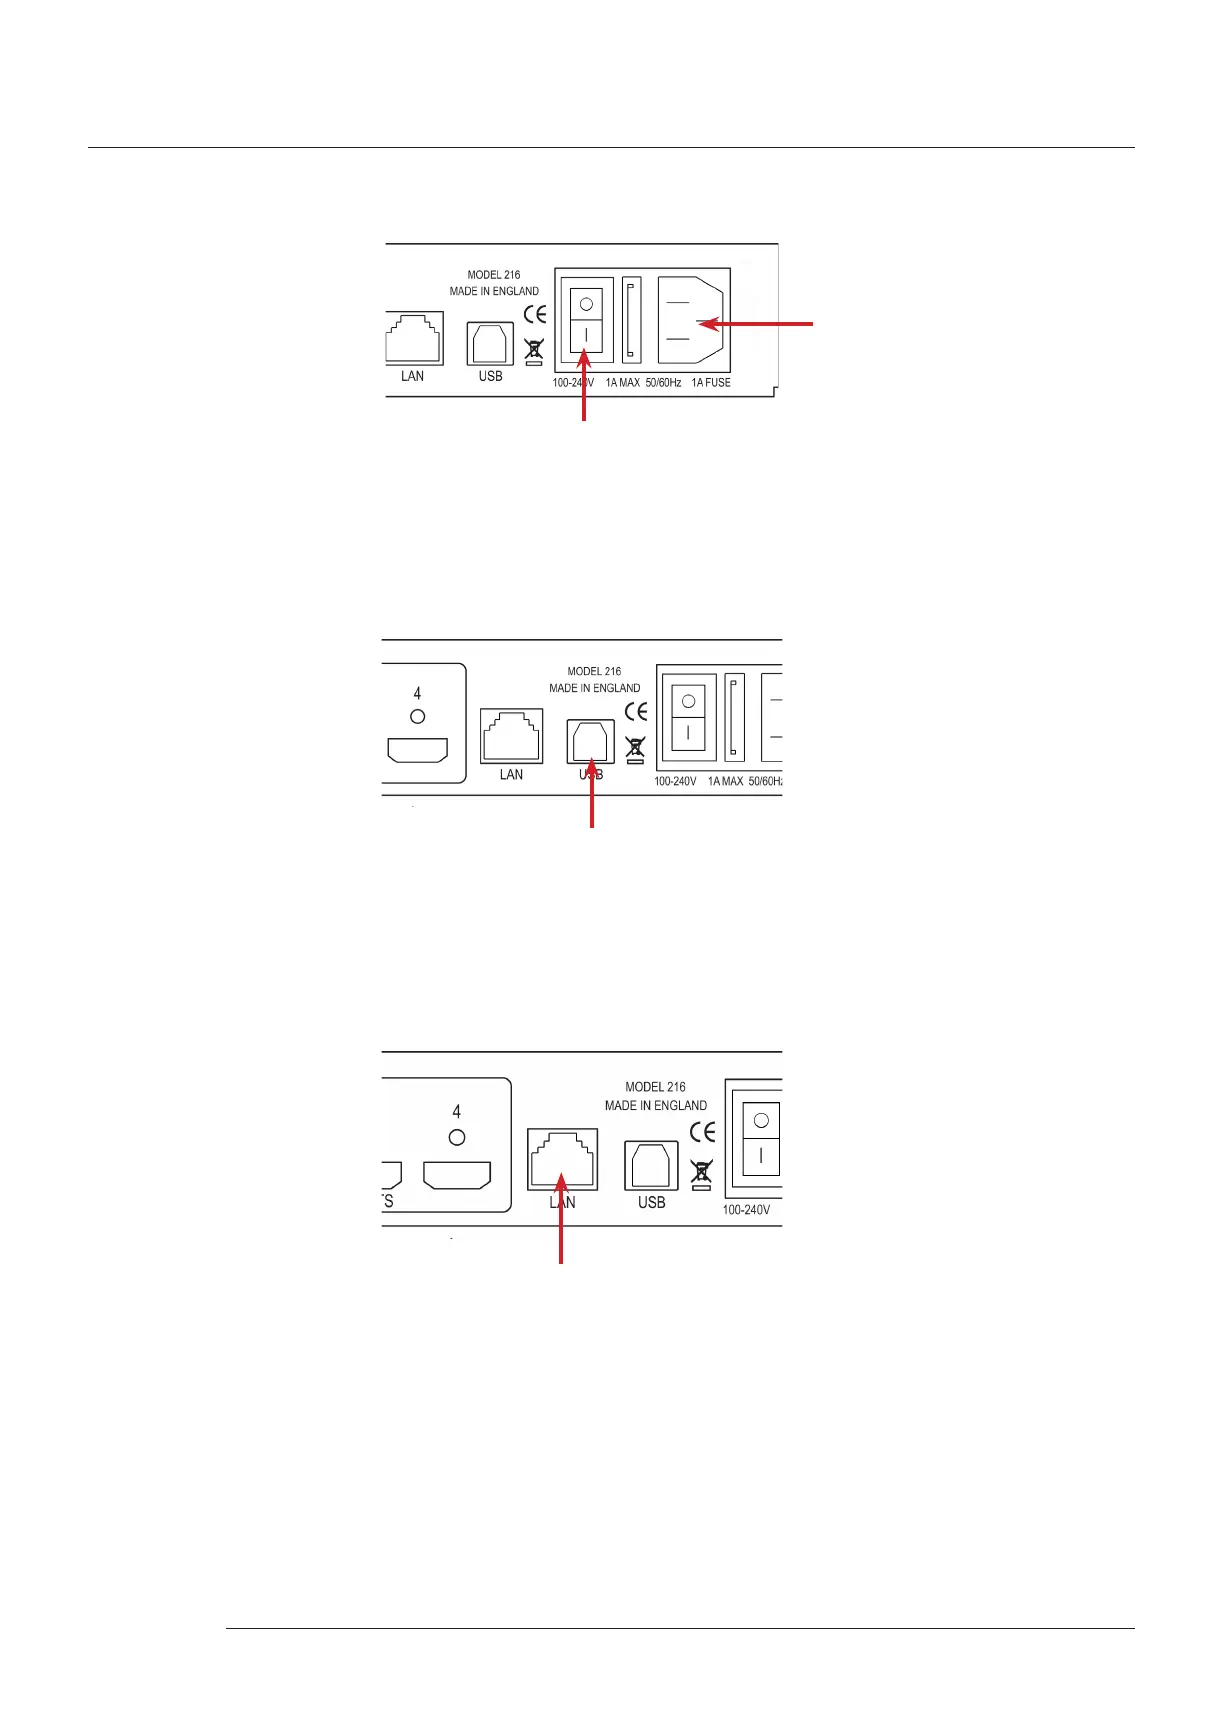
Step 3 - Connect a Mains Cable
Connect Mains cable
Switch On
When the power is switched on the Hx4 will boot and the LEDs on the front panel will ash for up to 15 seconds. Should the
LED’s continue to ash see the troubleshooting section.
Step 4 - Connecting to a PC
To successfully congure the Hx4, rst install the Wall Designer application on your PC by downloading the latest version from
the Datapath website: www.datapath.co.uk.
Quick Start Guide
USB Port
When the Hx4 has booted, connect it to your PC using the USB cable provided. The Hx4 unit is a plug and play device, Wall
Designer will detect it when the layouts are congured.
The Hx4 can also be congured via a Network, see Step 5.
Step 5 - Congure Via a Network
The Hx4 has a single ethernet port to allow users to add the device to their network.
Ethernet Port
Connect the Hx4 to a network using the LAN connector then open Wall Designer and create your display layout. At the point
where you associate the virtual device with a physical device the list will display all Hx4’s currently connected to the network.
Click on the virtual device to display its properties, the Device Properties can be changed in the same way as if connecting via
USB. Once any changes have been made click on Apply Settings to save.
See the Hx4 User Guide for information regarding network settings.
6
Bekijk gratis de handleiding van Datapath Hx4, stel vragen en lees de antwoorden op veelvoorkomende problemen, of gebruik onze assistent om sneller informatie in de handleiding te vinden of uitleg te krijgen over specifieke functies.
Productinformatie
| Merk | Datapath |
| Model | Hx4 |
| Categorie | Niet gecategoriseerd |
| Taal | Nederlands |
| Grootte | 5125 MB |
Caratteristiche Prodotto
| Kleur van het product | Zwart |
| Gewicht | 1860 g |
| Breedte | 316 mm |
| Diepte | 172 mm |
| Hoogte | 42 mm |
