Danby DRRM300W handleiding
Handleiding
Je bekijkt pagina 16 van 64
15
INSTALLATION INSTRUCTIONS
ANTI-TIP BRACKET
An anti-tip bracket kit is provided with the range.
WARNING: Tip Over Hazard
• A child or adult can tip the range and be seriously injured.
• Connect the anti-tip bracket to the rear foot of the range.
• Reconnect the anti-tip bracket if the range is moved.
NOTE: DO NOT completely remove the rear leveling leg. The anti-tip bracket uses either the right-hand or
left-hand rear leveling leg to secure the range to the floor or wall.
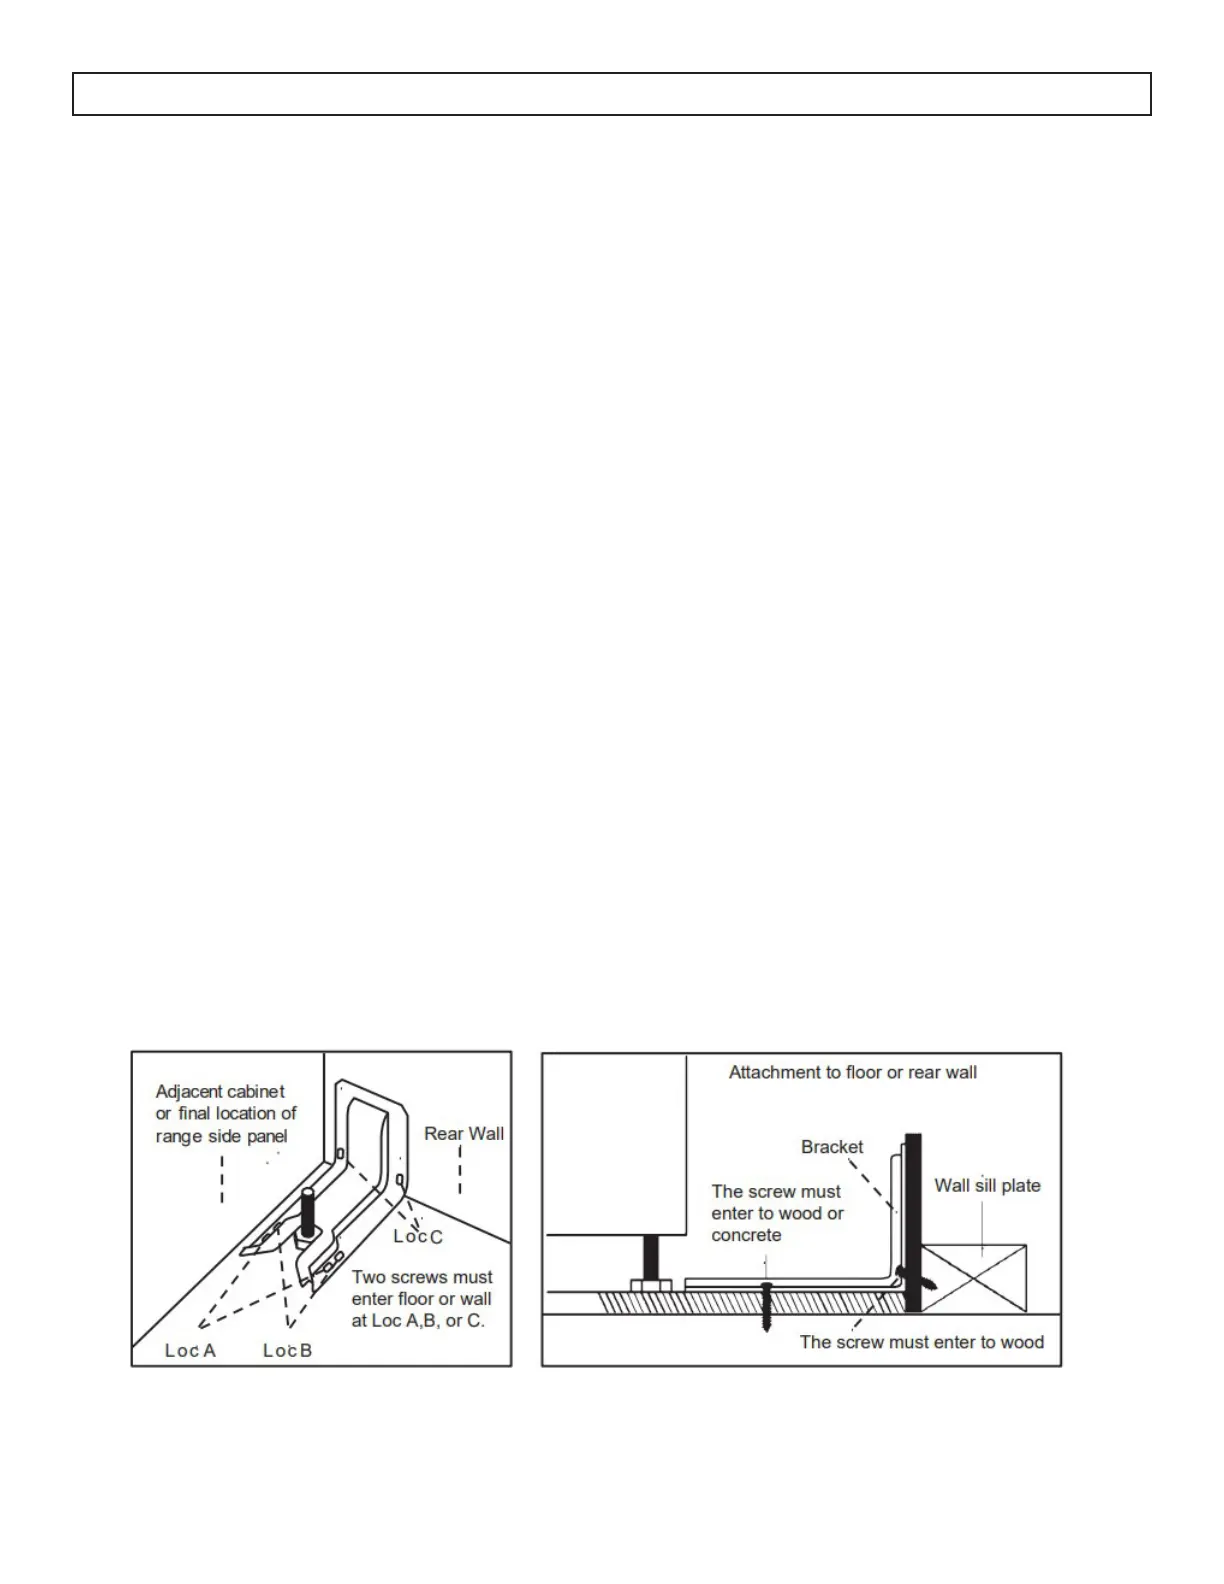
Bracket Location
Determine the final location of the range before attempting to install the bracket.
Place the bracket on the floor with the back edge against the rear wall. If the range does not reach the rear
wall, align the back edge of the bracket with the rear panel of the range in its final location.
NOTE: If the bracket does not touch the rear wall, you MUST screw the bracket to the FLOOR.
Position the site of the bracket against either the left or right cabinet. If there is no adjacent cabinet, align
the edge of the bracket with the side panel of the range in its final location. If the countertop overhangs the
cabinet, offset the bracket from the cabinet by the amount of overhang.
Mark the location for the pair of holes to be used (see illustration below).
NOTE: For FLOOR installation use either Loc A or B. For REAR WALL installation use Loc C.
Bekijk gratis de handleiding van Danby DRRM300W, stel vragen en lees de antwoorden op veelvoorkomende problemen, of gebruik onze assistent om sneller informatie in de handleiding te vinden of uitleg te krijgen over specifieke functies.
Productinformatie
| Merk | Danby |
| Model | DRRM300W |
| Categorie | Niet gecategoriseerd |
| Taal | Nederlands |
| Grootte | 8376 MB |


