Daikin REYA14A7Y1B handleiding
Handleiding
Je bekijkt pagina 29 van 60
15 Piping installation
Installation and operation manual
29
REMA5+REYA8~20A7Y1B
VRV 5 heat recovery
4P684060-1C – 2024.10
WARNING
NEVER remove the pinched piping by brazing.
Any gas or oil remaining inside the stop valve may blow off
the pinched piping.
6 Wait until all oil has dripped out before continuing with the
connection of the field piping in case the recovery was not
complete.
15.2.5 To connect the refrigerant piping to the
outdoor unit
NOTICE
▪ Be sure to use the supplied accessory pipes when
carrying out piping work in the field.
▪ Be sure that the field installed piping does not touch
other pipes, the bottom panel or side panel. Especially
for the bottom and side connection, be sure to protect
the piping with suitable insulation, to prevent it from
coming into contact with the casing.
Connect the stop valves to the field piping using the accessory pipes
supplied with the unit.
The connections to the branch kits are the responsibility of the
installer (field piping).
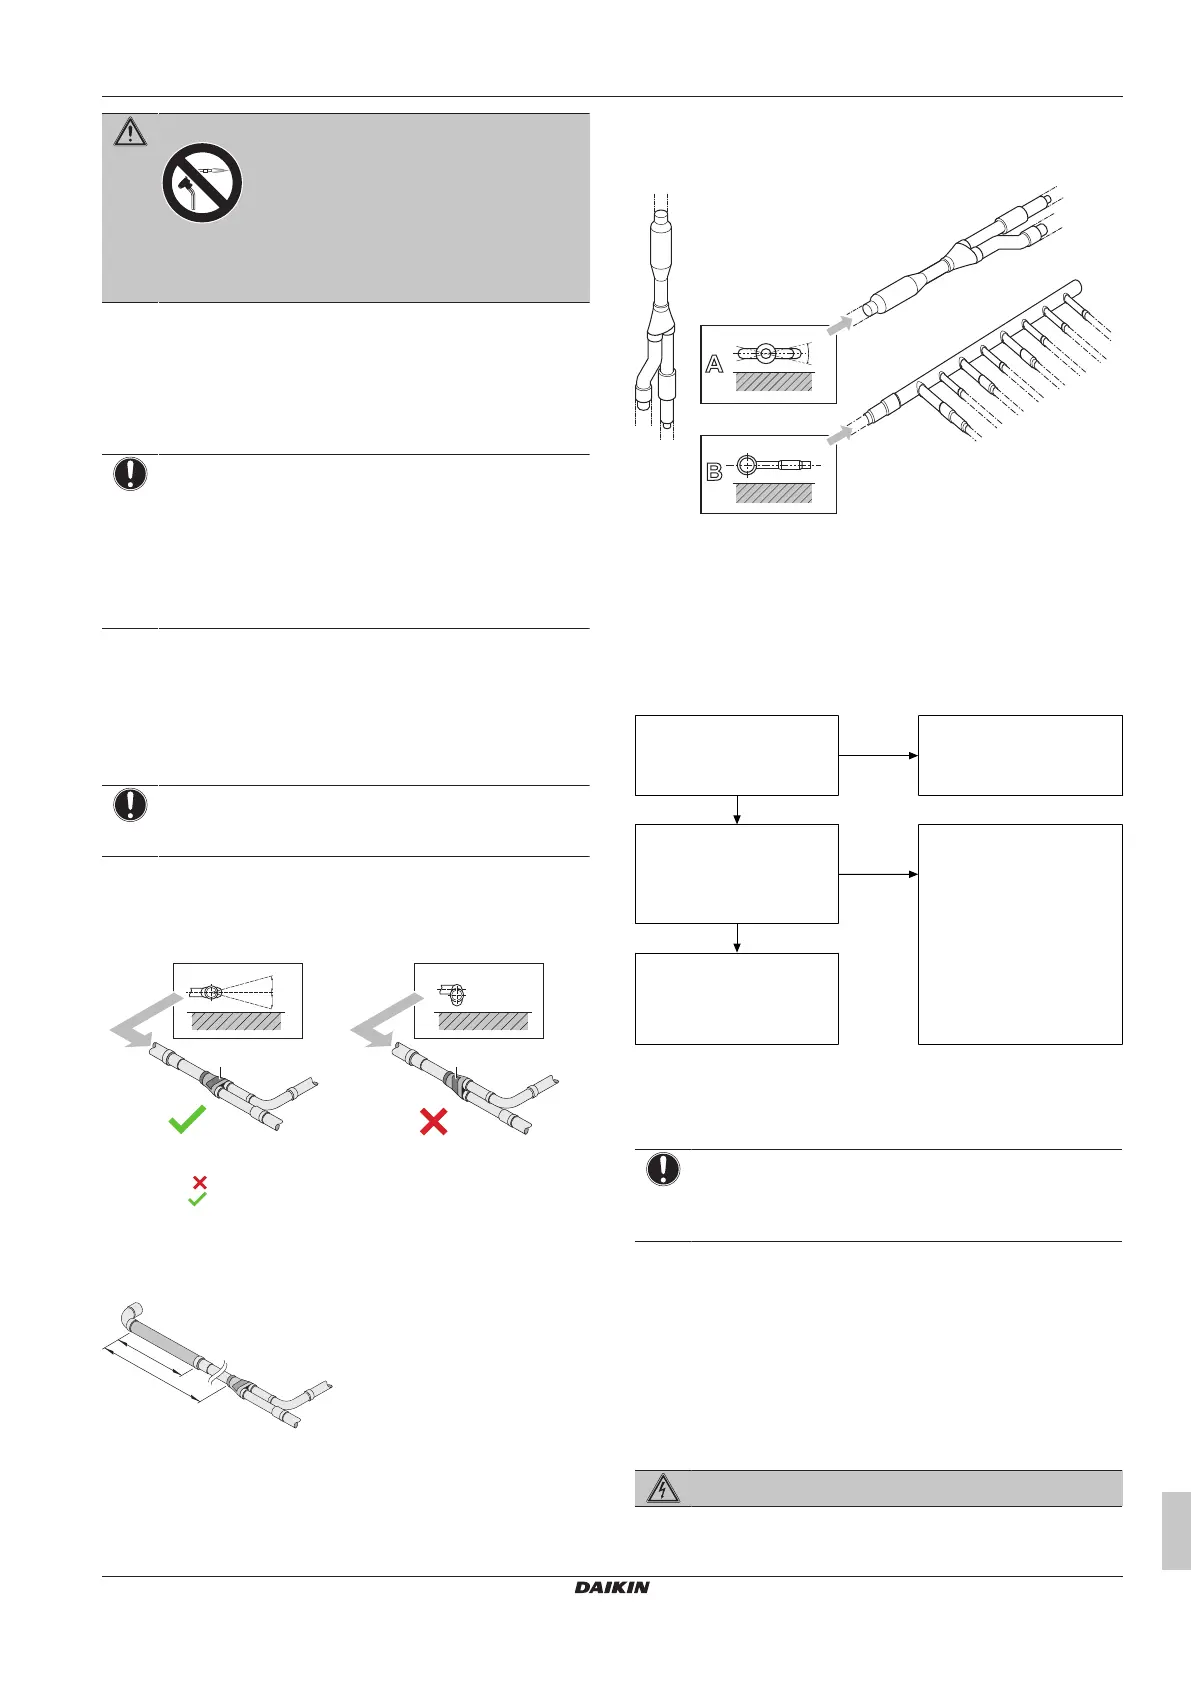
15.2.6 To connect the multi connection piping kit
NOTICE
Improper installation may lead to malfunction of the
outdoor unit.
▪ Install the joints horizontally, so that the caution label (a) attached
to the joint comes to the top.
▪ Do not tilt the joint more than 7.5° (see view A).
▪ Do not install the joint vertically (see view B).
a
a
A B
7.5°
7.5°
a Caution label
NOT allowed
Allowed
▪ Make sure that the total length of the piping connected to the joint
is absolute straight for more than 500mm. Only if a straight field
piping of more than 120mm is connected, more than 500mm of
straight section can be ensured.
>120 mm
>500 mm
15.2.7 To connect the refrigerant branching kit
For installation of the refrigerant branching kit, refer to the installation
manual delivered with the kit.
▪ Mount the refnet joint so that it branches either horizontally or
vertically.
▪ Mount the refnet header so that it branches horizontally.
A
B
±
3
0
°
a
b
c
d
a
a Horizontal surface
b Refnet joint mounted vertically
c Refnet joint mounted horizontally
d Header
15.3 Checking the refrigerant piping
15.3.1 About checking the refrigerant piping
Refrigerant piping works are
finished?
The indoor units / BS units /
outdoor unit are already
powered ON?
Use procedure:
"Method 2: after power ON"
Finish piping work
Use procedure:
"Method 1: Before power ON
(regular method)"
Yes
Yes
No
No
It is very important that all refrigerant piping work is done before the
units (outdoor, BS unit or indoor) are powered on. When the units
are powered on, the expansion valves will initialise. This means that
the valves will close.
NOTICE
Leak test and vacuum drying of field piping, BS units and
indoor units is impossible when field expansion valves are
closed.
Method 1: Before power ON
If the system has not yet been powered on, no special action is
required to perform the leak test and the vacuum drying.
Method 2: After power ON
If the system has already been powered on, activate setting [2‑21]
(refer to "18.1.4 To access mode 1 or 2" [4 41]). This setting will
open field expansion valves to guarantee a refrigerant piping
pathway and make it possible to perform the leak test and the
vacuum drying.
DANGER: RISK OF ELECTROCUTION
Bekijk gratis de handleiding van Daikin REYA14A7Y1B, stel vragen en lees de antwoorden op veelvoorkomende problemen, of gebruik onze assistent om sneller informatie in de handleiding te vinden of uitleg te krijgen over specifieke functies.
Productinformatie
| Merk | Daikin |
| Model | REYA14A7Y1B |
| Categorie | Niet gecategoriseerd |
| Taal | Nederlands |
| Grootte | 10147 MB |


