Handleiding
Je bekijkt pagina 16 van 24
12 Unit installation
Installation and operation manual
16
FXKA-A
VRV system air conditioner
3P747532-2A – 2023.11
a
a Level
NOTICE
Do NOT install the unit tilted. Possible consequence: If
the unit is tilted against the direction of the condensate flow
(the drain piping side is raised), the float switch might
malfunction and cause water to drip.
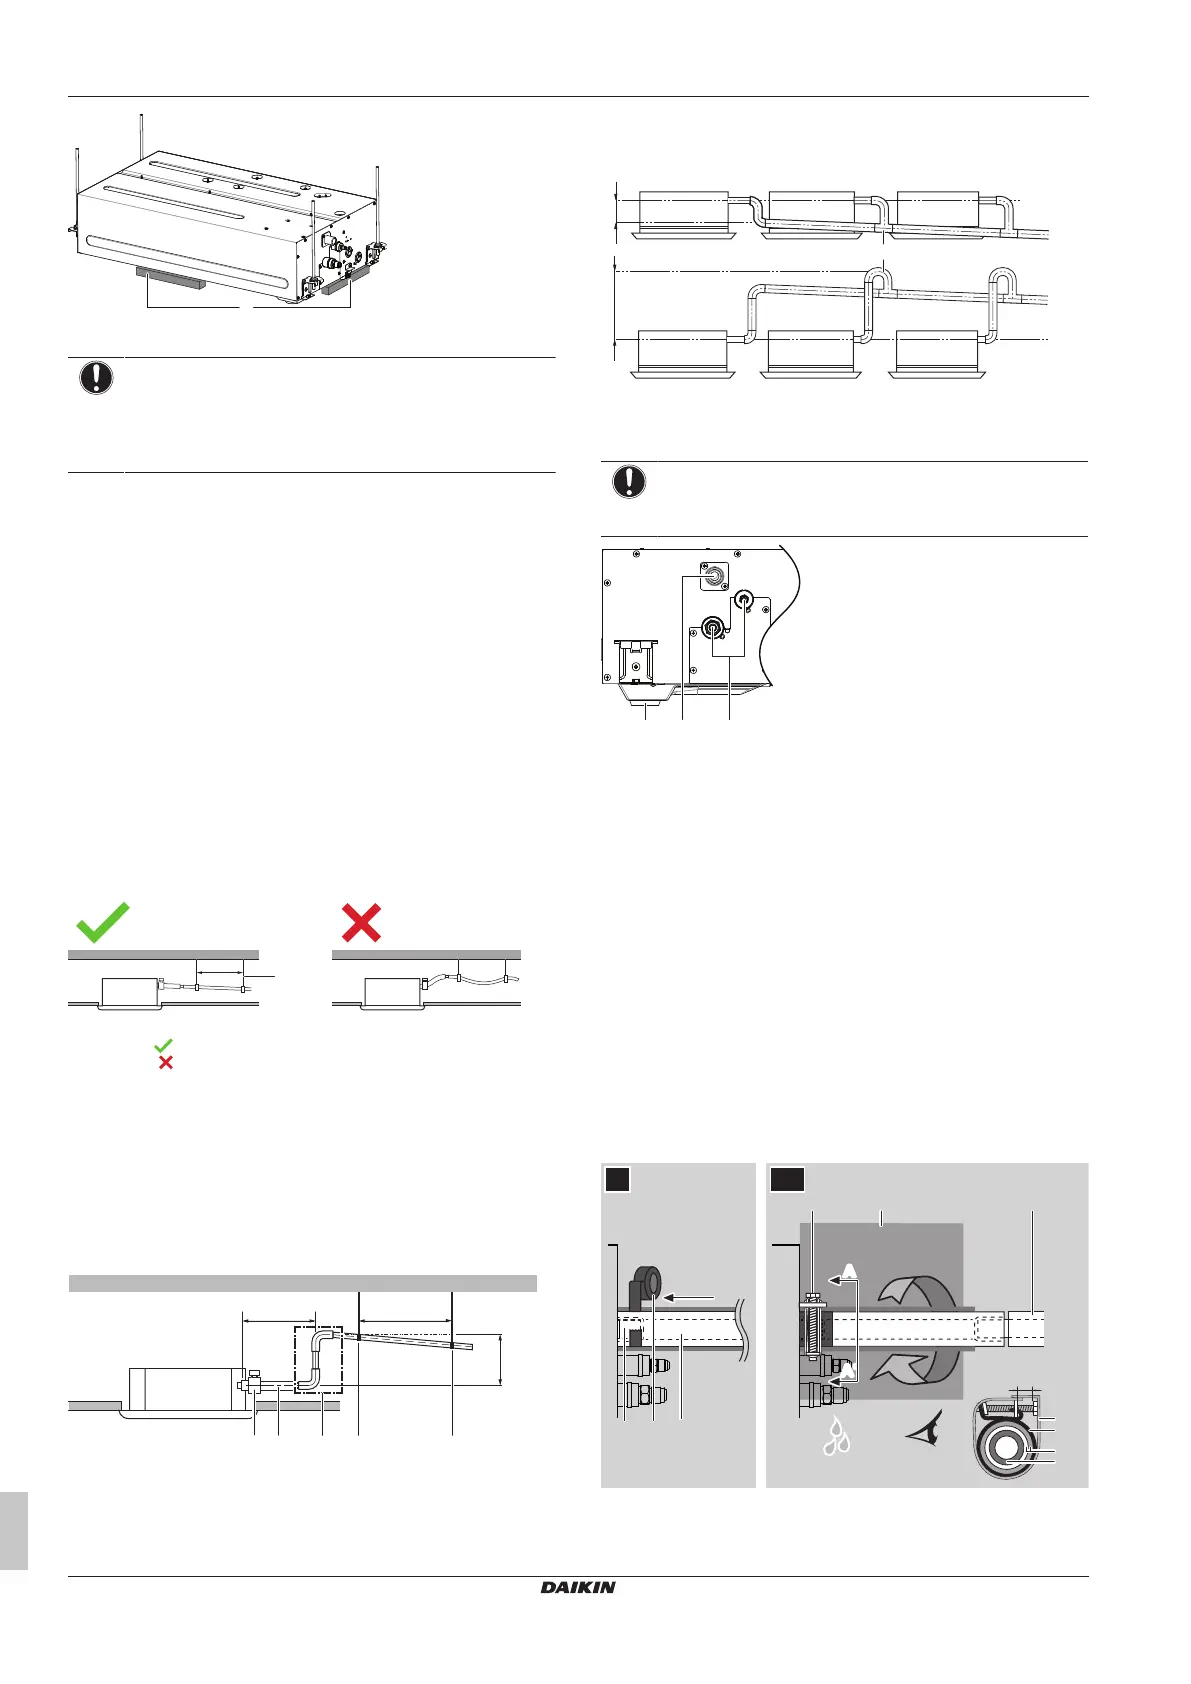
12.2.2 Guidelines when installing the drain
piping
Make sure condensation water can be evacuated properly. This
involves:
▪ General guidelines
▪ Connecting the drain piping to the indoor unit
▪ Checking for water leaks
General guidelines
▪ Pipe length. Keep drain piping as short as possible.
▪ Pipe size. Keep the pipe size equal to or greater than that of the
connecting pipe (vinyl pipe of 25 mm nominal diameter and
32mm outer diameter).
▪ Slope. Make sure the drain piping slopes down (at least 1/100) to
prevent air from being trapped in the piping. Use hanging bars as
shown.
1~1.5 m
a
a Hanging bar
Allowed
Not allowed
▪ Condensation. Take measures against condensation. Insulate
the complete drain piping in the building.
▪ Rising piping. If necessary to make the slope possible, you can
install rising piping.
▪ Drain hose inclination: 0~75 mm to avoid stress on the piping
and to avoid air bubbles.
▪ Rising piping: ≤300mm from the unit, ≤675 mm perpendicular
to the unit.
≤675
≤300
1000~1500
(mm)
b c
a
dd
a Metal clamp (accessory)
b Drain hose (accessory)
c Rising drain piping (vinyl pipe of 25mm nominal diameter
and 32mm outer diameter) (field supply)
d Hanging bars (field supply)
▪ Combining drain pipes. You can combine drain pipes. Make
sure to use drain pipes and T-joints with the correct gauge for the
operating capacity of the units.
≥100
≤635
(mm)
a
a T-joint
To connect the drain piping to the indoor unit
NOTICE
Incorrect connection of the drain hose might cause leaks,
and damage the installation space and surroundings.
b
c
a
a Drain outlet for maintenance
b Drain pipe connection
c Refrigerant pipes
Drain piping connection
1 Push the drain hose as far as possible over the drain pipe
connection.
2 Wrap the vinyl tape around the drain hose under the metal
clamp, ensuring it encircles the hose 2 or 3 times. The tape
should extend beyond the width of the metal clamp for proper
coverage.
3 Tighten the metal clamp until the screw head is less than 4mm
from the metal clamp part.
4 Check for water leaks (see "To check for water leaks"[417]).
5 Wind the large sealing pad (= insulation) around the metal
clamp and drain hose, and fix it with tie wraps. Start wrapping
from the tightened part of the metal clamp so that the end of the
metal clamp is wrapped twice.
6 Connect the drain piping to the drain hose.
≤4 mm
A-A'
b
a
e
d
4
1
2
2~61
5
e
A
f
6
3
d
ca
A
A'A'
b
a Drain pipe connection (attached to the unit)
b Vinyl tape
c Drain hose (accessory)
Bekijk gratis de handleiding van Daikin FXKA25AMVEB, stel vragen en lees de antwoorden op veelvoorkomende problemen, of gebruik onze assistent om sneller informatie in de handleiding te vinden of uitleg te krijgen over specifieke functies.
Productinformatie
| Merk | Daikin |
| Model | FXKA25AMVEB |
| Categorie | Airco |
| Taal | Nederlands |
| Grootte | 3845 MB |


