Daikin FXHA32AVEB8 handleiding
Handleiding
Je bekijkt pagina 22 van 28
15 Finishing the indoor unit installation
Installation and operation manual
22
FXHA-A
VRV system air conditioner
3P668115-5E – 2022.11
30~35
7
edca b b f hg ji
NL
60~80
10~20
k l
m
m
h
n
n
n
f
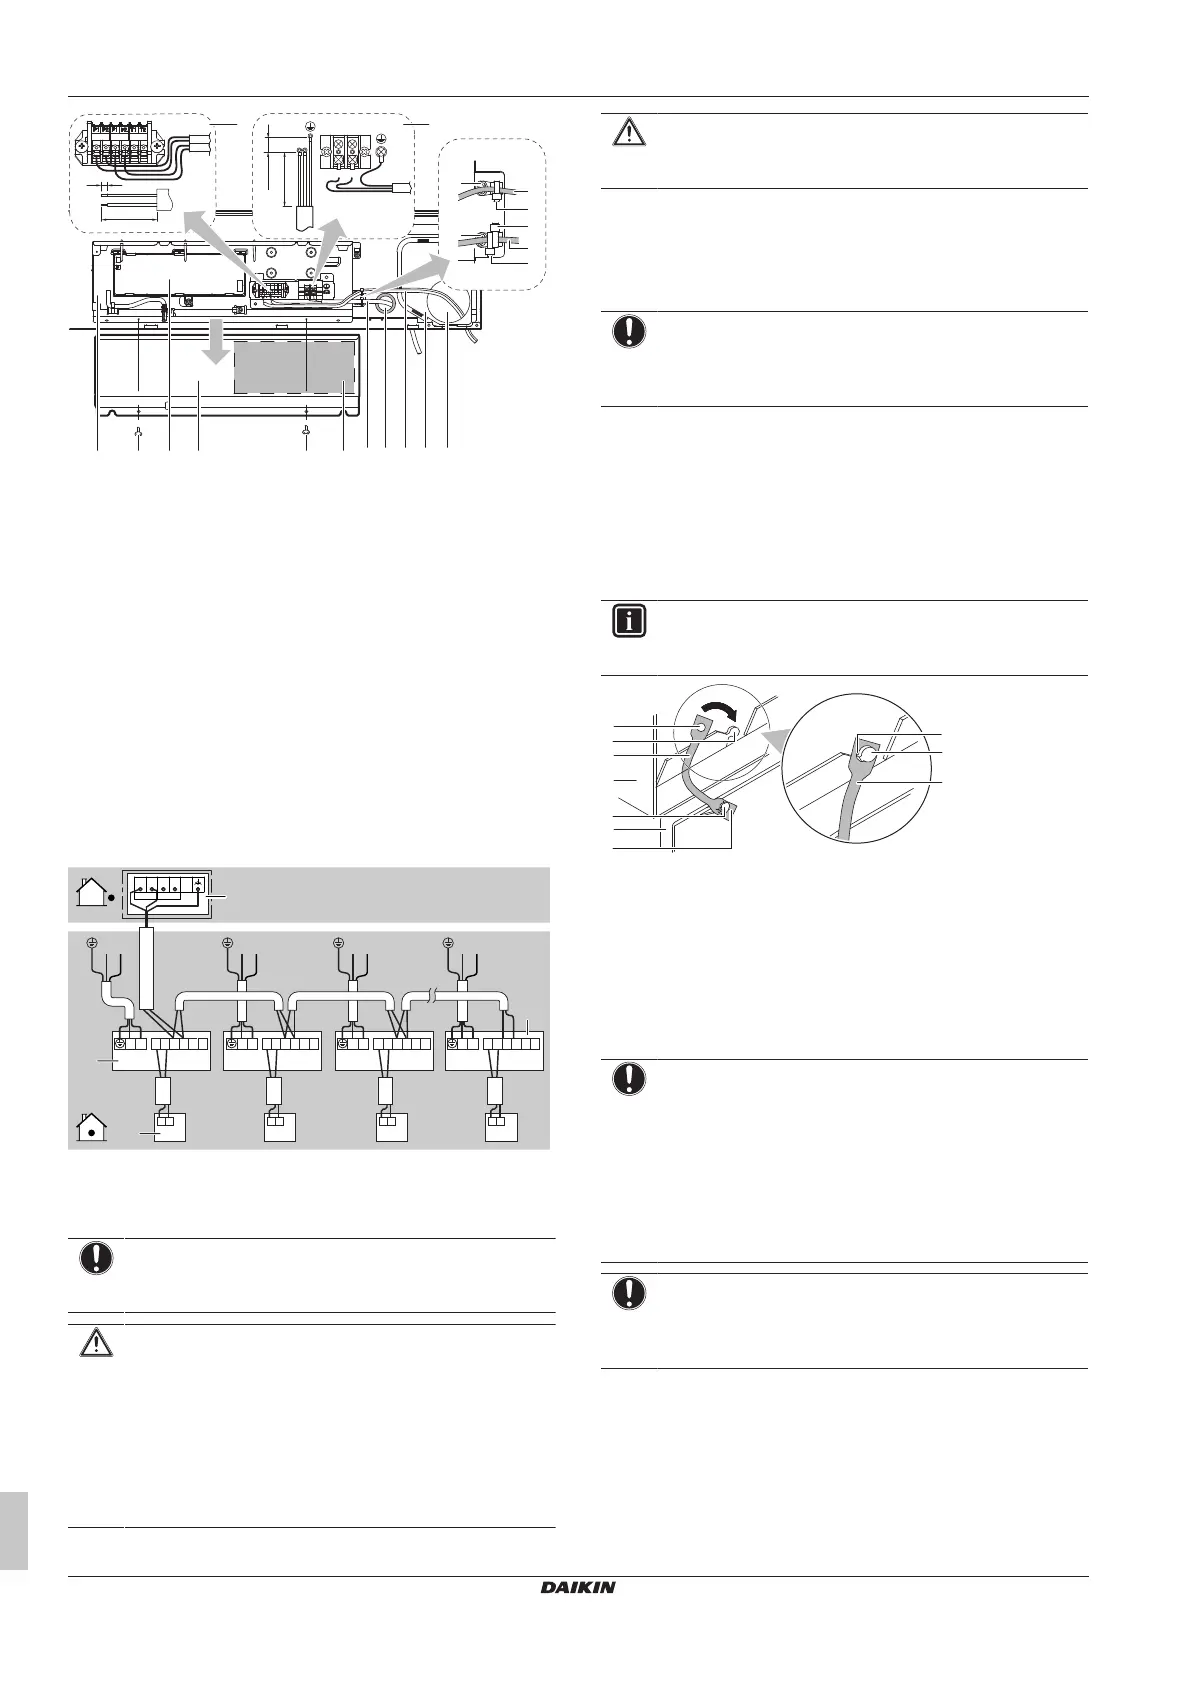
a Control box
b Service cover screw
c Printed circuit board
d Service cover
e Wiring diagram label
f Power supply wiring
g Small cut out hole
h User interface cable and transmission cable
i Rear piping cover
j Large cut out hole
k Connection of user interface cable and transmission
cable
l Connection of power supply cable
m Wiring fixture fixed with a screw (accessory)
n Tie wrap (accessory)
7 Seal all gaps with sealing material (accessory) to prevent small
animals from entering the system.
8 Reattach the service cover.
Complete system example
1 user interface controls 1 indoor unit.
LN LN LN
P
1
P
2
P
1
P
2
P
1
P
2
P
1
P
2
P
1
P
2
F
1
F
2
T
1
T
2
P
1
P
2
F
1
F
2
T
1
T
2
P
1
P
2
F
1
F
2
T
1
T
2
P
1
P
2
F
1
F
2
T
1
T
2
N L
d
c
b
LN
N L N L N L
TO OUT/D
TO IN/D
a
a Outdoor unit
b Indoor unit
c User interface
d Most downstream indoor unit
NOTICE
For the use of group control and related limitations refer to
manual of outdoor unit.
CAUTION
▪ Each indoor unit has to be connected to a separate
user interface. Only a safety system compatible remote
controller can be used as the user interface. See
technical data sheet for remote controller compatibility
(e.g. BRC1H52/82*).
▪ The user interface has to be put in the same room as
the indoor unit. For details, please refer to the
installation and operation manual of the user interface.
CAUTION
In case shielded wire is used, connect the shielding to the
outdoor unit side only.
15 Finishing the indoor unit
installation
NOTICE
Block any gaps around pipes and cables with sealing
material (accessory) to avoid dust from entering the indoor
unit.
15.1 To mount the suction grille and
decoration side panel
1 Install securely in the reverse order. Refer to "To open the
indoor unit"[416].
2 When installing the suction grille, attach the strap of the suction
grille to the hook on the indoor unit.
INFORMATION
When closing the suction grille, make sure the straps of the
suction grille are not pinched anywhere.
a
c
d
e
c
b
a
b
b
f
a Round hole
b Hook
c Strap
d Indoor unit
e Suction grille
f Cross-shaped hole
16 Commissioning
NOTICE
General commissioning checklist. Next to the
commissioning instructions in this chapter, a general
commissioning checklist is also available on the Daikin
Business Portal (authentication required).
The general commissioning checklist is complementary to
the instructions in this chapter and can be used as a
guideline and reporting template during commissioning and
hand-over to the user.
NOTICE
ALWAYS operate the unit with thermistors and/or pressure
sensors/switches. If NOT, burning of the compressor might
be the result.
16.1 Checklist before commissioning
1 After the installation of the unit, check the items listed below.
2 Close the unit.
3 Power up the unit.
Bekijk gratis de handleiding van Daikin FXHA32AVEB8, stel vragen en lees de antwoorden op veelvoorkomende problemen, of gebruik onze assistent om sneller informatie in de handleiding te vinden of uitleg te krijgen over specifieke functies.
Productinformatie
| Merk | Daikin |
| Model | FXHA32AVEB8 |
| Categorie | Niet gecategoriseerd |
| Taal | Nederlands |
| Grootte | 4490 MB |


