Daikin FXFQ80AVEB handleiding
Handleiding
Je bekijkt pagina 8 van 16
Installation and operation manual
5
Be sure to use both a spanner and torque wrench together
when connecting or disconnecting pipes to/from the unit.
Do not mix anything other than the specified refrigerant, such
as air, etc..., inside the refrigerant circuit.
Refer to Table 1 for the dimensions of flare nut spaces and
the appropriate tightening torque. (Overtightening may
damage the flare and cause leaks.)
Table 1
When connecting the flare nut, coat the flare inner surface
with ether oil or ester oil and initially tighten 3 or 4 turns by
hand before tightening firmly.
If the refrigerant gas leaks during the work, ventilate the area.
A toxic gas is emitted by the refrigerant gas being exposed to
a fire.
Make sure there is no refrigerant gas leak. A toxic gas may
be released by the refrigerant gas leaking indoor and being
exposed to flames from an area heater, cooking stove, etc.
Finally, insulate as shown in the figure below (use the
supplied accessory parts)
Piping insulation procedure
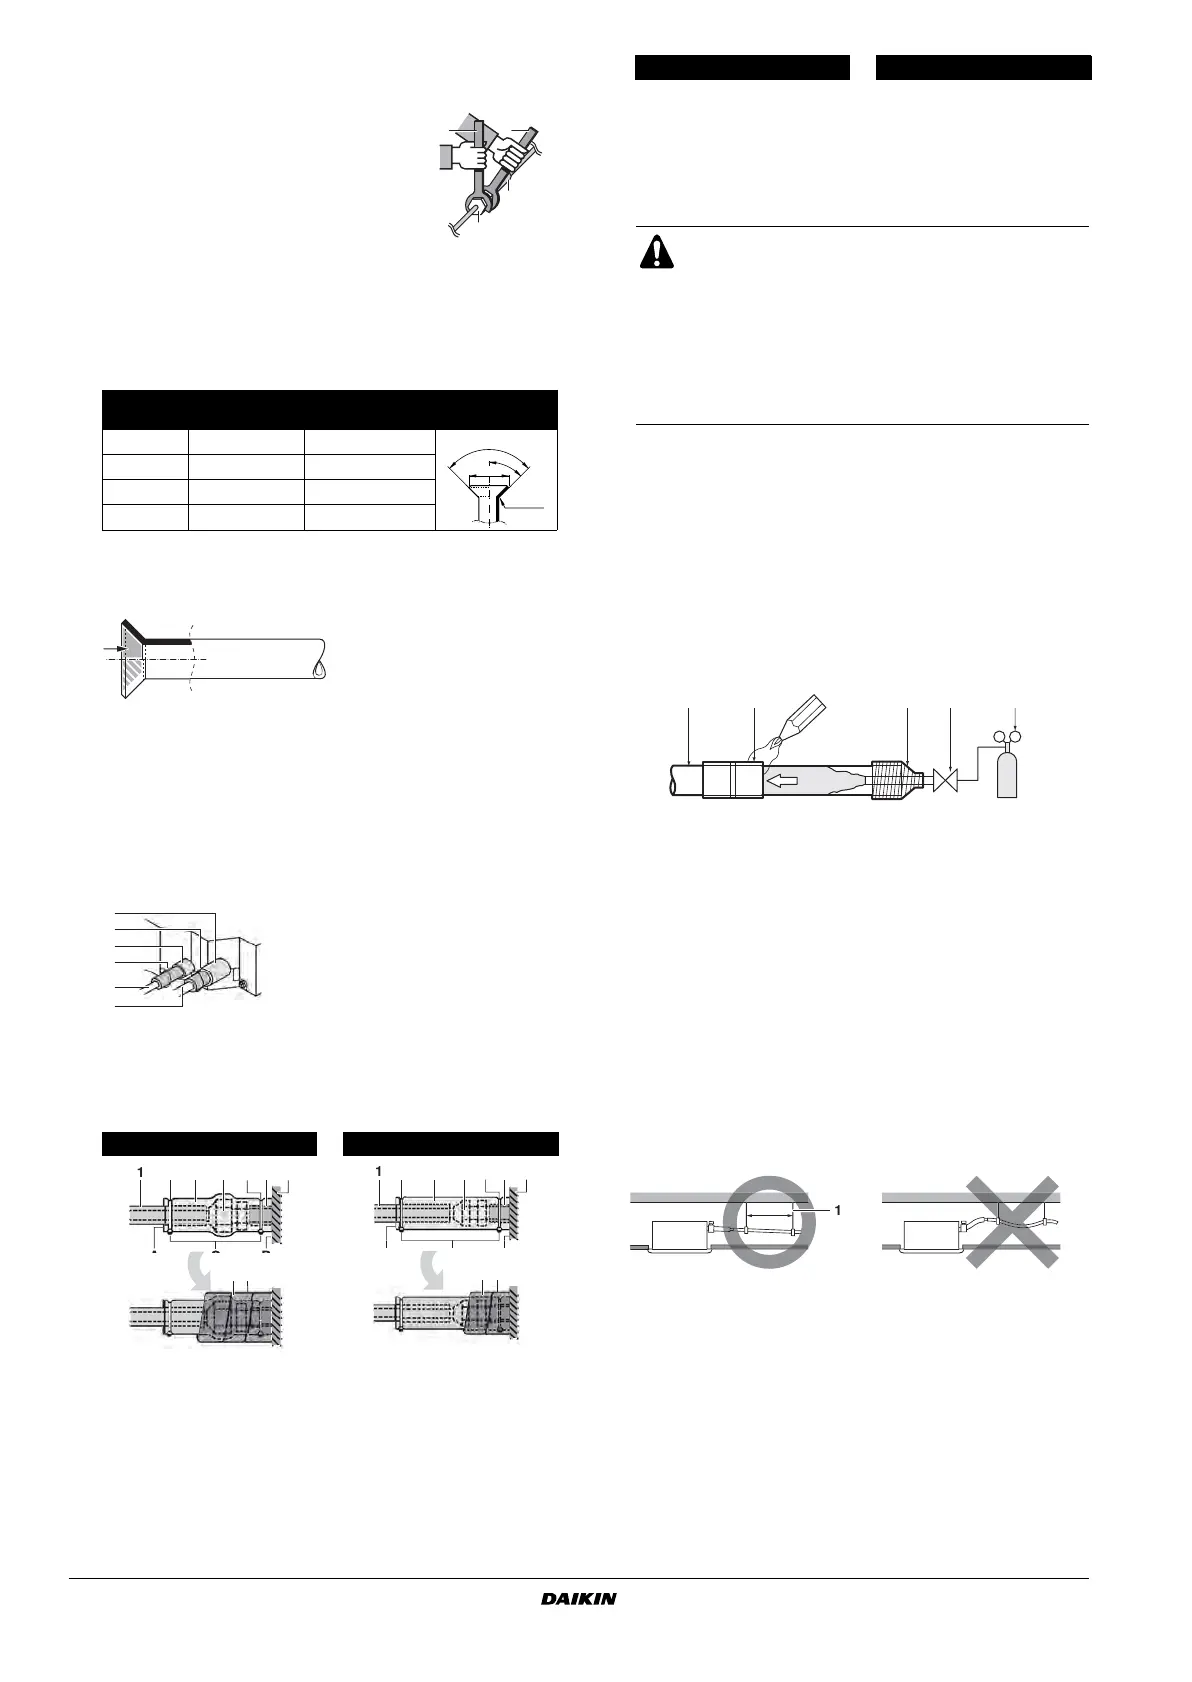
Cautions for brazing
Be sure to carry out a nitrogen blow when brazing.
Brazing without carrying out nitrogen replacement or
releasing nitrogen into the piping will create large quantities
of oxidized film on the inside of the pipes, adversely affecting
valves and compressors in the refrigerating system and
preventing normal operation.
When brazing while inserting nitrogen into the piping,
nitrogen must be set to 0.02 MPa with a pressure-reducing
valve (=just enough so that it can be felt on the skin).
Drain piping work
Installation of drain piping
Install the drain piping as shown in figure and take measures
against condensation. Improperly rigged piping could lead to
leaks and eventually wet furniture and belongings.
Install the drain pipes.
- Keep piping as short as possible and slope it downwards
at a gradient of at least 1/100 so that air may not remain
trapped inside the pipe.
- Keep pipe size equal to or greater than that of the
connecting pipe (vinyl pipe of 25 mm nominal diameter
and 32 mm outer diameter).
- Push the supplied drain hose as far as possible over the
drain socket.
1 Torque wrench
2 Spanner
3 Piping union
4 Flare nut
Pipe gauge
Tightening
torque
Flare dimension A
(mm)
Flare shape
Ø6.4 15~17 N•m 8.7~9.1
Ø9.5 33~39 N•m 12.8~13.2
Ø12.7 50~60 N•m 16.2~16.6
Ø15.9 63~75 N•m 19.3~19.7
Gas piping Liquid piping
1 Piping insulation material (field supply)
2 Flare nut connection
3 Insulation for fitting (delivered with the unit)
4 Piping insulation material (main unit)
5 Main unit
6 Clamp (field supply)
7 Medium 1 sealing pad for gas piping (delivered with the unit)
Medium 2 sealing pad for liquid piping (delivered with the unit)
12
4
3
R0.4~0.8
45°
±2
90°
±2
A
1
2
5
3
4
5
1 Liquid pipe
2 Gas pipe
3 Insulation for fitting for liquid
pipe
4 Insulation for fitting for gas
pipe
5 Clamps
(use 2 clamps per insulation)
A
B
D
C
7
1
2
3
4
5
6
6
A
B
C
1
2
3
4
5
6
6
D
7
A Turn seams up
B Attach to base
C Tighten the part other than the piping insulation material
D Wrap over from the base of the unit to the top of the flare nut
connection
For local insulation, be sure to insulate local
piping all the way into the pipe connections inside
the unit.
Exposed piping may cause condensation or may
cause burns when touched.
Make sure that no oil remains on plastic parts of
the decoration panel (optional equipment).
Oil may cause degradation and damage to the
plastic parts.
1 Refrigerant piping
2 Part to be brazed
3 Taping
4 Hands valve
5 Pressure-reducing valve
6 Nitrogen
1 Hanging bar
Gas piping Liquid piping
12 34
5
6
6
1-1.5 m
1
EN3P320142-1F.book Page 5 Tuesday, October 3, 2017 2:46 PM
Bekijk gratis de handleiding van Daikin FXFQ80AVEB, stel vragen en lees de antwoorden op veelvoorkomende problemen, of gebruik onze assistent om sneller informatie in de handleiding te vinden of uitleg te krijgen over specifieke functies.
Productinformatie
| Merk | Daikin |
| Model | FXFQ80AVEB |
| Categorie | Niet gecategoriseerd |
| Taal | Nederlands |
| Grootte | 2934 MB |


