Daikin EKEXVA400 handleiding
Handleiding
Je bekijkt pagina 21 van 36
13 Unit installation
Installation and operation manual
21
EKEACBVE + EKEXVA50~500
Option kit for combination of Daikin outdoor units with field-
supplied air handling units
4P724517-1 – 2023.06
R2T Thermistor (liquid pipe)
Install the thermistor behind the distributor on the
coldest pass of the heat exchanger (contact your heat
exchanger dealer).
R3T Thermistor (gas pipe)
Install the thermistor at the gas pipe of the heat
exchanger as close as possible to the heat exchanger.
R4T Thermistor (discharge air)
Install the thermistor in the discharge area of the air
handling unit.
AHU
R1T*
R1T**
R4T
R2T R3T
b
a
f
e
c d
AHU Air handling unit
*/** Location of R1T can be chosen.
a Outdoor air
b Exhaust air
c Supply air
d Extract air
e Heat exchanger
f Heat recovery
Evaluation must be done to check if the air handling unit is protected
against freeze-up. This must be done during test operation.
The thermistor needs to be installed in an enclosed area. Install it
inside the air handling unit, or shield it to prevent it from getting
touched.
R3T
R2T
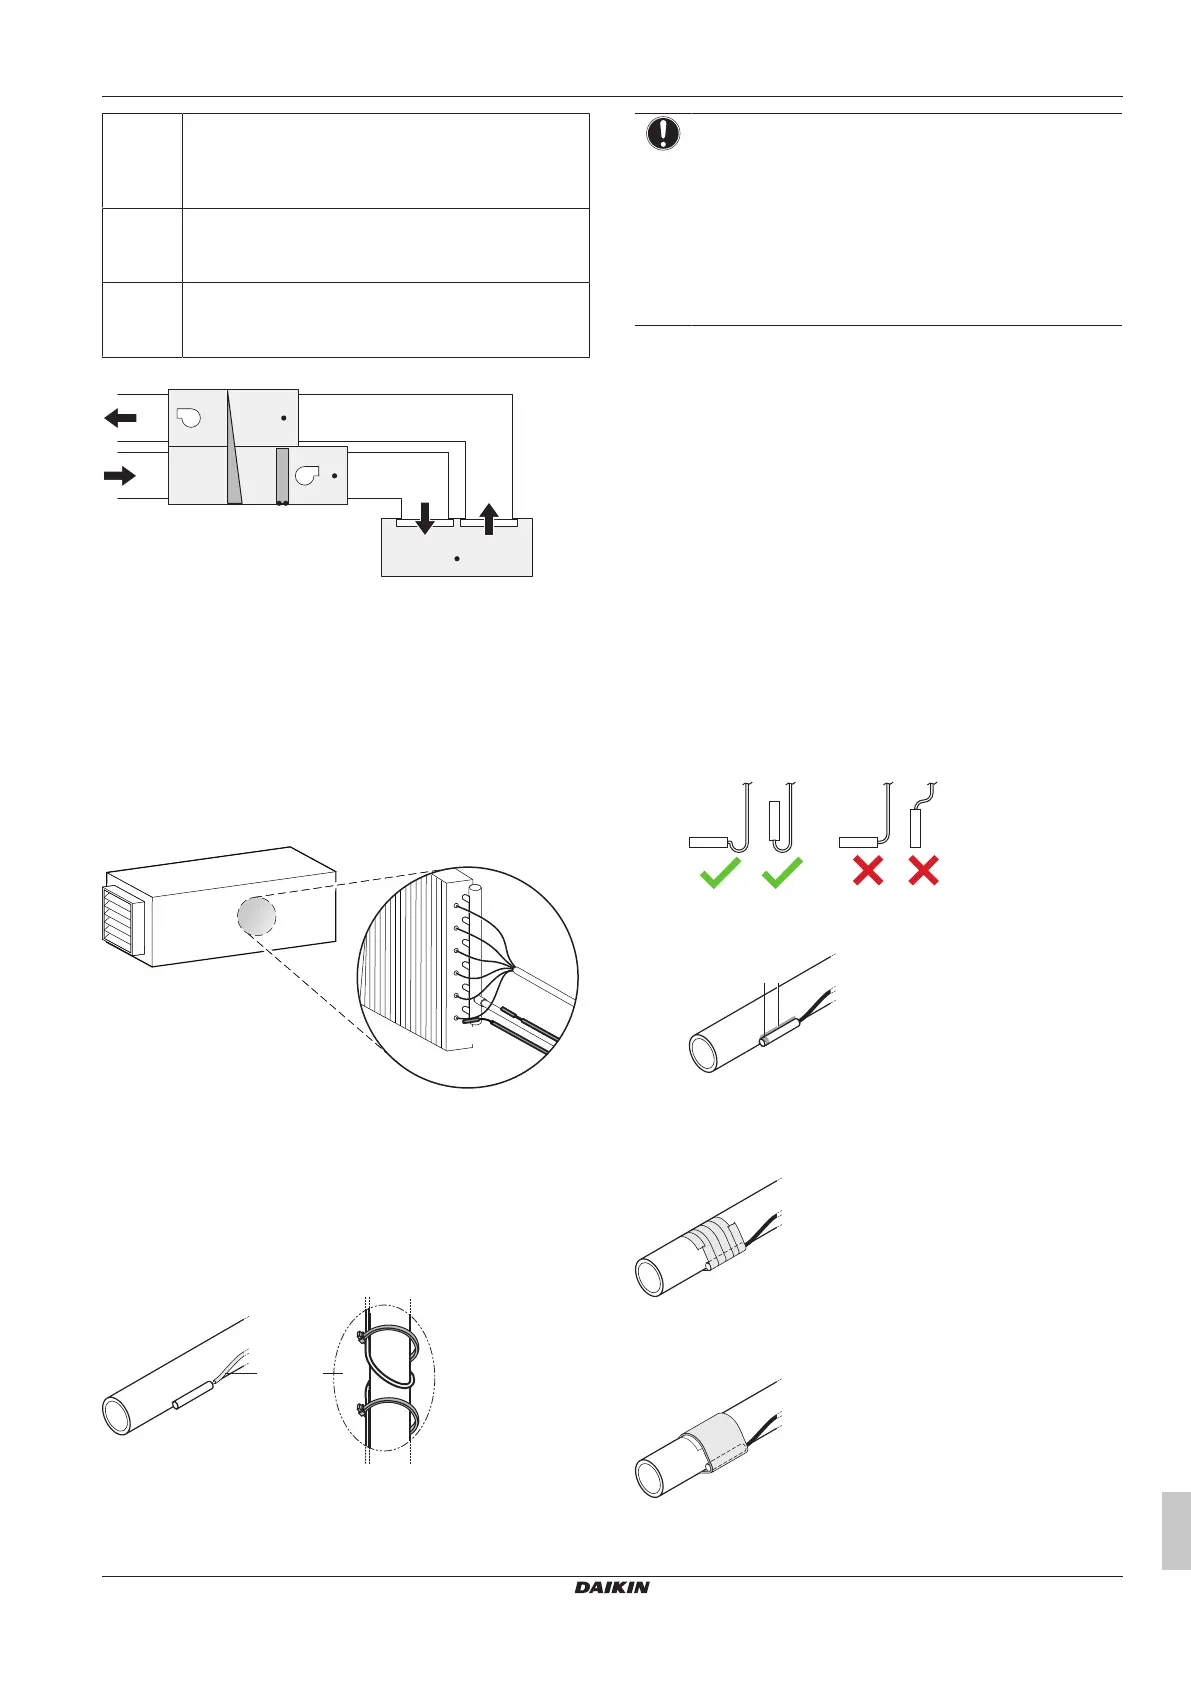
13.3.2 To install the thermistor cable
1 Put the thermistor cable in a separate protective tube.
2 Always add a pull-relief to the thermistor cable to avoid strain
on the thermistor cable and loosening of the thermistor. Strain
on the thermistor cable or loosening of the thermistor may result
in bad contact and incorrect temperature measurement.
a b
NOTICE
▪ The connection must be made on an accessible
location.
▪ To make the connection waterproof, the connection can
also be made in a switch box or connector box.
▪ The thermistor cable must be located at least 50 mm
away from power supply wire. Not following this
guideline may result in malfunction due to electrical
noise.
13.3.3 To install a longer thermistor cable
The thermistor is supplied with a standard cable of 2.5m. This cable
can be made longer up to 20m.
1 Cut the wire or bundle the remainder of the thermistor cable.
Keep at least 1m of the original thermistor cable.
2 Strip the wire ±7mm at both ends and insert these ends into the
wire-to-wire splice.
3 Pinch the splice with the correct crimp tool (pliers).
4 After connection, heat up the shrink-insulation of the wire-to-
wire splice with a shrink heater to make a watertight connection.
5 Wrap electrical insulation tape around the connection.
6 Put a pull-relief in front of and behind the connection.
13.3.4 To fix the thermistor
1 Make sure to install as follows:
▪ Put the thermistor wire slightly down to prevent water
accumulation on top of the thermistor.
▪ Make good contact between thermistor and air handling unit.
Put the top of the thermistors on the air handling unit, this is
the most sensitive point of the thermistor.
ba
a Most sensitive point of the thermistor
b Maximise the contact
2 Fix the thermistor with insulating aluminum tape (field supply) to
ensure a good heat transference.
3 Put an insulation rubber (delivered as accessory) around the
thermistor (R2T/R3T) to prevent loosening of the thermistor
after some years.
4 Fasten the thermistor with 2 cable ties (delivered as accessory).
Bekijk gratis de handleiding van Daikin EKEXVA400, stel vragen en lees de antwoorden op veelvoorkomende problemen, of gebruik onze assistent om sneller informatie in de handleiding te vinden of uitleg te krijgen over specifieke functies.
Productinformatie
| Merk | Daikin |
| Model | EKEXVA400 |
| Categorie | Niet gecategoriseerd |
| Taal | Nederlands |
| Grootte | 5715 MB |


