Daikin BRC1H51K handleiding
Handleiding
Je bekijkt pagina 9 van 32
8 About the box
Installer and user reference guide
9
BRC1H51W+K+S
Wired remote controller
4P513689-1 – 2018.02
For the installer
8 About the box
8.1 To unpack the controller
1 Open the box.
2 Separate the accessories.
a b
1× 2×
a Installation and operation manual
b Wood screws + wall plugs (Ø4.0×30)
9 Preparation
9.1 Wiring requirements
All wiring must comply with the following requirements:
Wire specification Value
Type Sheathed vinyl cord or cable (2
wires)
Section 0.75~1.25 mm
2
Maximum length 500 m
9.1.1 To prepare the wiring for installation
1 Peel the sheath of the part of the cable that needs to pass
through the inside of the rear casing (L), according to the figure
and the table.
2 Keep a 10mm distance between the length of the 2 wires.
10 mm
L
Wiring outlet L
Top ±150mm
Left ±120mm
Bottom ±100mm
Rear No requirements
10 Installation
10.1 Overview: Installation
The installation of the controller typically consists of the following
stages:
1 Determining how you want to route the electrical wiring, and
nipping away a piece of the rear casing accordingly.
2 Mounting the rear casing to the wall.
3 Connecting the electrical wiring.
4 Closing the controller.
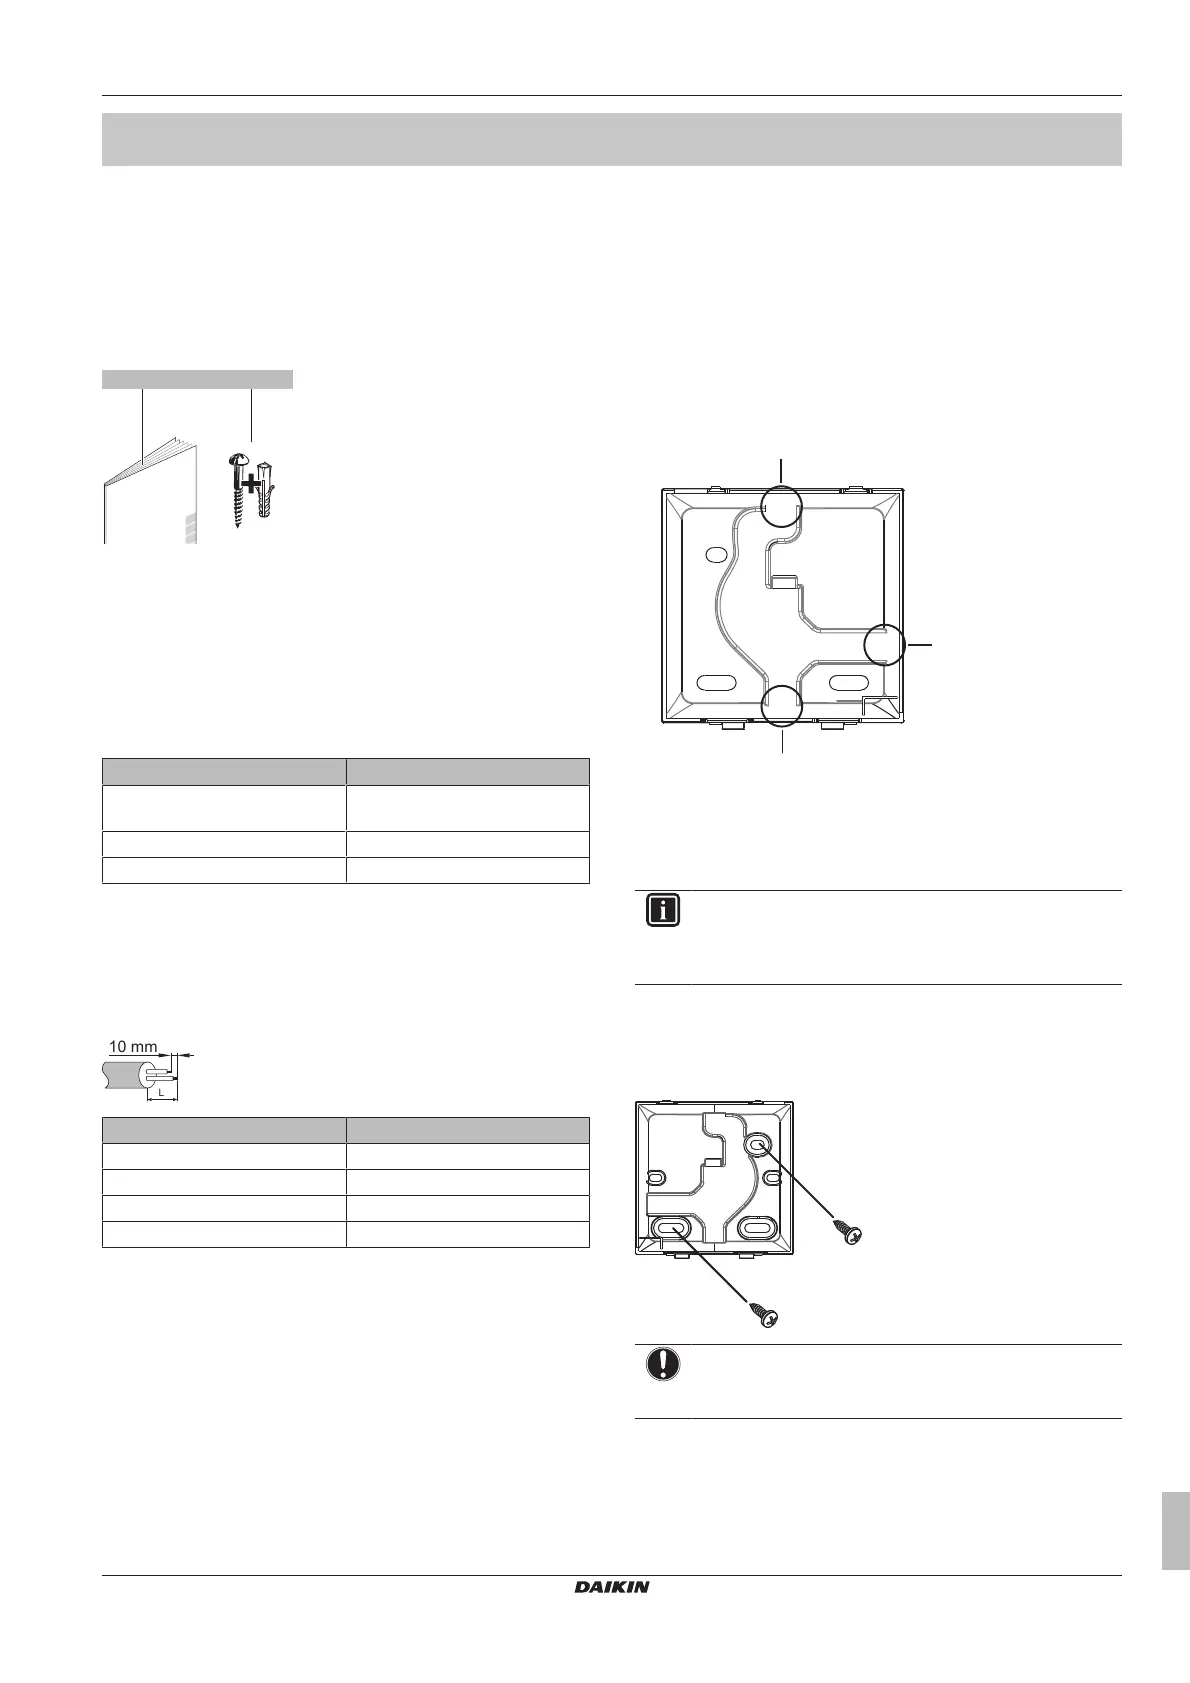
10.2 Mounting the controller
10.2.1 About mounting the controller
Before you can mount the controller, you have to determine the
wiring routing, and accordingly, remove a piece of the controller's
rear casing.
The wiring can be routed from the top, the rear, the left, or the
bottom. Remove a piece of the rear casing according to the
illustration:
a
b
c
a Wiring from the top
b Wiring from the left
c Wiring from the bottom
In case you are routing the wiring from the rear, you don't have to
remove anything.
INFORMATION
When routing the wiring from the top or from the rear,
insert the wiring through the knockout hole before
mounting the rear casing to the wall.
10.2.2 To mount the controller
1 Take the screws and plugs from the accessory bag.
2 Mount the rear casing to a flat surface.
NOTICE
Be careful not to distort the rear casing by overtightening
the mounting screws.
Bekijk gratis de handleiding van Daikin BRC1H51K, stel vragen en lees de antwoorden op veelvoorkomende problemen, of gebruik onze assistent om sneller informatie in de handleiding te vinden of uitleg te krijgen over specifieke functies.
Productinformatie
| Merk | Daikin |
| Model | BRC1H51K |
| Categorie | Niet gecategoriseerd |
| Taal | Nederlands |
| Grootte | 3544 MB |


