CYP WPS-HP201-KIT handleiding
Handleiding
Je bekijkt pagina 14 van 56
7
7. INSTALLATION
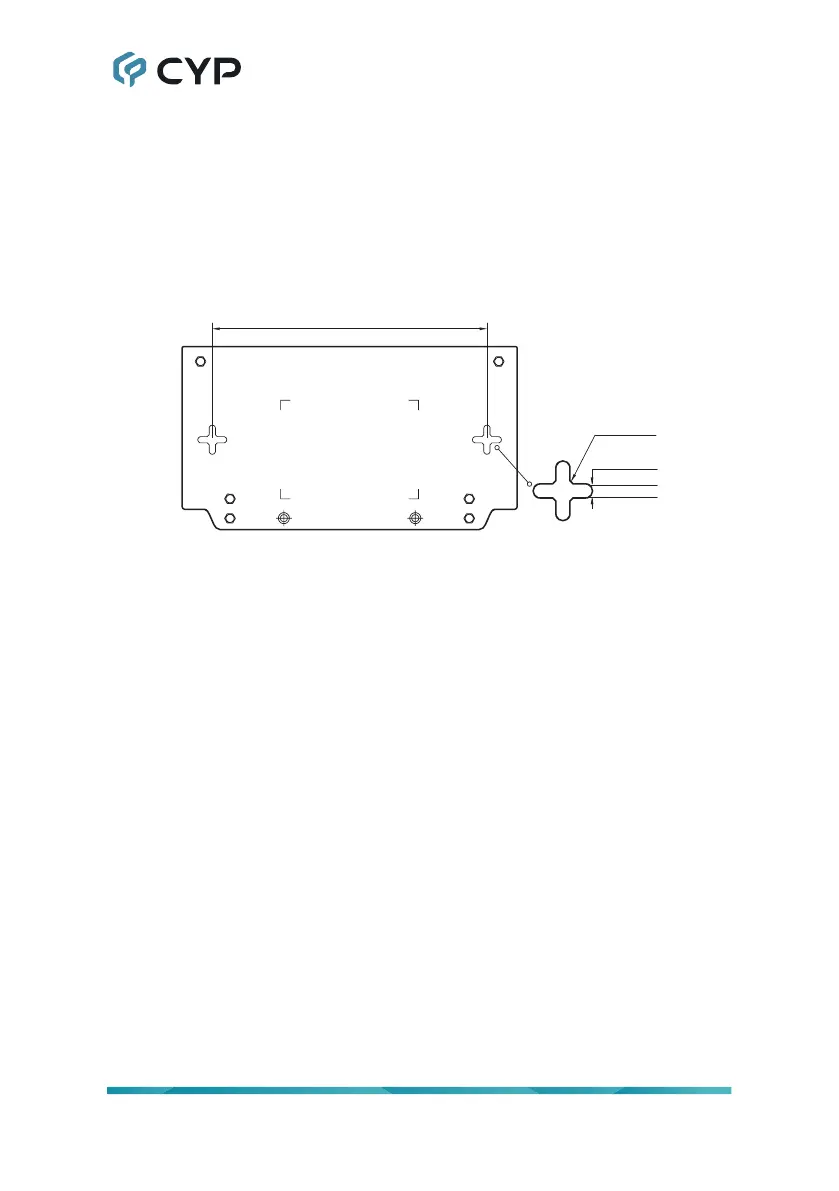
7.1 Wall Mounting
Step 1)
Drill two screw starter holes into the mounting wall with 140mm
space between them, as shown in the image below. Use screw
anchors if needed.
140 mm
3.3 mm
Ø 6 mm
Step 2)
Drive a screw into each hole, leaving a small gap between the wall
and the screw head.
Screw Head Diameter:
Between 5.5 ~ 6 mm.
Screw Rod Diameter:
Less than 3.3 mm.
Step 3)
Carefully hang the unit on both screw heads by tting them into the
cross-shaped holes on the back of the unit, and slide it downwards
until it is xed in place.
Note: Suggested height of wall mount is lower than 3 meters.
7.2 Cable Connection & Startup
Step 1)
Connect to a display with an HDMI or VGA cable.
Step 2)
Plug in the power supply (or connect the Ethernet cable, if powered
via PoE). The unit’s boot logo will show on the screen.
Step 3)
Plug in a USB mouse, or USB cable connected to a touch-capable
display, to activate the onscreen mouse functionality. (Optional)
Note: Default video output is HDMI only. If necessary, change video
output to "HDMI and VGA" through the WebGUI.
Bekijk gratis de handleiding van CYP WPS-HP201-KIT, stel vragen en lees de antwoorden op veelvoorkomende problemen, of gebruik onze assistent om sneller informatie in de handleiding te vinden of uitleg te krijgen over specifieke functies.
Productinformatie
| Merk | CYP |
| Model | WPS-HP201-KIT |
| Categorie | Niet gecategoriseerd |
| Taal | Nederlands |
| Grootte | 4886 MB |


