CYP PUV-1650RX handleiding
Handleiding
Je bekijkt pagina 12 van 92
12
3
LOCK: Press and hold for 3 seconds to lock all button functions on
the top panel of both the Tx and Rx. Press and hold for 3 seconds to
release the lock function. The LED will be lit when the top panel is in
the locked state.
4
− (MINUS/DOWN): Press to move down or adjust selections within
OSD menus.
5
+ (PLUS/UP): Press to move up or adjust selections within OSD
menus.
Note: Pressing and holding “−” or “+” will accelerate the scrolling or
parameter adjustment speed.
6
ENTER: Press to confirm a selection within the OSD or to go deeper
into a menu item.
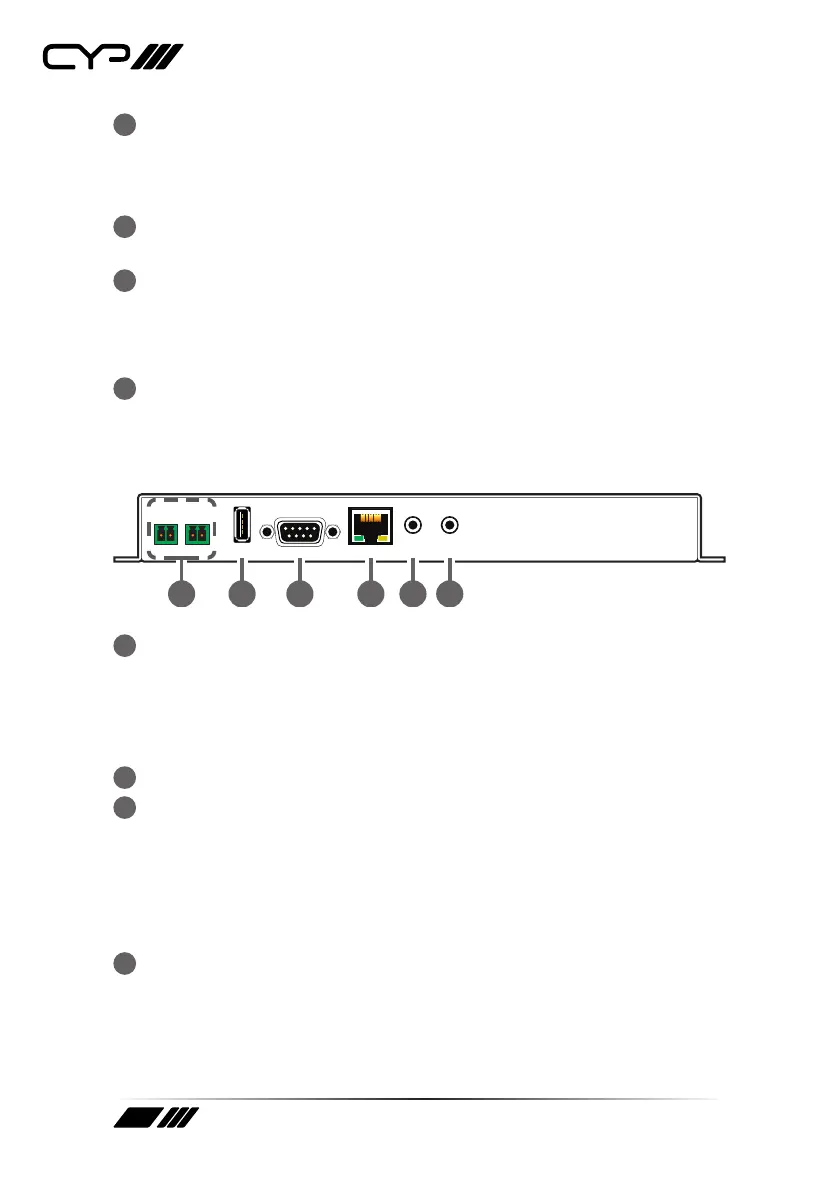
6.4 Receiver’s Front and Rear Panels
2
1
LANSERVICE RS-232 IR OUTIR IN
RELAY OUT
1 2 3 4 5 6
1
RELAY OUT 1~2: Connect to devices that support relay triggered
power activation, such as projector screens or blinds, to control them
via macro commands.
Note: The voltage/amp limit for these relay connections is 0 ~ 30VDC/10A
or 0 ~ 250VAC/10A.
2
SERVICE: This slot is reserved for firmware update use only.
3
RS-232: Connect to a Projector, Media Player or other serial
controllable device to directly control RS-232 devices using the unit’s
scheduling and macro functions.
Note: The operational mode of the RS-232 port (Control/Console) can be
changed in the OSD menu to allow RS-232 control of the Receiver rather
than control of remote devices.
4
LAN: Connect directly, or through a network switch, to your PC/laptop
to control the unit via Telnet/WebGUI and to extend the network
across the HDBaseT connection.
Note: Control is only available when connected to a compatible
collaboration HDBaseT Transmitter.
Bekijk gratis de handleiding van CYP PUV-1650RX, stel vragen en lees de antwoorden op veelvoorkomende problemen, of gebruik onze assistent om sneller informatie in de handleiding te vinden of uitleg te krijgen over specifieke functies.
Productinformatie
| Merk | CYP |
| Model | PUV-1650RX |
| Categorie | Niet gecategoriseerd |
| Taal | Nederlands |
| Grootte | 6863 MB |


