CYP MED-PJ-8320 handleiding
Handleiding
Je bekijkt pagina 29 van 92
24
11) User VGA Update: To upload a VGA boot graphic via USB, select “Yes”
and then insert a USB stick containing the new boot graphic le (8-bit
*.BMP format, 640×480 resolution) into the Service port. The upload
will occur immediately.
Note: The USB stick must contain, in the root directory, a compatible and
properly named (LOGO_BOOT_VGA_*.BMP) graphic file.
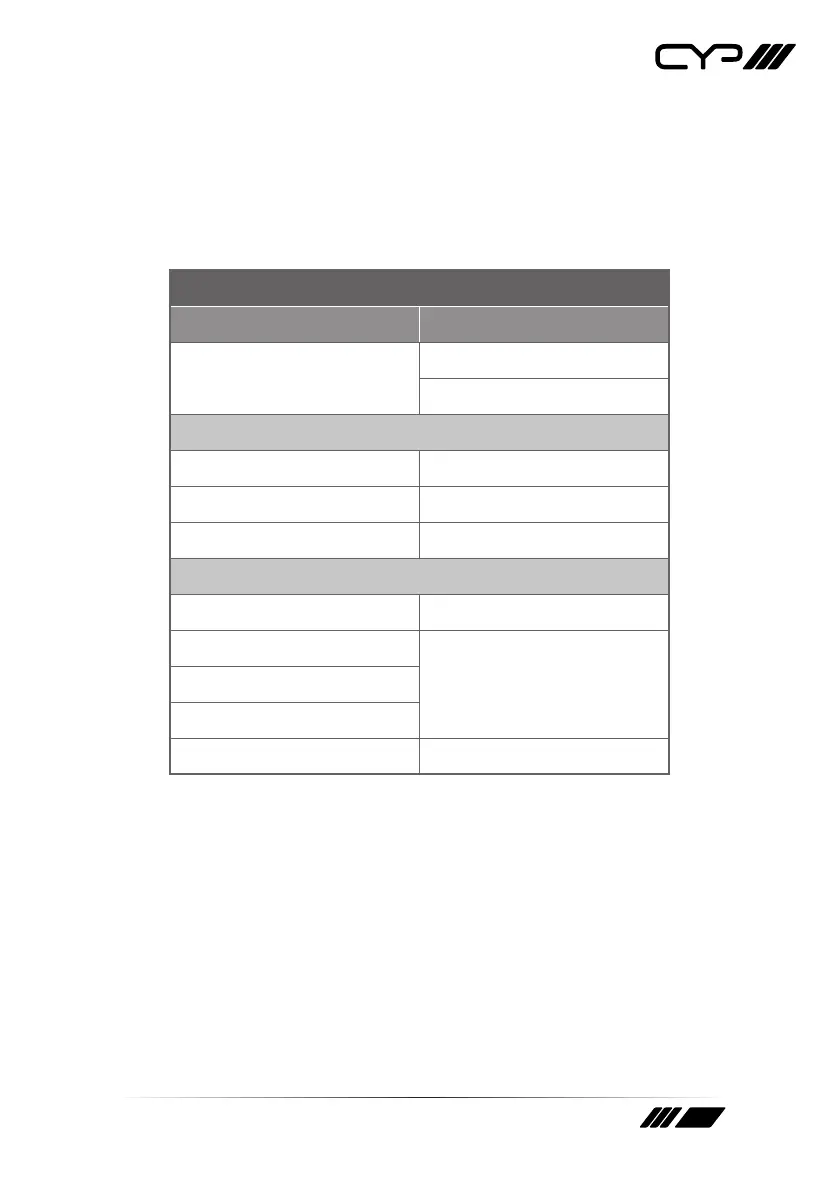
ETHERNET
2ND LEVEL 3RD LEVEL
IP Mode DHCP
Static
Static IP Cong
IP Address X.X.X.X [192.168.1.50]
Subnet Mask X.X.X.X [255.255.255.0]
Gateway X.X.X.X [192.168.1.254]
Link Status
IP Mode [Current IP Mode]
IP Address
[Current Network Info]Subnet Mask
Gateway
MAC Addr. [Unit’s MAC Address]
1) IP Mode: Set the unit’s IP address mode to Static or DHCP.
2) Static IP Cong: When the unit is in Static IP mode the IP address,
netmask and gateway addresses may be manually set here. Changes
will occur immediately.
Note: Only editable in Static IP mode.
3) Link Status: Displays the unit’s current IP conguration and the unit’s
MAC address.
Bekijk gratis de handleiding van CYP MED-PJ-8320, stel vragen en lees de antwoorden op veelvoorkomende problemen, of gebruik onze assistent om sneller informatie in de handleiding te vinden of uitleg te krijgen over specifieke functies.
Productinformatie
| Merk | CYP |
| Model | MED-PJ-8320 |
| Categorie | Niet gecategoriseerd |
| Taal | Nederlands |
| Grootte | 6462 MB |


