Handleiding
Je bekijkt pagina 16 van 40
16
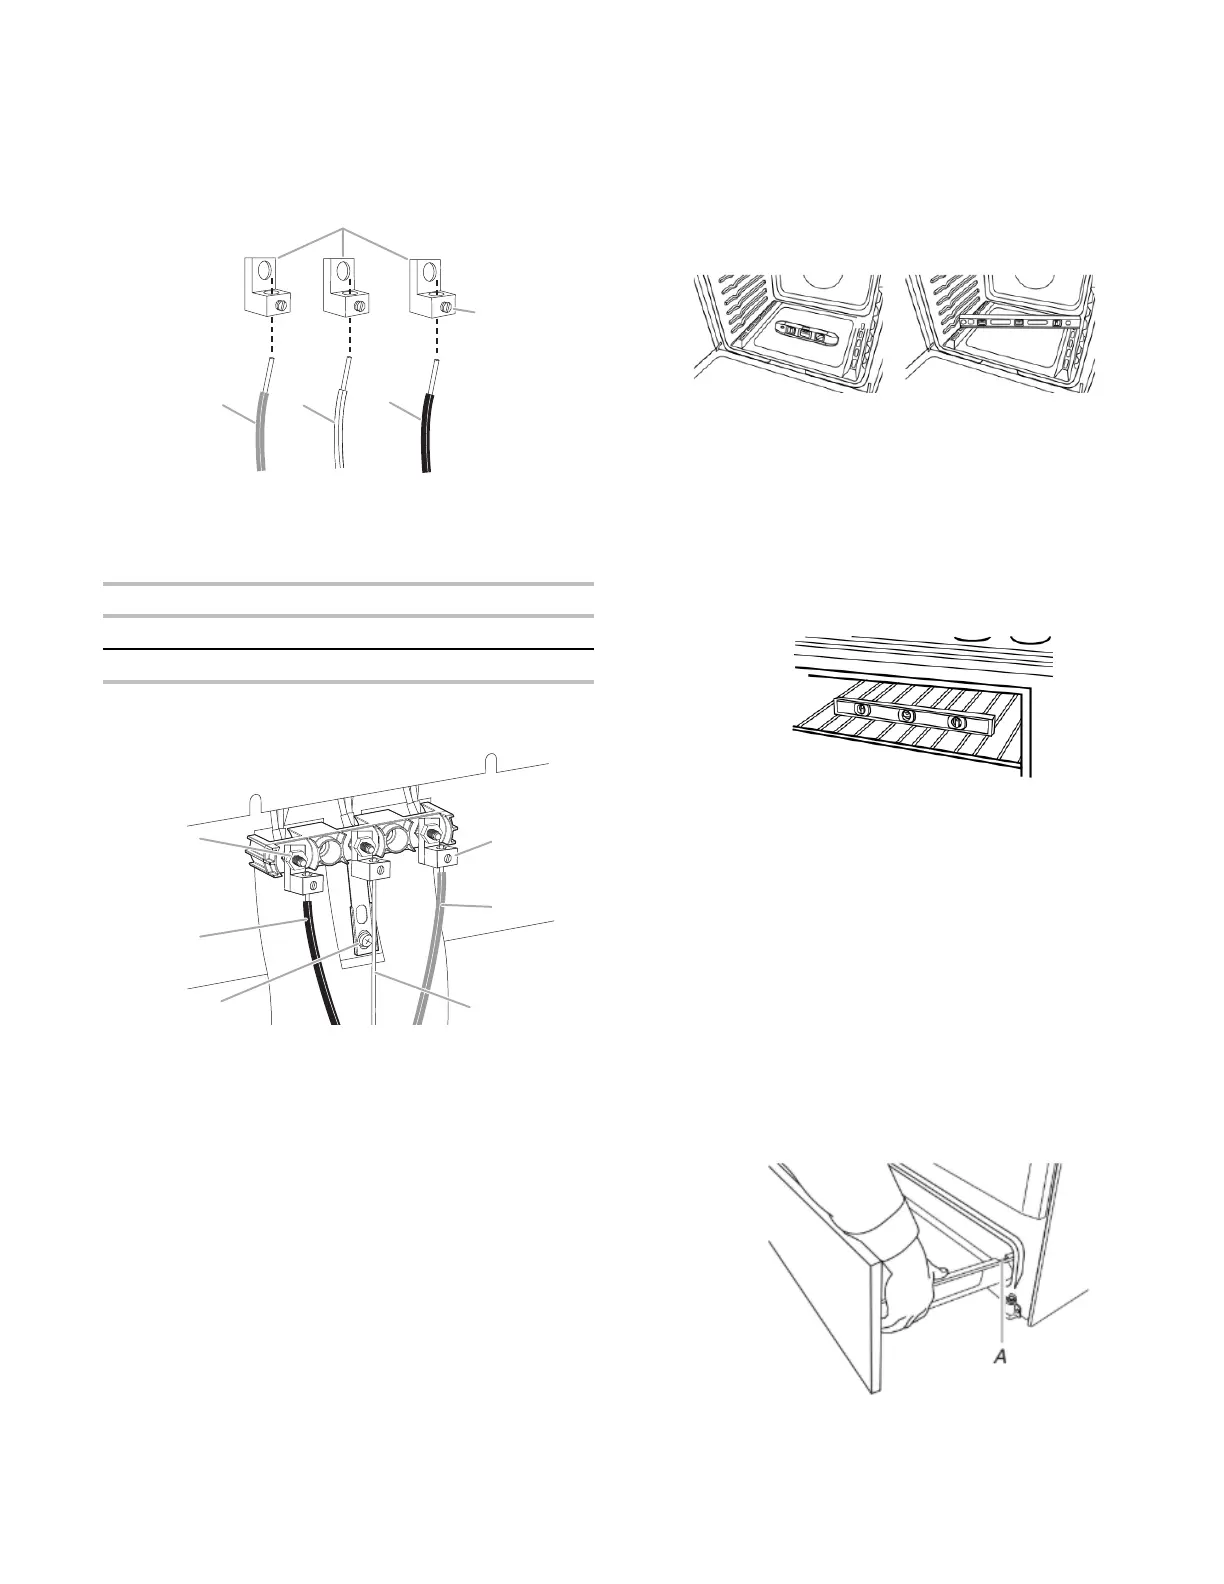
2. Attach terminal lugs to line 2 (red), bare (green) ground, and
line 1 (black) wires. Loosen (do not remove) the setscrew on
the front of the terminal lug and insert exposed wire end
through bottom of terminal lugs. Securely tighten setscrew to
torque as shown in the following Bare Wire Torque
Specifications chart.
A
B
C
D E
A. Terminal lug
B. Setscrew
C. Line 2 (red) wire
D. Bare (green) ground wire
E. Line 1 (black) wire
Bare Wire Torque Specifications
Wire Awg Torque
8 gauge copper 25 lbs-in (2.8 N-m)
6 gauge aluminum 35 lbs-in (4.0 N-m)
3. Use 3/8" (9.5 mm) nut driver to connect the bare (green)
ground wire to the center terminal block post with one of the
10-32 hex nuts.
A
B
C
F
E
D
A. 10-32 hex nut
B. Line 2 (red)
C. Ground-link
screw
D. Bare (green) ground wire
E. Line 1 (black)
F. Terminal lug
4. Connect line 2 (red) and line 1 (black) wires to the outer
terminal block posts with 10-32 hex nuts.
5. Using a torque wrench, tighten the hex nuts to a
recommended torque of 20 in-lbs (2.3 N-m).
6. Securely tighten hex nuts.
IMPORTANT: Verify the tightness of the hex nuts.
7. Replace terminal block access cover.
8. Reconnect power.
Level Range
Determine if you have AquaLift
®
Technology or Steam Clean by
referring to the “Range Maintenance and Care” section.
For Ranges with AquaLift
®
Technology or Steam
Clean:
1. Place level on the oven bottom as indicated in one of the two
figures below depending on the size of the level. Check with
the level: side to side and front to back.
2. If range is not level, pull range forward until rear leveling leg is
removed from the anti-tip bracket.
3. Follow the directions in Style 1 or Style 2, depending on the
style of drawer supplied with the range.
For Ranges without AquaLift
®
Technology or
Steam Clean:
1. Place a standard flat rack in oven.
2. Place level on the rack and check levelness of the range, first
side to side; then front to back.
3. If range is not level, pull range forward until rear leveling leg is
removed from the anti-tip bracket.
4. Follow the directions in Style 1 or Style 2, depending on the
style of drawer supplied with the range.
Style 1: Ranges Equipped with a Storage Drawer:
Use a 1/4" (0.64 cm) drive ratchet, wrench or pliers to adjust
leveling legs up or down until the range is level. Push range back
into position. Check that rear leveling leg is engaged in the anti-tip
bracket.
Storage Drawer (on some models)
The storage drawer can be removed. Before removing, make sure
drawer is cool and empty.
To Remove:
1. Pull the storage drawer straight back to the drawer stop.
A. Drawer stop notch
2. Lift up the front of the drawer and pull the drawer out.
Bekijk gratis de handleiding van Crosley CREW3874RB, stel vragen en lees de antwoorden op veelvoorkomende problemen, of gebruik onze assistent om sneller informatie in de handleiding te vinden of uitleg te krijgen over specifieke functies.
Productinformatie
| Merk | Crosley |
| Model | CREW3874RB |
| Categorie | Fornuis |
| Taal | Nederlands |
| Grootte | 3650 MB |


