Create Wind Wood handleiding
Handleiding
Je bekijkt pagina 9 van 72
9
ENGLISH
• Mark the correct position of the holes and x the ceiling support using the screws with
metal anchors or screws and washers suitable for the type of ceiling chosen.
• Verify proper installation of the bracket before hanging the fan. The mounting bracket
must support the entire weight of the fan.
• Check that the ceiling where you intend to mount the fan is stable and capable of safely
supporting the weight of the fan.
• Do not x the mounting bracket directly on ceilings less than 10mm to avoid the risk of the
screw loosening and coming out.
INSTALLING THE MOUNTING BRACKET
NOTE: This fan can also be installed in a false ceiling, for this you must use xing screws
with a spring lever (not included).
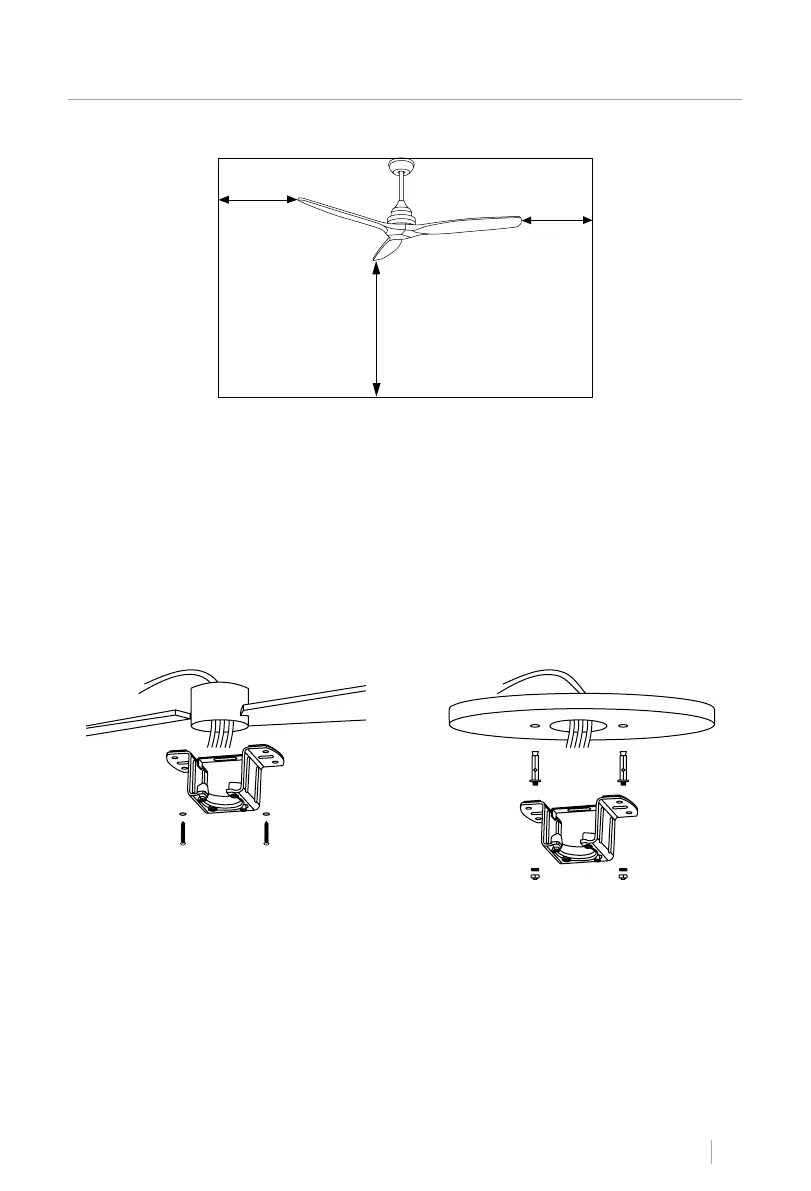
Wood roof
Drill the necessary holes and then secure
the mounting bracket with the wood screws
and washers to the ceiling joints.
Concrete roof
Drill holes with an 8mm drill bit, accord-
ing to the length of the expansion screws.
Next, secure the mounting bracket to the
ceiling with the expansion screws.
INSTALLATION INSTRUCTIONS
• To avoid personal injury and injury, ensure that the fan is hung in a location that allows the
blades to be 2.3 m or more from the oor and 76 cm from the nearest wall or obstacle.
• Make sure the mounting bracket is properly attached to the building structure and can
support the full weight of the fan.
INSTALLATION PREPARATION
min. 76 cm
min. 76 cm
min. 2.3 m
Bekijk gratis de handleiding van Create Wind Wood, stel vragen en lees de antwoorden op veelvoorkomende problemen, of gebruik onze assistent om sneller informatie in de handleiding te vinden of uitleg te krijgen over specifieke functies.
Productinformatie
| Merk | Create |
| Model | Wind Wood |
| Categorie | Ventilator |
| Taal | Nederlands |
| Grootte | 6553 MB |
