Continental CPA60 handleiding
Handleiding
Je bekijkt pagina 8 van 28
8
REFRIGERATED BASES & PIZZA PREP TABLES
OPERATIONS MANUAL
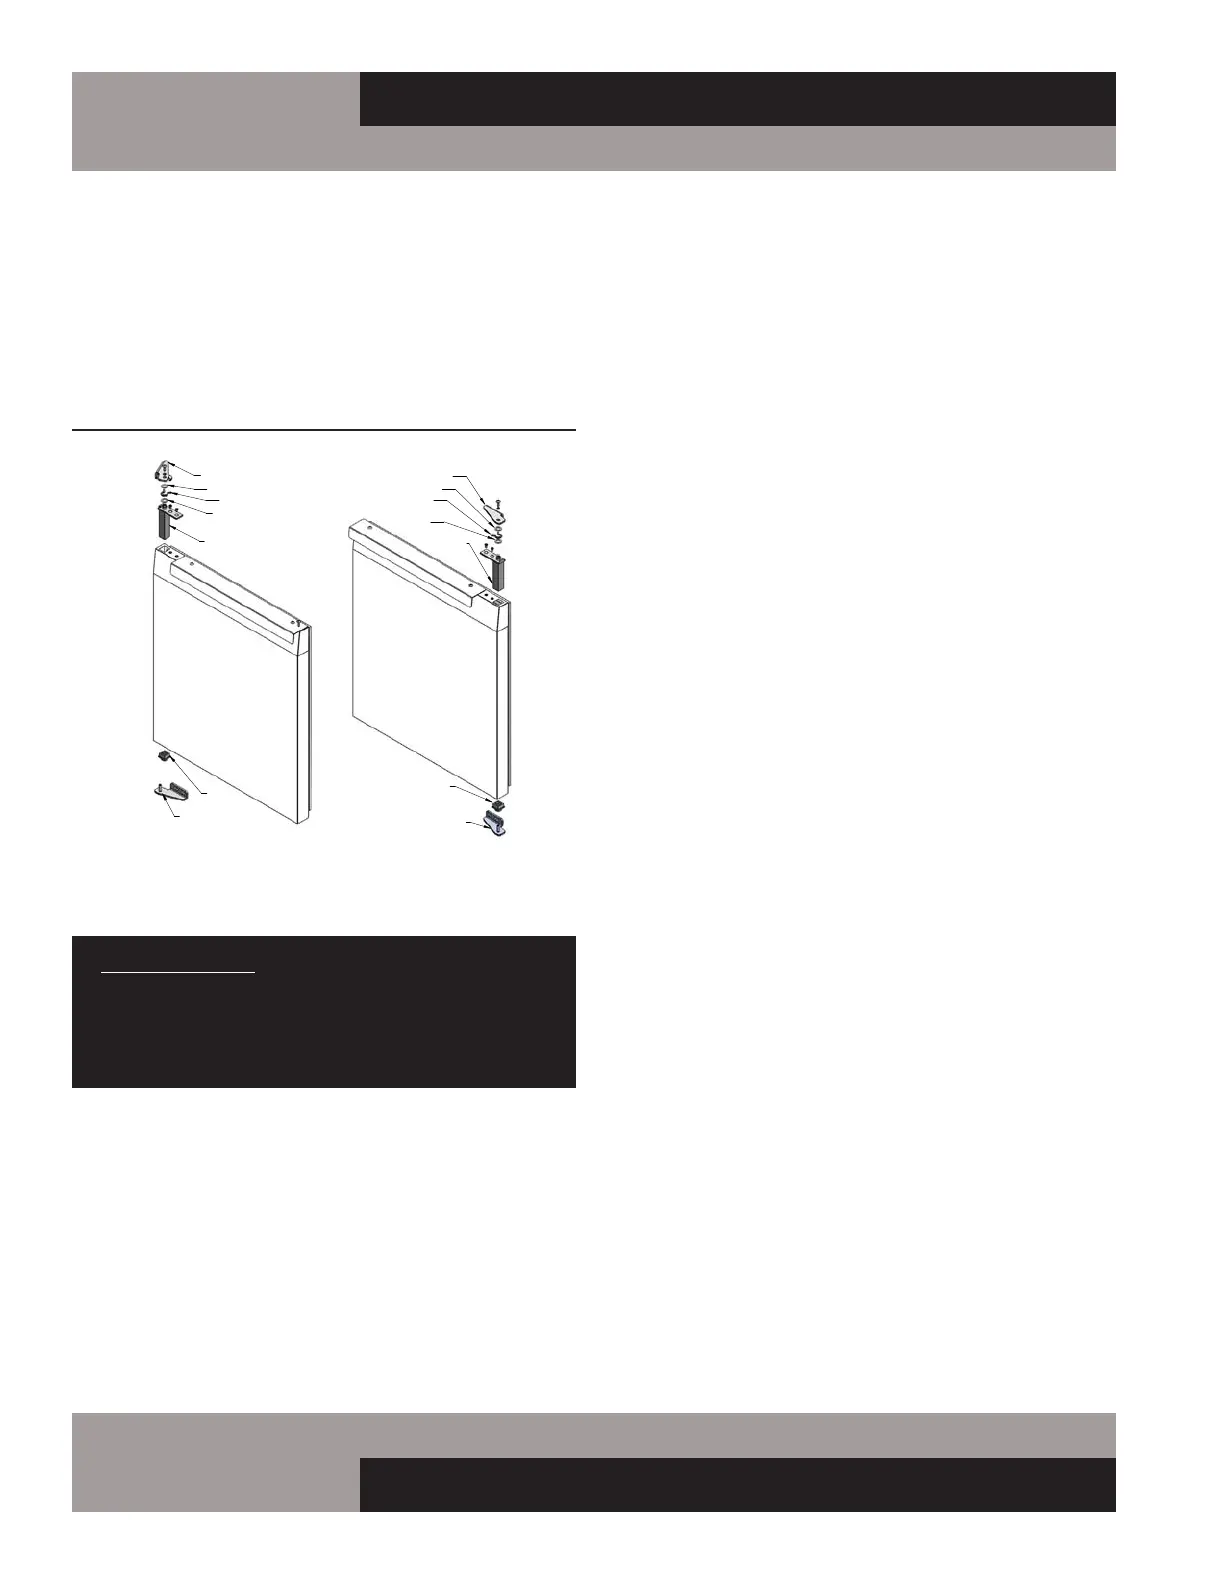
For doors with spring cartridge on the bottom: open the door
fully (115°) and remove the mounting screws securing the
hinge cartridge bracket to the cabinet below the door. Lower
the door down carefully, to avoid bumping the cartridge bracket,
and slide it off the pivot pin bracket over the door. To reinstall,
reverse this procedure and follow the instructions above to set
the hinge tension and adjust the door properly.
RE-HINGING DOORS
IMPORTANT NOTE: DOORS ARE FIELD REVERSIBLE,
BUT DIFFERENT HINGE BRACKETS ARE REQUIRED.
HAVE YOUR MODEL AND SERIAL NUMBER READY AND
CONTACT THE FACTORY FOR THE PARTS NEEDED FOR
YOUR UNIT.
Remove the door and hinge cartridge bracket from the cabinet,
as described above (see Figure 7). Remove the pivot bracket,
located at the opposite edge of the door (see Figure 8) by
loosening the (2) mounting screws. Remove the hinge cartridge
from the door by removing the (2) screws and sliding the car-
tridge out. Remove the plastic pivot insert from the opposite
end of the door by carefully prying it out with a flat-blade screw-
driver or putty knife. Remove the remaining “filler screws” from
the face of the cabinet and reinstall them in the threaded holes
where the brackets were originally mounted.
To re-assemble the reverse-hinged door, obtain the correct
cartridge bracket and pivot bracket for the top and bottom of the
“opposite-hand” door (see Figure 8 for parts identification).
Follow the steps above, in reverse order.
REMOVAL AND ADJUSTMENT OF DRAWERS
To remove the drawers from the cabinet, slide each drawer
out until it stops. Unhook the stop clip at the front of the left
and right-hand drawer slide (see Figure 9) by pushing the clip
forward and pressing down on the top back edge as shown.
Lift the drawer slightly as you pull it the rest of the way out.
The center member, with the wheels attached, will remain in
the cabinet. To remove a drawer center member for cleaning or
maintenance, pull it out and push up on the release lever at the
back, as shown.
To install a drawer, identify the correct parts and orient the
center members so the plastic clips are in the front and at the
top. Insert one of the center members into the front of the cor-
rect cabinet member (which is permanently attached to the
inside of the cabinet) and slide it in, until it stops. Push up on
the release lever (located toward the rear and top of the center
member) to allow the center member roll the rest of the way
into the cabinet member, in the “drawer closed” position. Repeat
for the opposite side center member. Pull each center member
out a few inches, press down on the rear of each stop clip, and
pull forward so the hook on the front of the clip rotates up, into
the “unlocked” position. Lift the drawer body into place, resting
the drawer members (the channels welded to the sides of the
drawers) on the front wheels of the center member, and slide
the drawer into the cabinet. Once the drawer goes in all the way
and slides smoothly, open it enough to access the stop clips.
Lift the back of each clip and push in at the front, so the hook
portion snaps into the “locked” position. The drawers are now
secured, so they cannot accidentally be lifted out of the cabinet.
Check that the drawer is properly aligned, rolls smoothly and the
drawer gasket seals firmly.
If the drawer fronts need adjustment (once all drawers are
installed and closed), loosen the five screws that hold the drawer
front to the drawer body. Move the drawer front into position
desired and re-tighten all screws.
FIGURE 8: Door Hinge Components
Bekijk gratis de handleiding van Continental CPA60, stel vragen en lees de antwoorden op veelvoorkomende problemen, of gebruik onze assistent om sneller informatie in de handleiding te vinden of uitleg te krijgen over specifieke functies.
Productinformatie
| Merk | Continental |
| Model | CPA60 |
| Categorie | Niet gecategoriseerd |
| Taal | Nederlands |
| Grootte | 5819 MB |


