Handleiding
Je bekijkt pagina 12 van 36
12 Chef 540 Upright Cooker
1. Warning: Risk of electric shock. Ensure the
cooker is NOT plugged into a power point before
proceeding.
2. Remove all control knobs on the front of the cooker by
gripping each knob behind its skirt and pulling away
from the control panel if not already done as part of the
Gas Hob conversion.
3. Remove the control panel by removing the 2 screws
behind the grill door below the Control Panel. Rest the
control panel on the open grill door being careful not to
stretch or damage the wiring.
4. Warning: Risk of laceration. The now exposed
front edge and other edges of the grill compartment
panel can have sharp edges. Wear appropriate gloves.
5. Remove the grill burner gas injector using the 7mm
spanner from its holder in front of the aeration shutter. To
loosen the injector, rotate the spanner in a clockwise
direction as you are working from behind it!
6. Select the correct gas injector for the grill burner and the
intended gas type and replace the grill burner gas
injector. Set the injector in place firmly but not with
excessive torque.
7. Locate the recessed turndown adjustment screw in each
gas valve, insert the screwdriver, and turn the adjustment
screw clockwise until the screw stops. Note: All gas
valves for the Gas Hob, Gas Oven, and Gas Separate
Grill need to be adjusted the same way.
8. Replace the control panel being careful to ensure any
wires do not get trapped between the grill compartment
panel and the control panel as per the reverse of step 3.
9. Install control knobs (with skirts where used) by pushing
them on fully.
• 7mm open-ended or ring spanner or 7mm hex socket
screwdriver or nut runner.
• #2 Phillips head screwdriver.
1. Warning: Risk of electric shock. Ensure the
cooker is NOT plugged into a power point before
proceeding.
2. Remove the plastic cover behind the gas connection point
by unscrewing 2x Phillips screws).
3. Warning: Risk of laceration. The rear cover
and internal components can have sharp edges. Wear
appropriate gloves and long sleeve & leg clothes.
4. Remove the rear panel by unscrewing 2 (or 4 where
used) Phillips screws.
5. Inside the lower back of the cooker, remove the lower
internal baffle plate (where fitted).
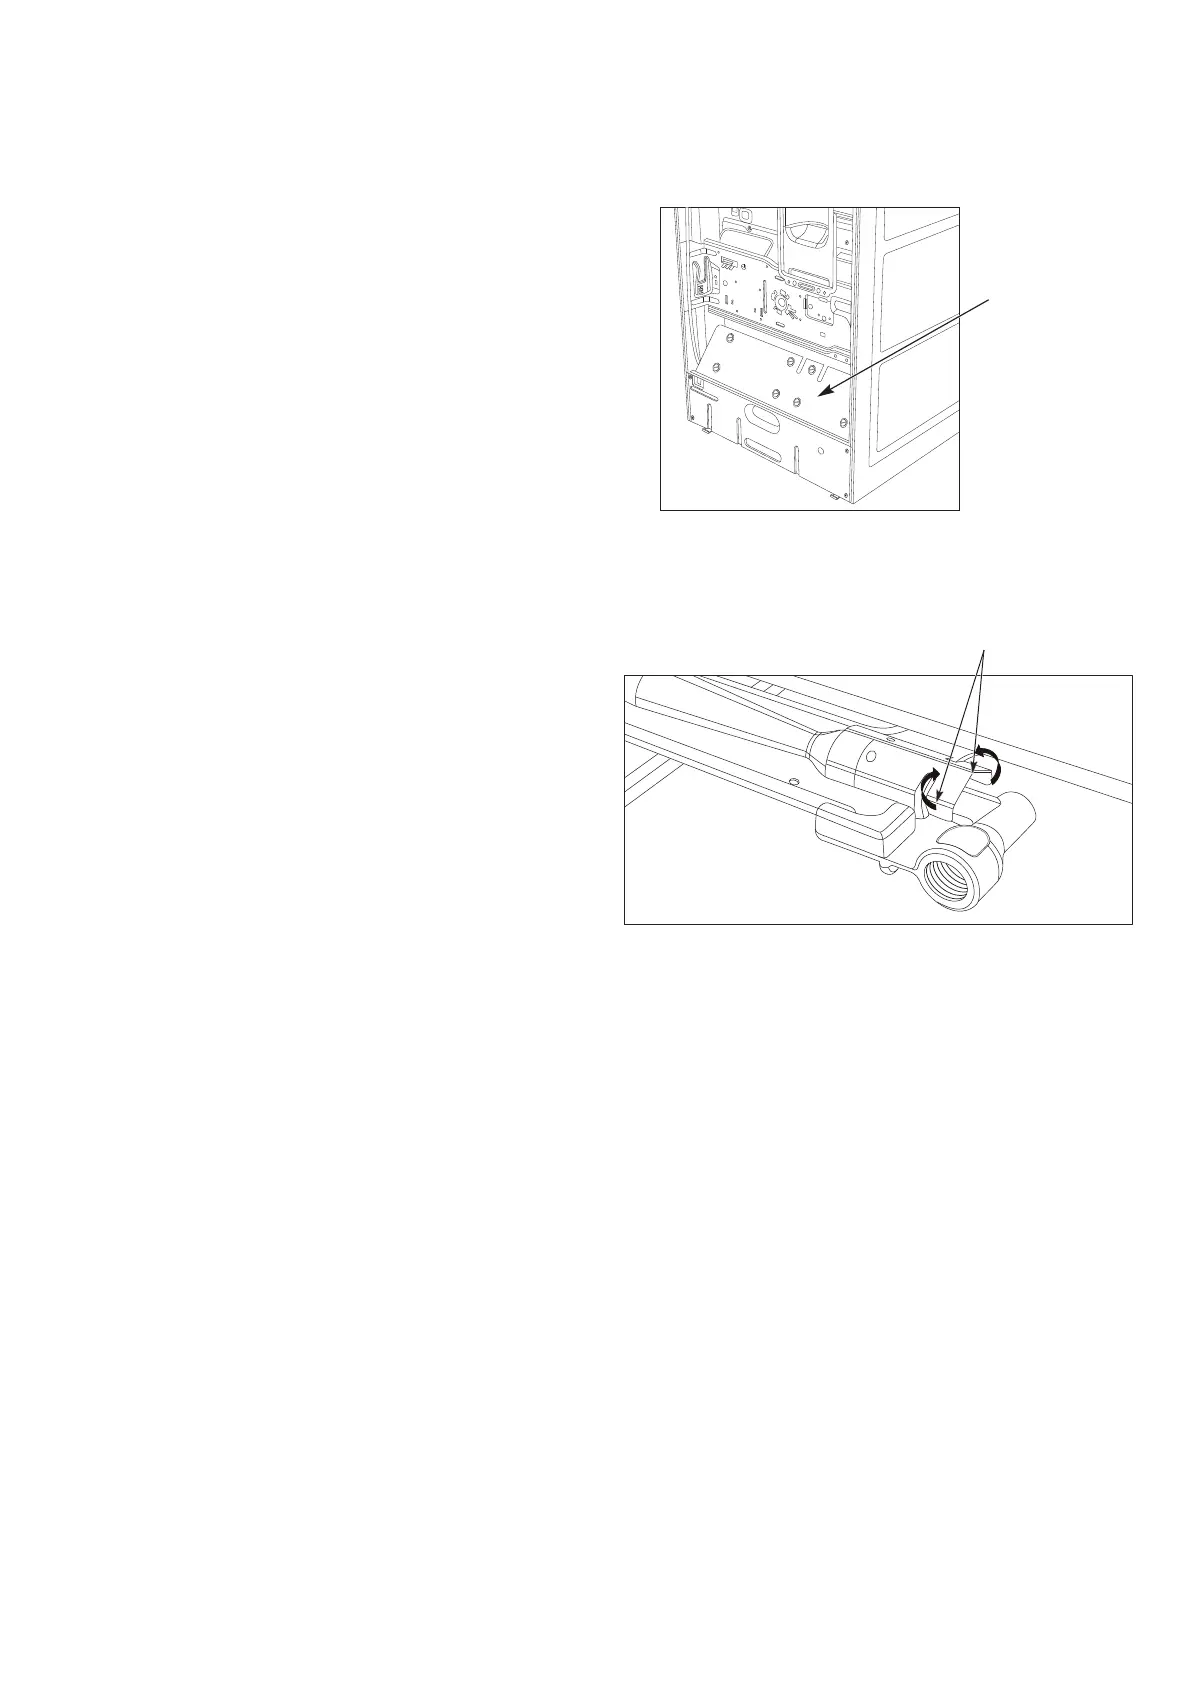
Gas conversion instructions
Lower internal
baffle plate
6. Remove the gas injector holder from the burner by
bending up the 2 metal tabs at the end of the burner
holding the gas injector, then slide the injector holder out
of the burner body.
Metal tabs of the
burner
7. Remove the oven burner gas injector from its holder using
the 7mm spanner or socket or nut runner.
8. Select the correct gas injector for the oven burner and
the intended gas type and replace the oven burner
gas injector. Set the injector in place firmly but not with
excessive torque.
9. Slide the gas injector holder back into the burner and
bend down the 2 metal tabs to ensure that the injector
holder cannot slide out of the burner body.
10. Install the internal baffle (where used), rear cover, and
plastic cover behind the gas connection as per the
reverse of steps 1 to 4.
Note: Adjustment of the turndown of the Gas Oven valve
(thermostat) should have been done as part of the Gas Hob
Conversion.
Gas Oven - Freestanding Cookers (Where used)
Tools required:
Bekijk gratis de handleiding van Chef CFG517, stel vragen en lees de antwoorden op veelvoorkomende problemen, of gebruik onze assistent om sneller informatie in de handleiding te vinden of uitleg te krijgen over specifieke functies.
Productinformatie
| Merk | Chef |
| Model | CFG517 |
| Categorie | Fornuis |
| Taal | Nederlands |
| Grootte | 6753 MB |