Handleiding
Je bekijkt pagina 266 van 604
8
Click [OK] [OK].
➠ The settings are applied.
◼ When Using macOS
1
Click [ ] [System Preferences] [Printers & Scanners].
➠ The [Printers & Scanners] screen is displayed.
2
Select the machine, and click [Options & Supplies].
3
On the [Options] tab, select the [Department ID Management] checkbox, and click
[OK].
4
On the driver setting screen, set the Department ID and PIN.
You must set the Department ID and PIN each time you print.
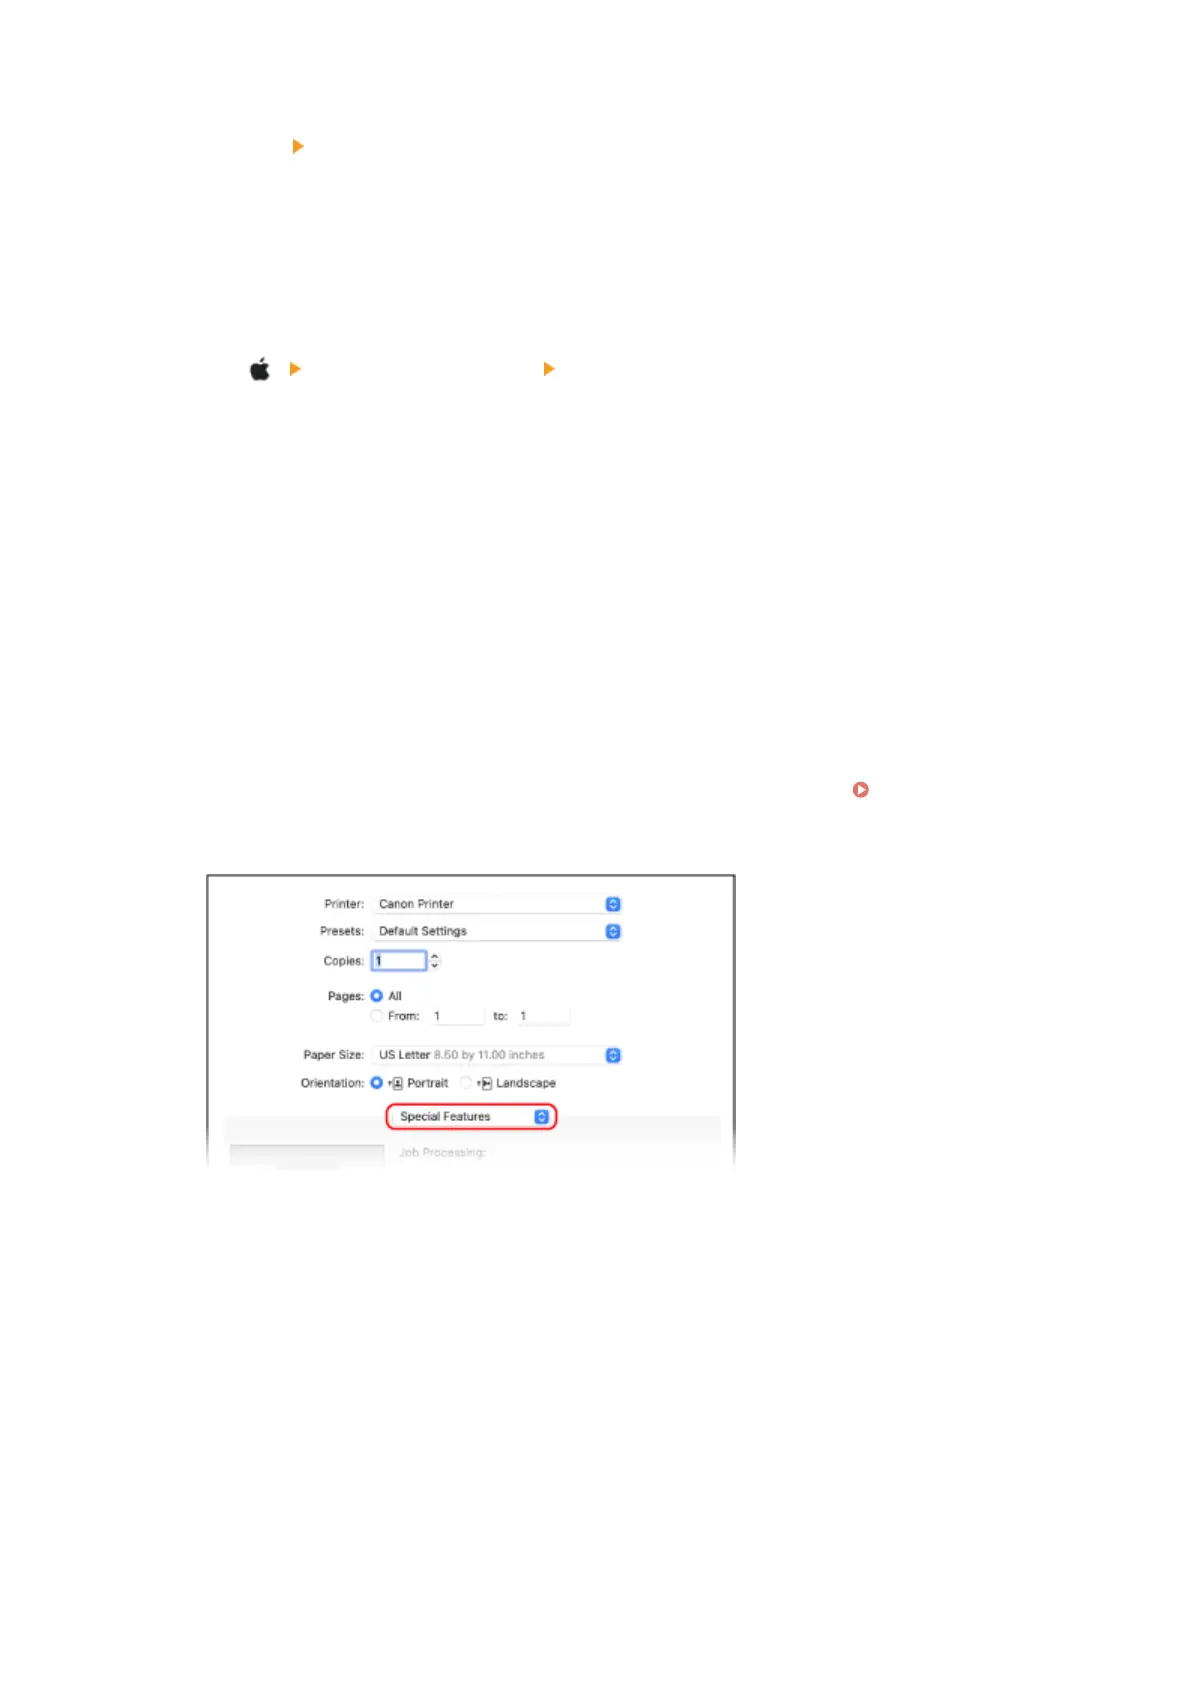
1
Display the printing dialog box, and select the printer driver of the machine. Printing from a
Computer(P. 192)
2
From the print options pop-up menu, select [Special Features].
If print options are not displayed, click [Show Details] in the printing dialog box.
3
Select the [Use Department ID Management] checkbox, and click [Settings].
➠ The [Department ID/PIN Settings] screen is displayed.
4
Enter the Department ID and PIN.
5
Set the authentication process and applicable range, as needed.
Conrming the Department ID and PIN when printing
Select the [Conrm Department ID/PIN When Printing] checkbox.
6
Click [OK].
Security
258
Bekijk gratis de handleiding van Canon imageCLASS LBP246dw II, stel vragen en lees de antwoorden op veelvoorkomende problemen, of gebruik onze assistent om sneller informatie in de handleiding te vinden of uitleg te krijgen over specifieke functies.
Productinformatie
| Merk | Canon |
| Model | imageCLASS LBP246dw II |
| Categorie | Printer |
| Taal | Nederlands |
| Grootte | 55888 MB |


