Handleiding
Je bekijkt pagina 207 van 604
➠ The secure data is sent to the machine.
Step 2: Printing Secure Data by Entering a PIN or Password
Print the secure data sent to the machine. If the secure data is left without printing, it will remain in the memory of the
machine, and you may not be able to print other data. Print the sent secure data as soon as possible.
Touch Panel Model(P. 199)
Black and White LCD Model(P. 199)
◼
Touch Panel Model
1
On the control panel, press [Secure Print] in the [Home] screen. [Home]
Screen(P. 114)
➠ The Secure Print screen is displayed.
If the screen for selecting the user is displayed, select your user name.
2
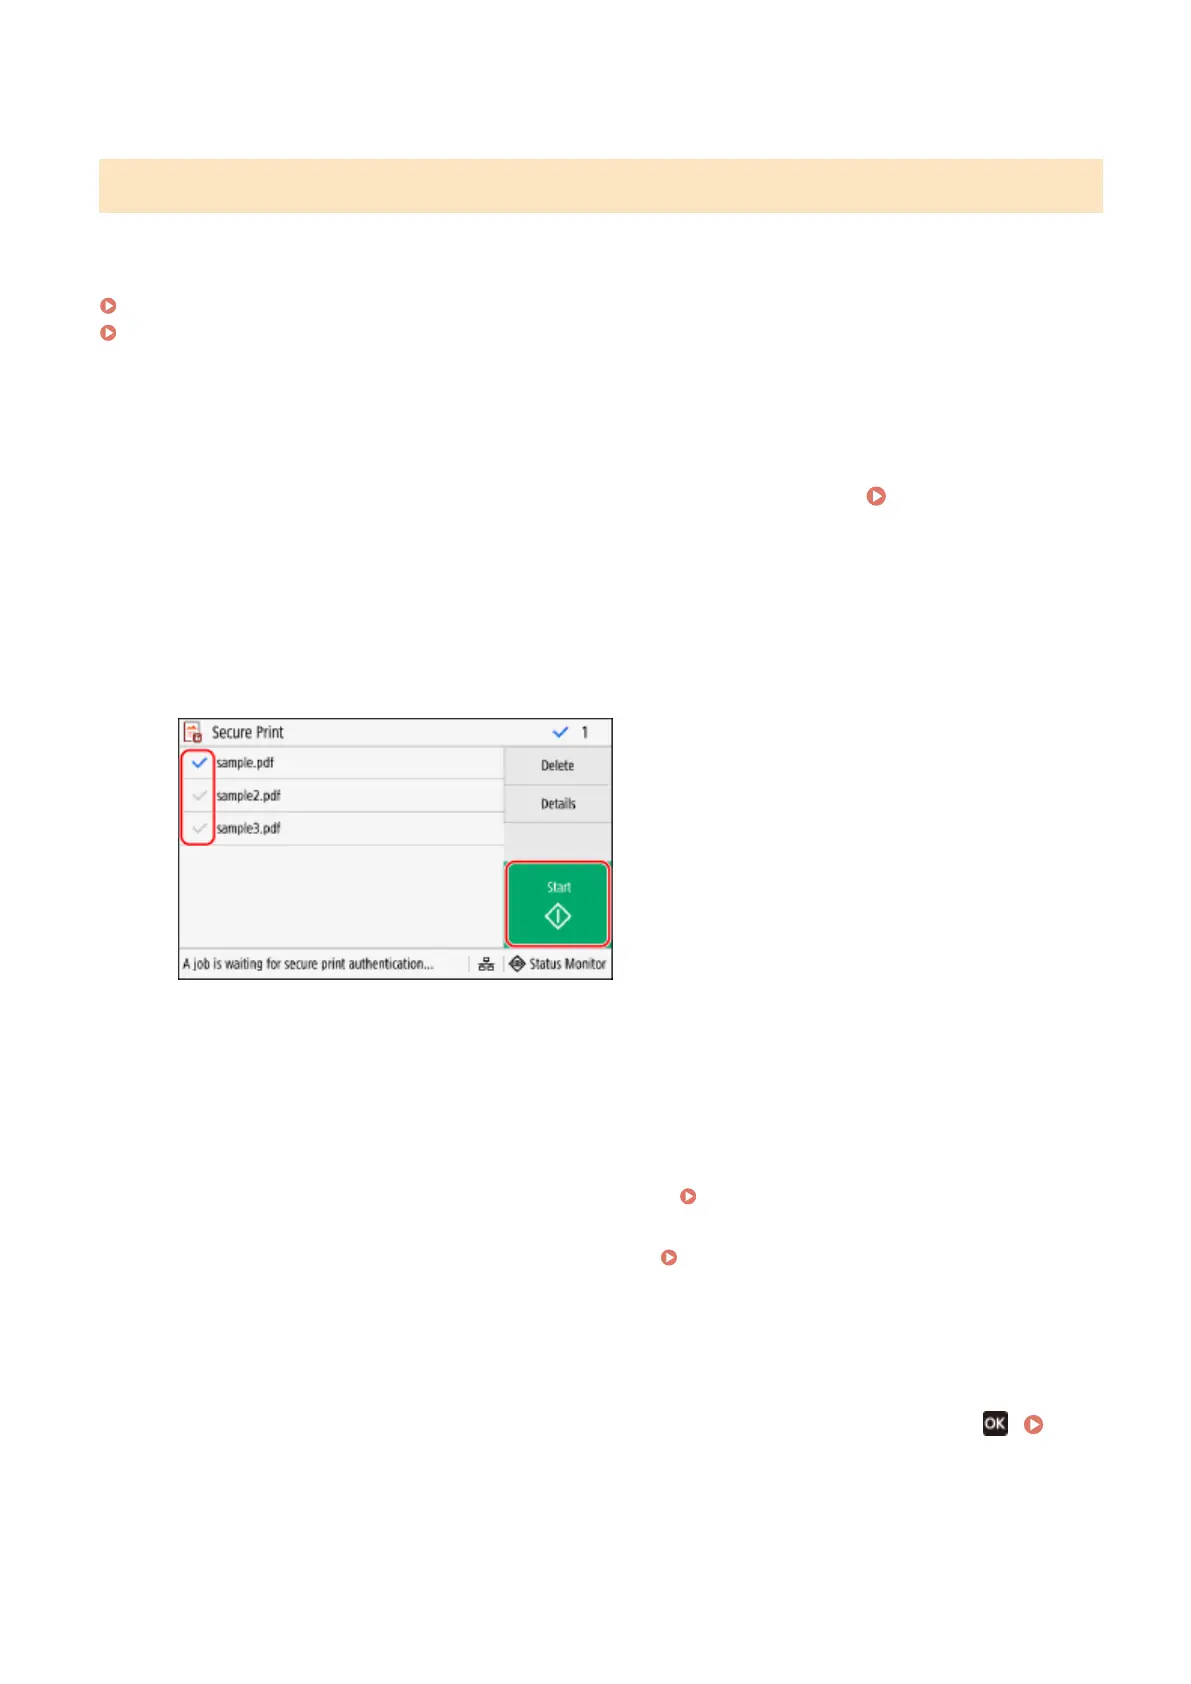
Select the checkbox of the secure data to print, and press [Start].
3
Enter the PIN or password, and press [Apply].
➠
Printing starts.
● If you selected multiple les of secure data in Step 2 above, only secure data that matches the entered PIN or
password is printed.
● To cancel printing, use the control panel to cancel printing. Canceling Printing with the Control
Panel(P. 213)
● Use [Status Monitor] to view the print job status and log.
Viewing the Print Job Status and Log(P. 215)
◼ Black and White LCD Model
1
On the control panel, select [Secure Print] in the [Home] screen, and press .
[Home] Screen(P. 114)
➠ The Secure Print screen is displayed.
If the screen for selecting the user is displayed, select your user name.
Printing
199
Bekijk gratis de handleiding van Canon imageCLASS LBP246dw II, stel vragen en lees de antwoorden op veelvoorkomende problemen, of gebruik onze assistent om sneller informatie in de handleiding te vinden of uitleg te krijgen over specifieke functies.
Productinformatie
| Merk | Canon |
| Model | imageCLASS LBP246dw II |
| Categorie | Printer |
| Taal | Nederlands |
| Grootte | 55888 MB |


