Cameo Studio PAR 4 G2 handleiding
Handleiding
Je bekijkt pagina 24 van 176
24
DMX
ITALIANO
POLSKI
ESPAÑOL
FRANCAIS
DEUTSCHENGLISH
SETUP AND INSTALLATION
HAZARD: Overhead mounting requires extensive experience, including the calculation of
the load limit values of the installation material and regular safety inspection of all
installation materials and spotlights. If you do not have these qualifications, do not
attempt to perform an installation yourself. Refer instead to a qualified professional.
Thereis a risk that devices that are incorrectly mounted and secured may come loose
and fall down. This can cause serious injury or death.
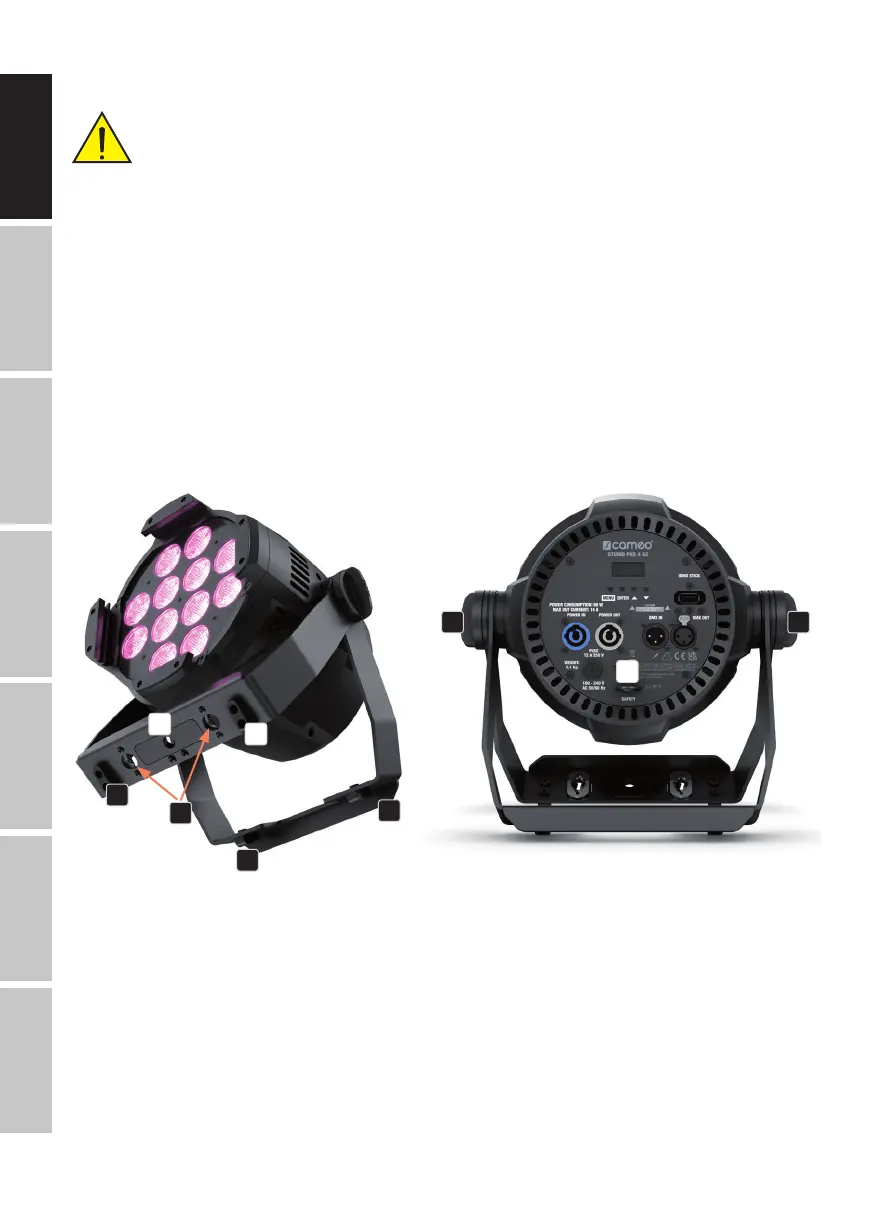
Thanks to its convenient double bracket, the spotlight can be positioned in a suitable location on
a level surface. Rubber feet prevent scratching of surfaces and ensure stability (A). Installation on
a truss is possible with a suitable truss clamp, which is attached to the mounting bracket (B). An
optional Omega bracket can be attached to the U-bracket for truss mounting (C). Suitable truss
clamps are optionally available. Ensure firm connections and secure the spotlight by attaching a
suitable safety cable to the securing lug on the back of the spotlight (D). Loosen the two handle
screws on the sides of the spotlight (E) to adjust the beam direction in the vertical plane and
tighten the two handle screws again after adjustment.
A
A
D
E E
B
C
A
A
The optionally available, tool-free, fold-out 16 mm TV spigot CLZSPIN16 can be mounted on the
U-bracket instead of the mounting plate with mounting hole (F).
Bekijk gratis de handleiding van Cameo Studio PAR 4 G2, stel vragen en lees de antwoorden op veelvoorkomende problemen, of gebruik onze assistent om sneller informatie in de handleiding te vinden of uitleg te krijgen over specifieke functies.
Productinformatie
| Merk | Cameo |
| Model | Studio PAR 4 G2 |
| Categorie | Verlichting |
| Taal | Nederlands |
| Grootte | 18313 MB |


