Brother PS-55 handleiding
Handleiding
Je bekijkt pagina 97 van 111
85
Changing the Light Bulb
CAUTION
• Turn off the main power switch and unplug the machine
before changing the light bulb. If the main power switch
is on when the light bulb is changed, an electric shock
may result. If the machine is on and Start/Stop button is
pressed or foot controller is stepped on, injuries may
result.
• To avoid burns, give the light bulb time to cool before
changing it.
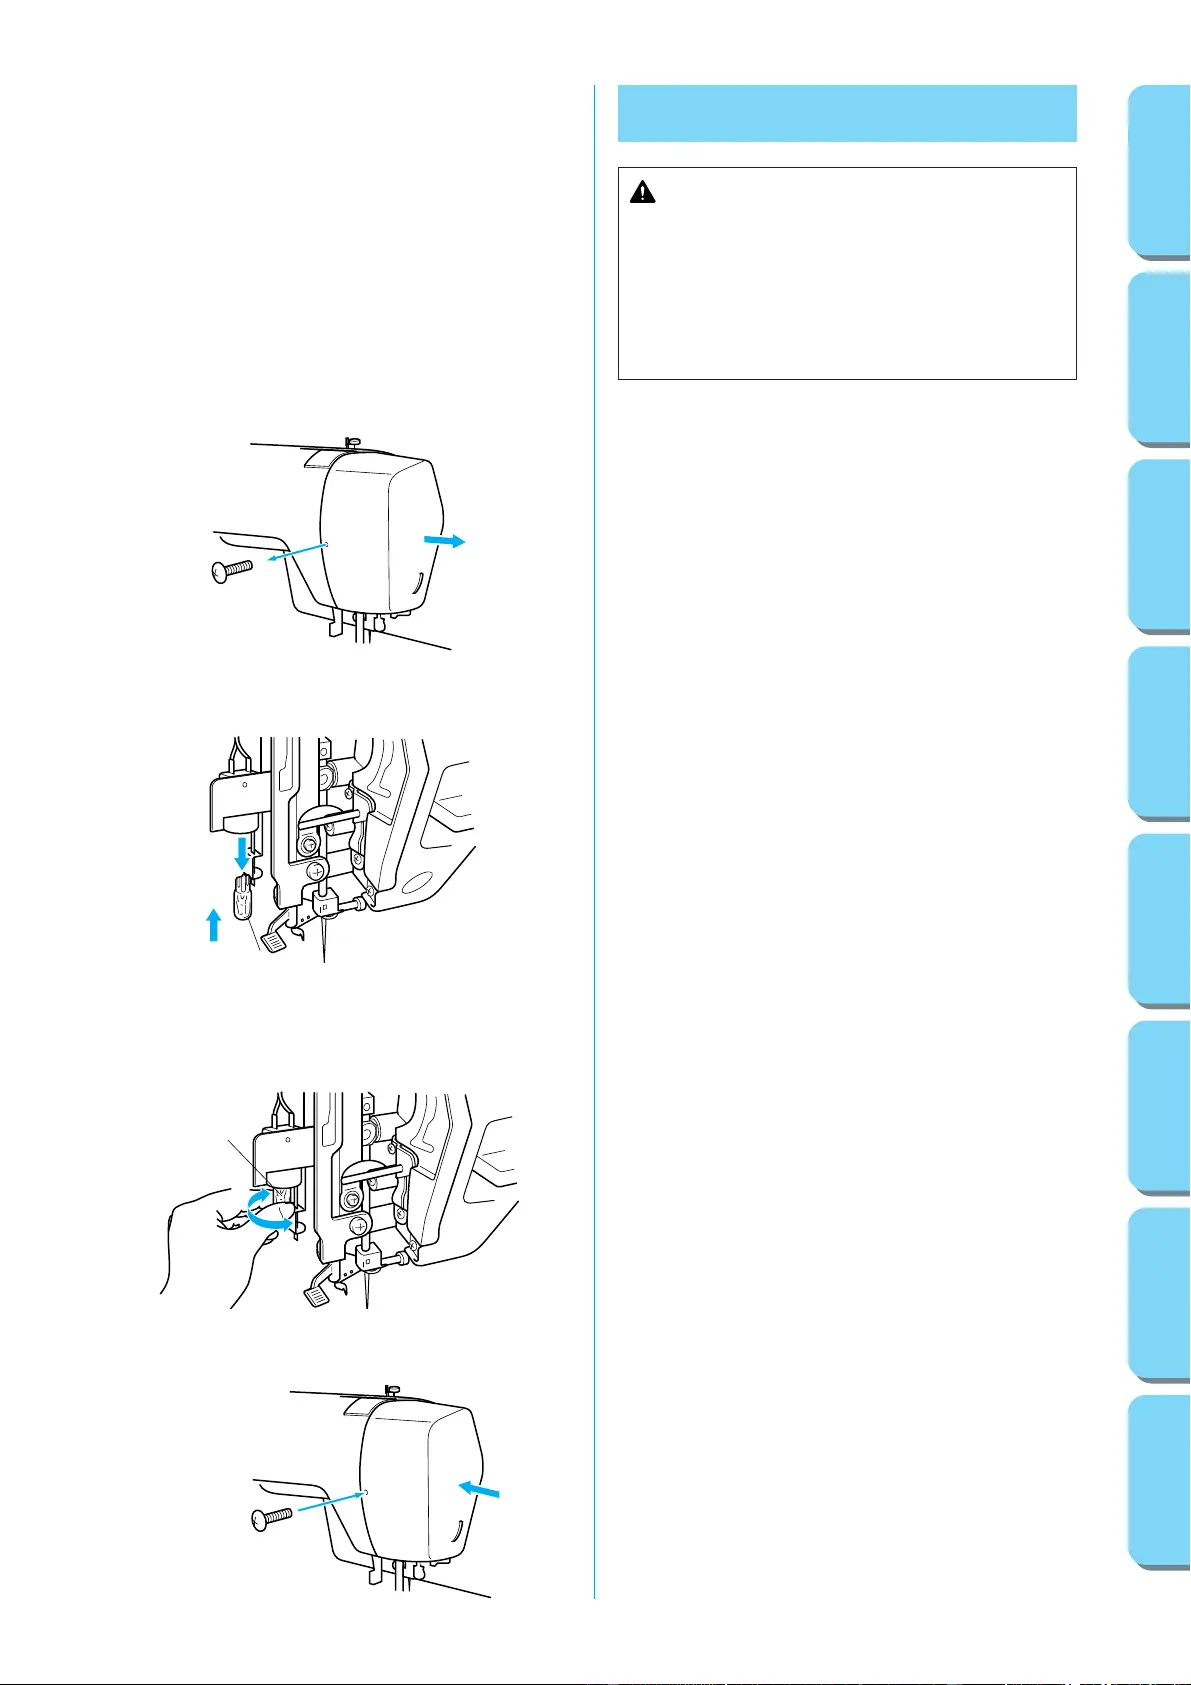
1. Remove the power supply plug from the outlet.
2. Loosen the screw on the reverse side of sewing head as shown
in fig. A.
3. Remove the light cover from the machine as illustrated in fig. A.
(Model STAR 240E, STAR 230E)
4. Replace the sewing light bulb. (See fig. B)
1 Bulb
1 Pull out
2 Push in
(Model PS-57, PS-55, PS-53)
4. Replace the sewing light bulb. (See fig. B)
1 Bulb
1 Loosen
2 Tighten
5. Reattach the light cover and fasten the screw as shown in fig.
C.
B
A
1
1
2
1
1
2
B
C
(Model STAR 240E, STAR 230E)
(Model PS-57, PS-55, PS-53)
TABLE OF CONTENTS
KNOWING YOUR
SEWING MACHINE
STRAIGHT AND
ZIGZAG STITCHING
BUILT-IN STITCHES
BUTTONHOLE AND
BUTTON SEWING
USING ATTACHMENTS
AND APPLICATIONS
MAINTENANCE
INDEX
Bekijk gratis de handleiding van Brother PS-55, stel vragen en lees de antwoorden op veelvoorkomende problemen, of gebruik onze assistent om sneller informatie in de handleiding te vinden of uitleg te krijgen over specifieke functies.
Productinformatie
| Merk | Brother |
| Model | PS-55 |
| Categorie | Naaimachine |
| Taal | Nederlands |
| Grootte | 15592 MB |


