Handleiding
Je bekijkt pagina 19 van 44
19
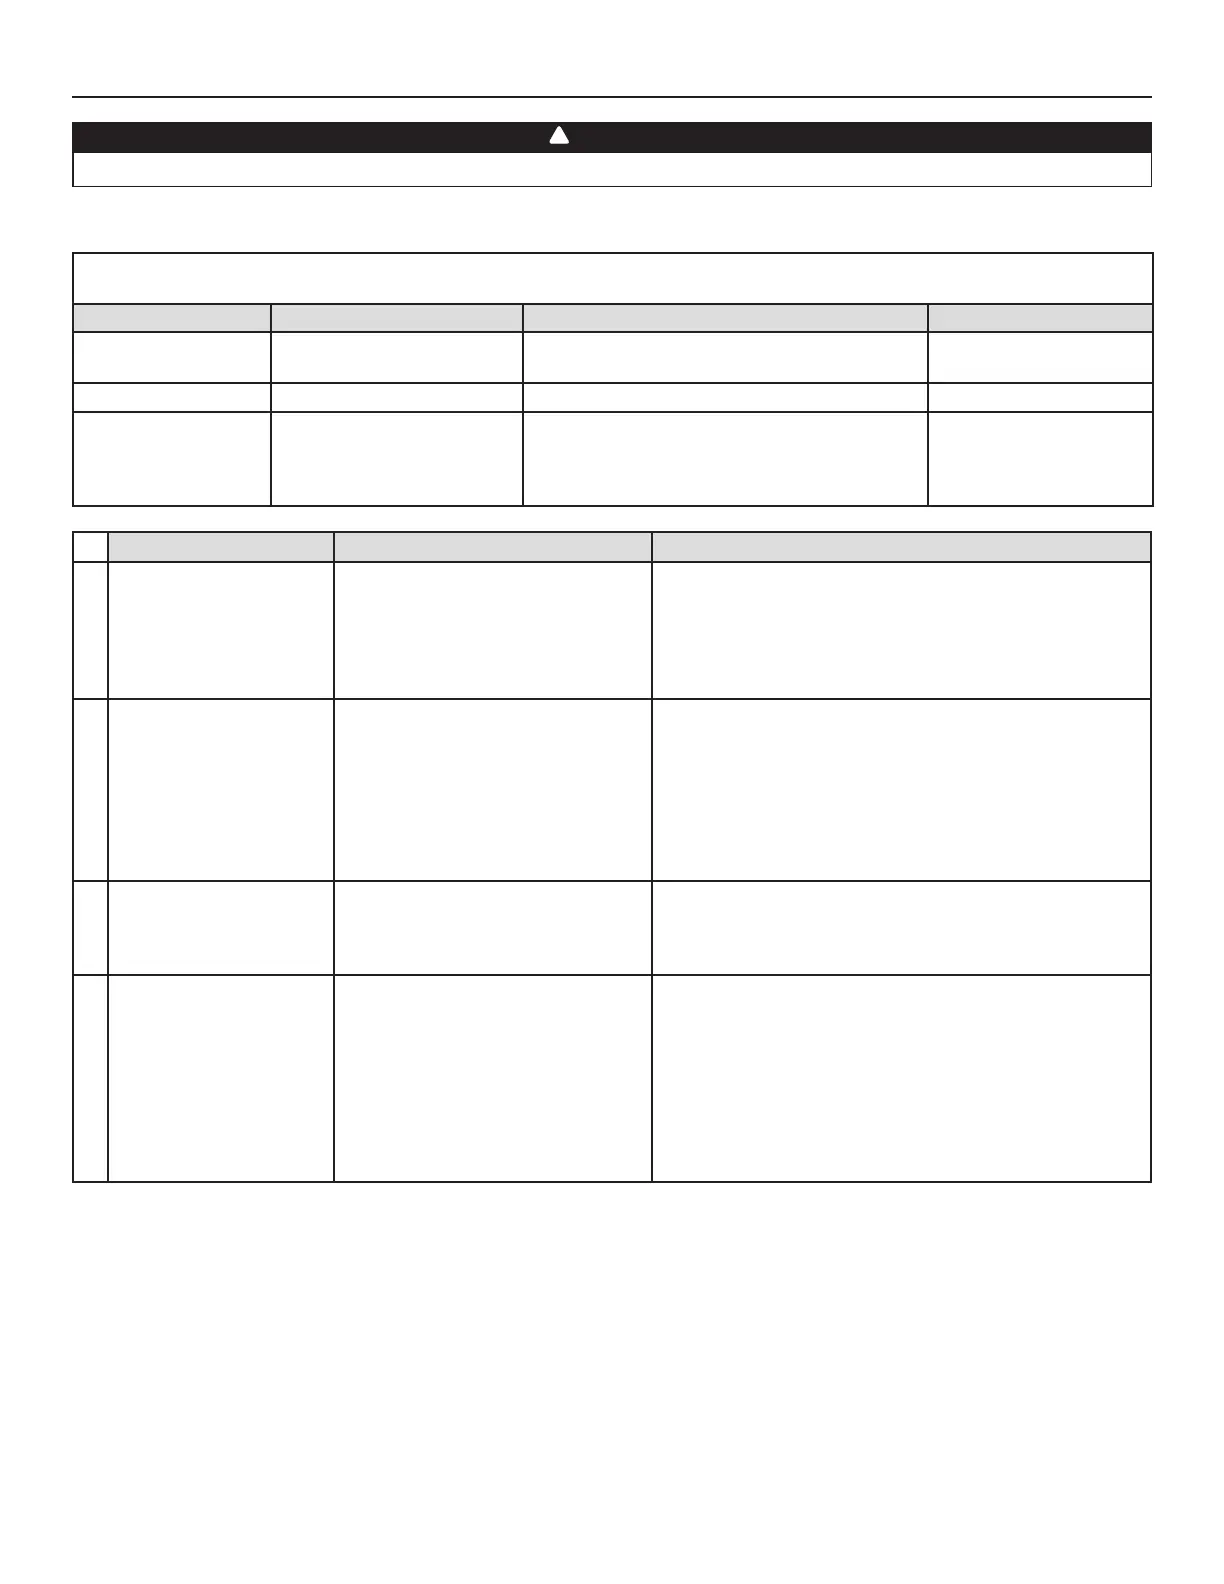
11. TROUBLESHOOTING
If the unit does not work properly, reset the unit by unplugging it for one minute and then replug it. If it still not working properly,
refer to table below.
If the integrated control LED of the unit is flashing, this means the unit sensors detected a problem. See the table below to know where
the problem occurs on the unit.
LED
SIGNAL ERROR TYPE ACTION UNIT STATUS
LED flashes GREEN Thermistor error. Replace the entire port assembly
(fresh air from outdoors port).
Unit works but will defrost
frequently.
LED flashes AMBER Damper error Go to point 7. Unit does not work.
LED flashes RED • The door is open and
the unit is not unplugged.
• Exhaust motor error.
• Put a magnet over the door switch or close the
door and press once on the integrated control
push button to reset the unit.
• Go to point 8.
Unit does not work.
PROBLEMS POSSIBLE CAUSES YOU SOULD TRY THIS
1
The error code E1 is
displayed on VT8W or
VT7W wall control screen.
• Unit not compatible with control.
• The wires may be in reverse position.
• The wires may be misconnected.
• The wires may be broken.
• Check table on page 2 for control compatibility.
• Ensure that the color coded wires have been connected to
their appropriate places.
• Ensure the wires are correctly connected.
• Inspect every wire and replace any that is damaged. If wires
are hidden into walls, test the control using a shorter wire.
2
There is no outdoor
temperature displayed on
VT8W wall control screen
__.
• RED wire in control cable damaged
or misconnected.
NOTE: At its very start-up or after a power failure, it takes
some minutes before the outdoor temperature appears
on screen. The delay duration depends on which
operation mode the wall control is set. The shortest
delay is obtained when the wall control is set on MIN
or MAX in VENT Mode.
• Ensure the RED wire is not damaged and properly connected.
3
VT8W or VT7W wall
control screen alternates
between normal display
and E3.
• The VT8W or VT7W wall control
may be defective.
• Replace the VT8W or VT7W wall control.
4
The wall control
does not work.
• Unit integrated control set to low or
high speed (AMBER or GREEN
continuous LED).
• Unit not compatible with control.
• The wires may be in reverse position.
• The wires may be misconnected.
• The wires may be broken.
• Defective wall control.
• Press on the integrated push button until the LED turns off.
• Check table on page 2 for control compatibility.
• Ensure that the color coded wires have been connected to
their appropriate places.
• Ensure the wires are correctly connected.
• Inspect every wire and replace any that are damaged.
• Replace the wall control.
WARNING
Risk of electric shocks. Electronic board connections must be checked by qualified personnel only.
!
Bekijk gratis de handleiding van Broan ERV120T, stel vragen en lees de antwoorden op veelvoorkomende problemen, of gebruik onze assistent om sneller informatie in de handleiding te vinden of uitleg te krijgen over specifieke functies.
Productinformatie
| Merk | Broan |
| Model | ERV120T |
| Categorie | Airco |
| Taal | Nederlands |
| Grootte | 6382 MB |


