Brighter X-STROBE IP handleiding
Handleiding
Je bekijkt pagina 4 van 29
BRIGHTER LIGHTING SP. Z.O.O.
ul. Warszawska 111
32-087 Bibice
POLAND
NIP: 9442248196
REGON: 361197164
Page 4 of 29
• A detailed electric check by an approved electrical engineer every three months, to make sure the circuit
contacts are in good condition and prevent overheating
• Be sure all screws and fasteners are securely tightened at all times. Loose screws may fall out during normal
operation, resulting in damage or injury as larger parts could fall
• Check for any deformations on the housing, color lenses, rigging hardware, and rigging points (ceiling,
suspension, trussing). Deformations in the housing could allow for dust to enter into the fixture. Damaged rigging
points or unsecured rigging could cause the fixture to fall and seriously injure a person(s)
• Electric power supply cables must not show any damage, material fatigue or sediments. NEVER remove the
ground prong from the power cable
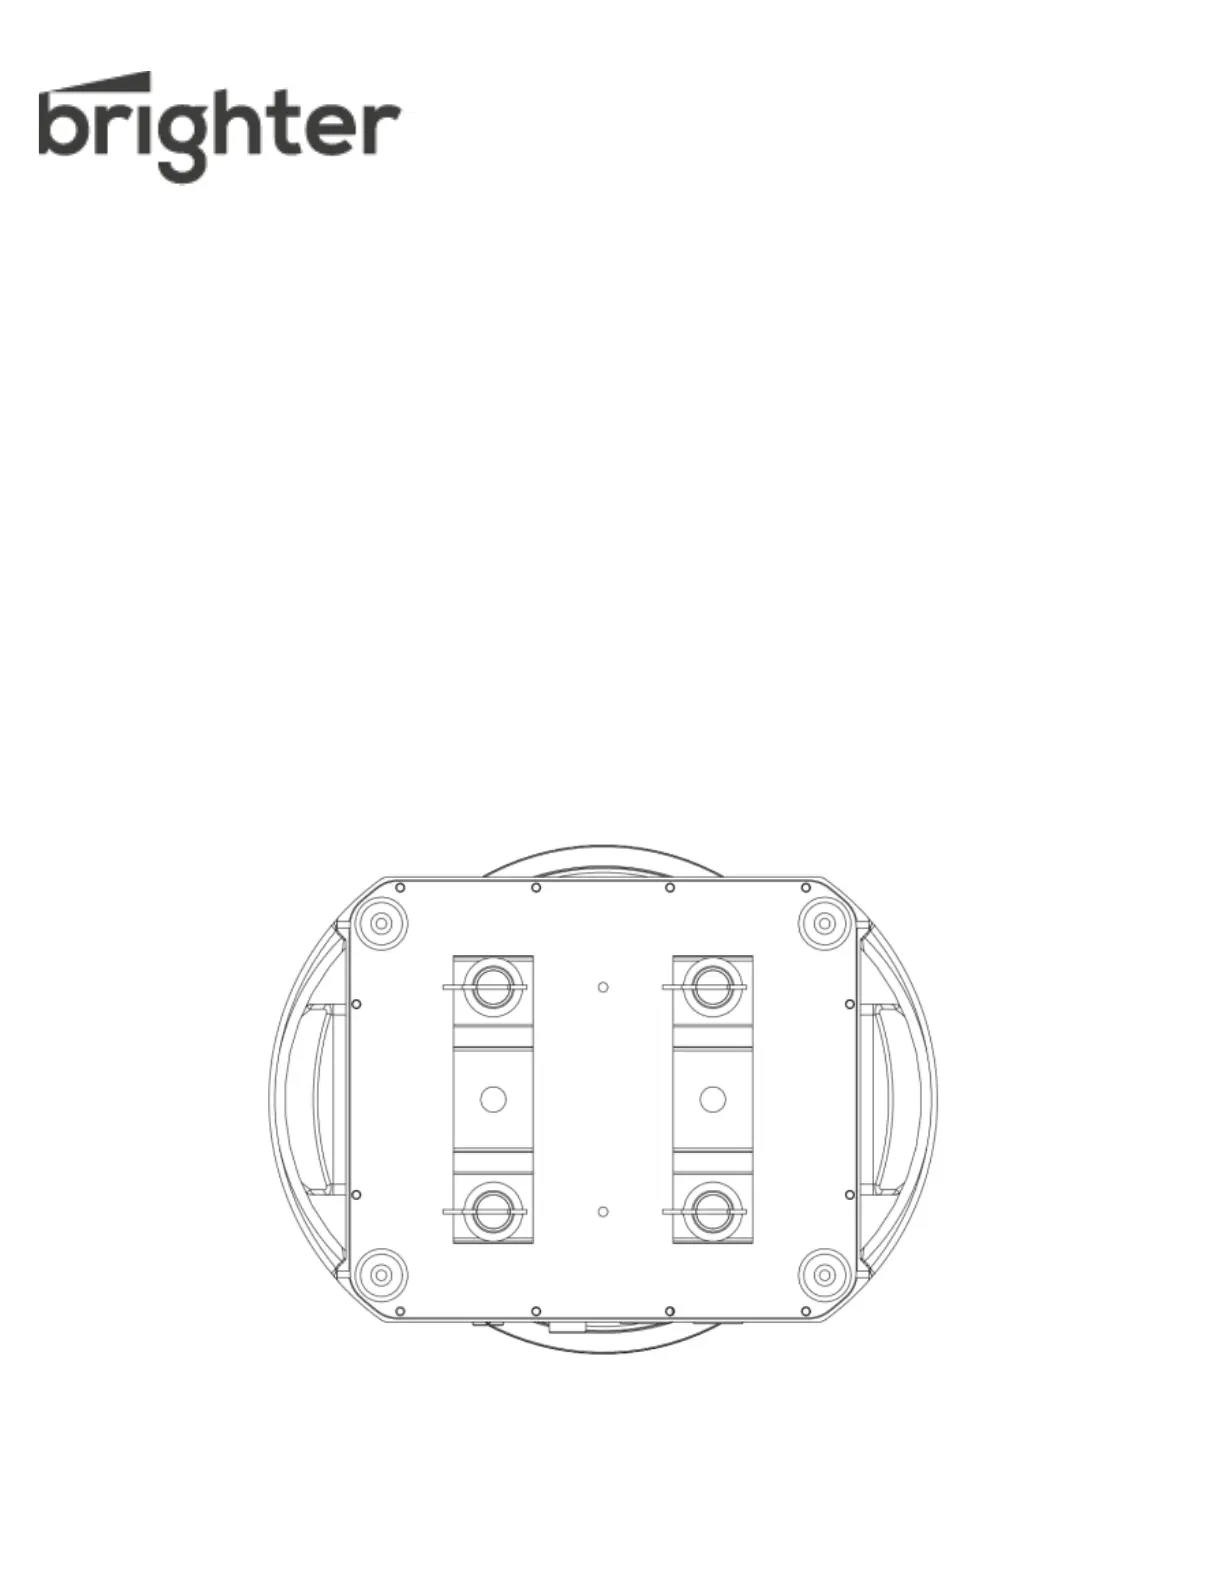
4.INSTALLATION GUIDELINES
OMEGA BRACKET INSTALLATION
Insert the Omega Brackets into the matching holes on the bottom of the fixture. Secure the Omega Brackets
to the fixture by turning each quick-lock fastener ¼ turn clockwise . Always check to make sure that each
fastener is completely locked. Omega brackets can be installed into the underside of the fixture’s base as
illustrated below.
Bekijk gratis de handleiding van Brighter X-STROBE IP, stel vragen en lees de antwoorden op veelvoorkomende problemen, of gebruik onze assistent om sneller informatie in de handleiding te vinden of uitleg te krijgen over specifieke functies.
Productinformatie
| Merk | Brighter |
| Model | X-STROBE IP |
| Categorie | Niet gecategoriseerd |
| Taal | Nederlands |
| Grootte | 7129 MB |

