Handleiding
Je bekijkt pagina 10 van 48
en Installation and connection
10
¡ If required, the mains cable must only be replaced
by a qualified electrician. A replacement mains
cable is available from the after-sales service.
¡ Do not use any multiple plugs or multi-connectors
and extension cords.
¡ The earthing system is correctly installed.
¡ If using a residual current device, only use one that
bears the mark . The presence of this mark is the
only way to be sure that it fulfils all the applicable
regulations.
¡ The mains cable does not come into contact with
heat sources.
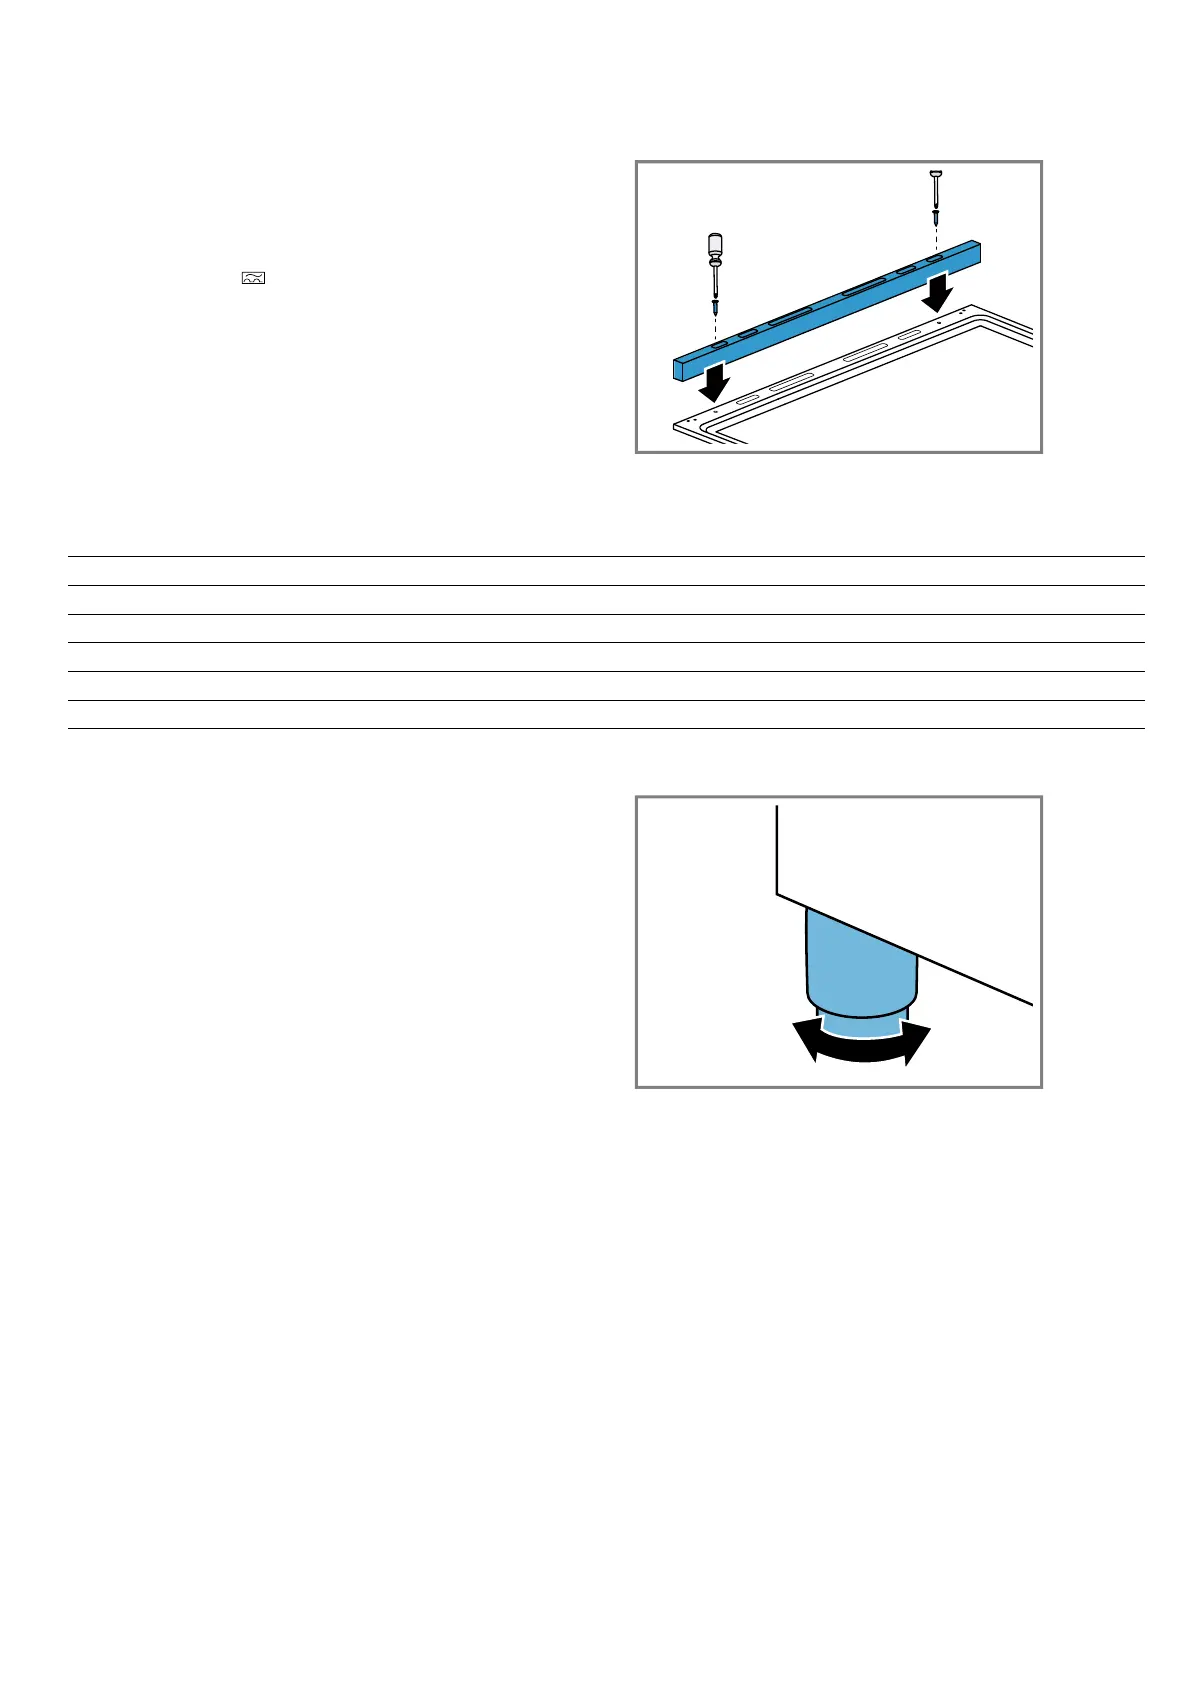
4.4 Splatter guard
¡ Position the holes and insert the splatter guard.
¡ Insert and tighten the screws.
4.5 Appliance categories
Country Category P (mbar)
RU, BY, KZ, AM, KG II 2H3B/P 2000 тта–3000 тта
UA II 2H3B/P 20 - 28 - 30
MA I 3+ 28 - 30/37
AE, LB, JO II 2H3B/P 20 - 28 - 30
EG II 2H3+ 20 - 28 - 30/37
4.6 Setting up the appliance
Place the appliance on a smooth surface.
Never set up the appliance behind a decorative door or
the door of a kitchen unit. There is a risk of overheat-
ing.
¡ Install the appliance in accordance with the spe-
cified dimensions.
¡ The distance between the top edge of the cooker
and the bottom edge of the extractor hood must
meet the requirements of the extractor hood manu-
facturer.
¡ Ensure that the appliance is not moved again after it
is set up.
¡ In particular, the distance from the high-output
burner or wok burner to the fronts of adjacent units
or from the wall must be at least 50 mm.
Positioning and levelling
Positioning the appliance
When installing the appliance, ensure that the final loc-
ation has sufficient space that the appliance can be
pulled out for cleaning and maintenance work.
The ground must be hard and stable. The wall directly
behind the appliance must be made of non-flammable
material, such as tiles.
If you have to pull the appliance while positioning it, en-
sure that the adjustable feet are screwed in tightly.
Aligning the appliance
Aligning the appliance
Turn the adjustable feet to align the appliance
Note:
¡ Do not align the appliance until all other work has
been completed.
¡ You can use the adjustable feet to increase the
height of the appliance by up to 45 mm.
¡ You must check the alignment of the appliance
once it has been installed in the intended location.
Adjacent units
Any adjacent units must not be made of flammable ma-
terials.
¡ The fronts of any adjacent units must be heat-resist-
ant up to at least 90 °C.
¡ If the appliance is installed very close to other units,
the minimum clearances specified in the figure must
be complied with.
Bekijk gratis de handleiding van Bosch HIZ5G7Q59M, stel vragen en lees de antwoorden op veelvoorkomende problemen, of gebruik onze assistent om sneller informatie in de handleiding te vinden of uitleg te krijgen over specifieke functies.
Productinformatie
| Merk | Bosch |
| Model | HIZ5G7Q59M |
| Categorie | Fornuis |
| Taal | Nederlands |
| Grootte | 5964 MB |


