Handleiding
Je bekijkt pagina 20 van 36
en Operating the appliance
20
Using combination mode
Note: The temperature range marked on the selector
for the oven applies only when using conventional
heating. In combination mode, the temperature in the
oven is higher than the temperature that has been set.
Switching on combination mode
1. Open the top cover of the appliance.
2. Open the oven door.
3. Press and hold the selector for the oven to the
ignition position 8.
The oven gas burner ignites. Press and hold the
selector for a few seconds until the flame stabilises
4. Turn the selector for the oven to the required
temperature.
5. Press and hold the selector for the grill and turn it to
the "—" position.
The grill gas burner ignites. Press and hold the
selector for a few seconds until the flame stabilises.
6. Close the oven door carefully.
7. Set the required temperature using the selectors for
the grill and oven.
Caution!
If the grill and oven gas burners are operating at the
same time (combination mode); when cooking with
water, the grill gas burner may go out due to the air
circulation.
Notes
■ If the gas burner does not ignite within 15 seconds,
stop attempting to ignite the flame, open the oven
door and wait for 60 seconds.
■ If the flame inadvertently goes out, turn the selector
to the "Û" position and wait for 60 seconds.
Switching off combination mode
Turn the selector for the grill and oven to Û.
Rotisserie spit
Ro t i s s e r i e spi t
The rotary spit is particularly good for cooking large
roasts, such as rolled roasting joints or poultry. The
meat becomes crispy and brown.
Preparing roasts
To ensure that the roast is well-browned and cooked
evenly, observe the following points:
Skewering and securing the meat to the spit
Place the joint as close as possible to the centre of the
rotary spit.
Use the clamps to secure the joint at both ends. In
doing so, the joint must be at least 10 cm away from
the end of the spit.
You can also truss the joint with string. With poultry,
bind the ends of the wings underneath the back and the
thighs against the body. This prevents them from
overbrowning. Pierce the skin on the underside of the
wings to allow the fat to escape.
Inserting the rotary spit
:Warning – Risk of burns!
Never touch the hot surfaces of the cooking
compartment or the heating elements. Keep children at
a safe distance. Open the appliance door carefully. Hot
steam may escape from the appliance.
:Warning – Caution!
Do not insert the rotary spit without meat.
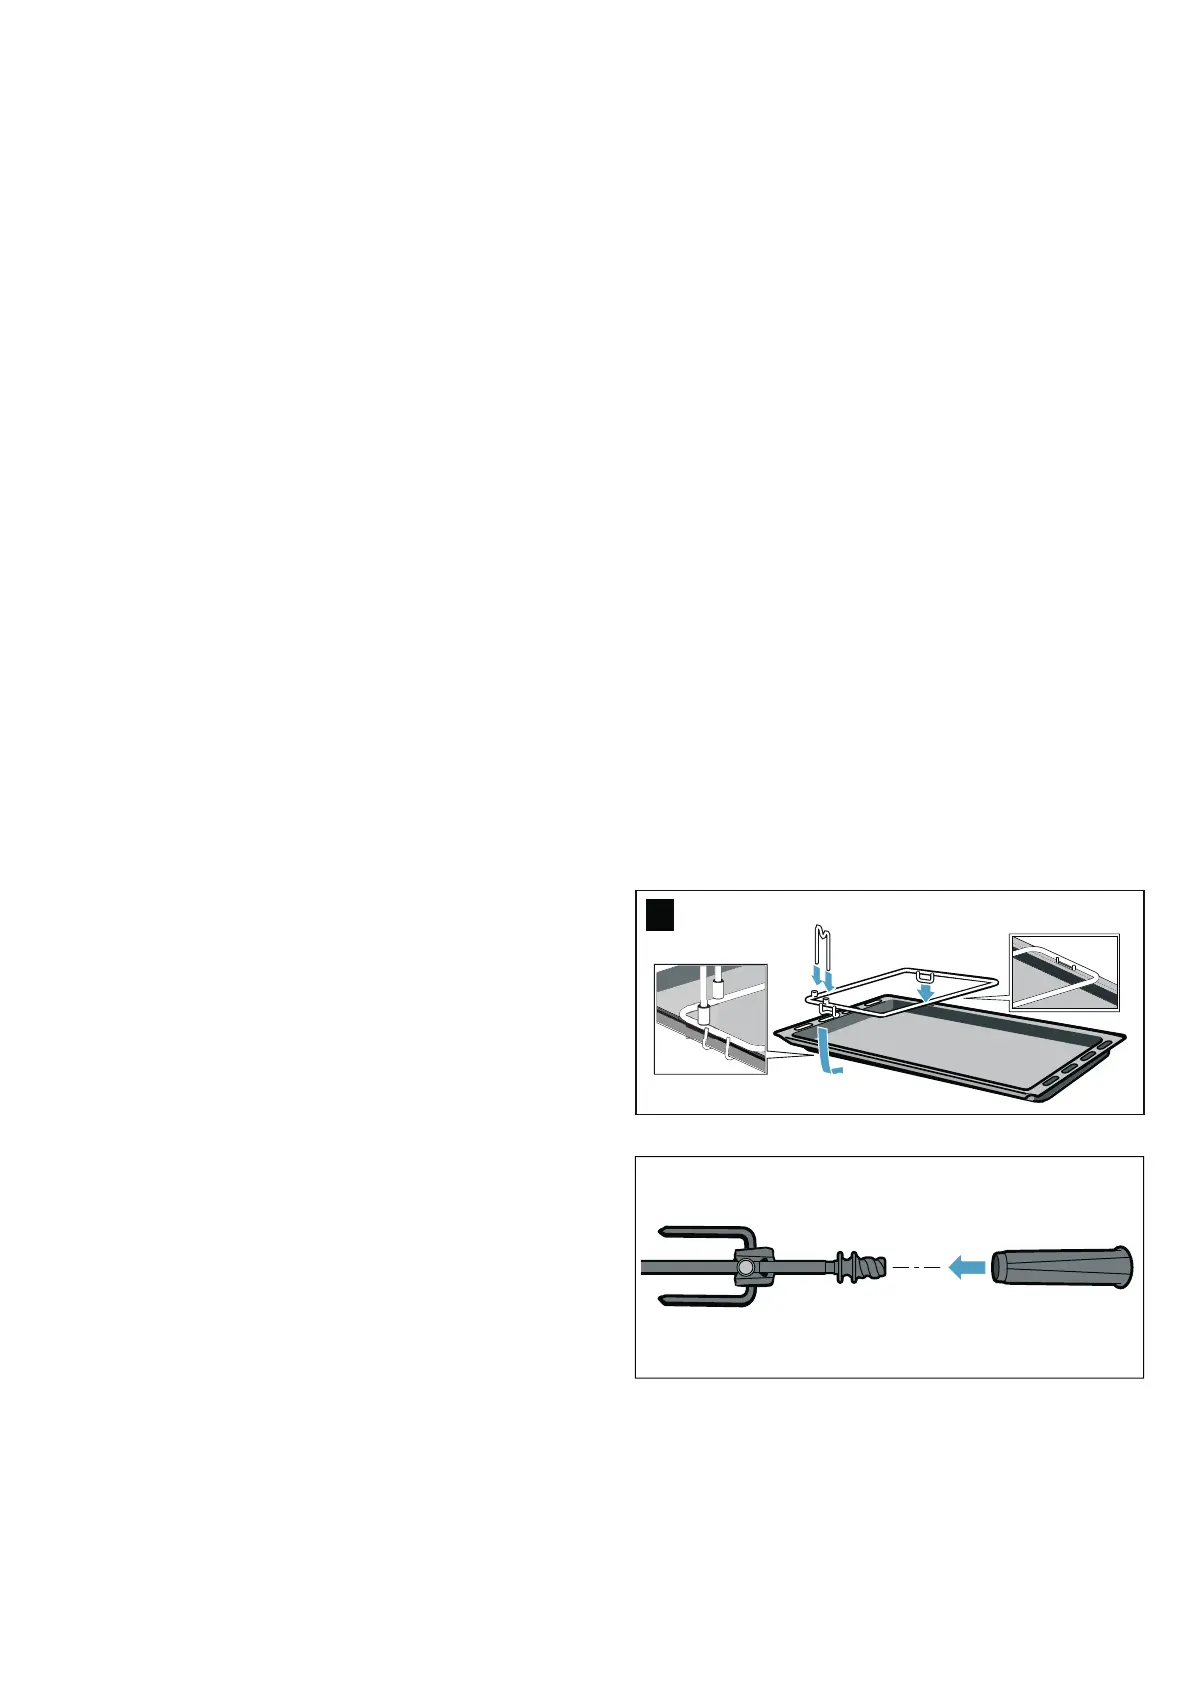
1. Place the rotary spit support on the baking tray. (Fig.
A)
2. Slide the handle onto the rotary spit and screw it on.
3. Slide the baking tray in at shelf position 1.
4. Insert the rotary spit onto the support. There is an
opening in the back oven wall. Insert the rotary spit
here. (Fig. B) Ensure that the rotary spit is inserted
correctly.
$
Bekijk gratis de handleiding van Bosch HGW3ASQ59M, stel vragen en lees de antwoorden op veelvoorkomende problemen, of gebruik onze assistent om sneller informatie in de handleiding te vinden of uitleg te krijgen over specifieke functies.
Productinformatie
| Merk | Bosch |
| Model | HGW3ASQ59M |
| Categorie | Fornuis |
| Taal | Nederlands |
| Grootte | 4881 MB |


