Handleiding
Je bekijkt pagina 8 van 16
8
3LIOC2BO
1. GENERAL
Carefully read the following important information
regarding installation safety and maintenance.
Keep this information booklet accessible for further
consultations.
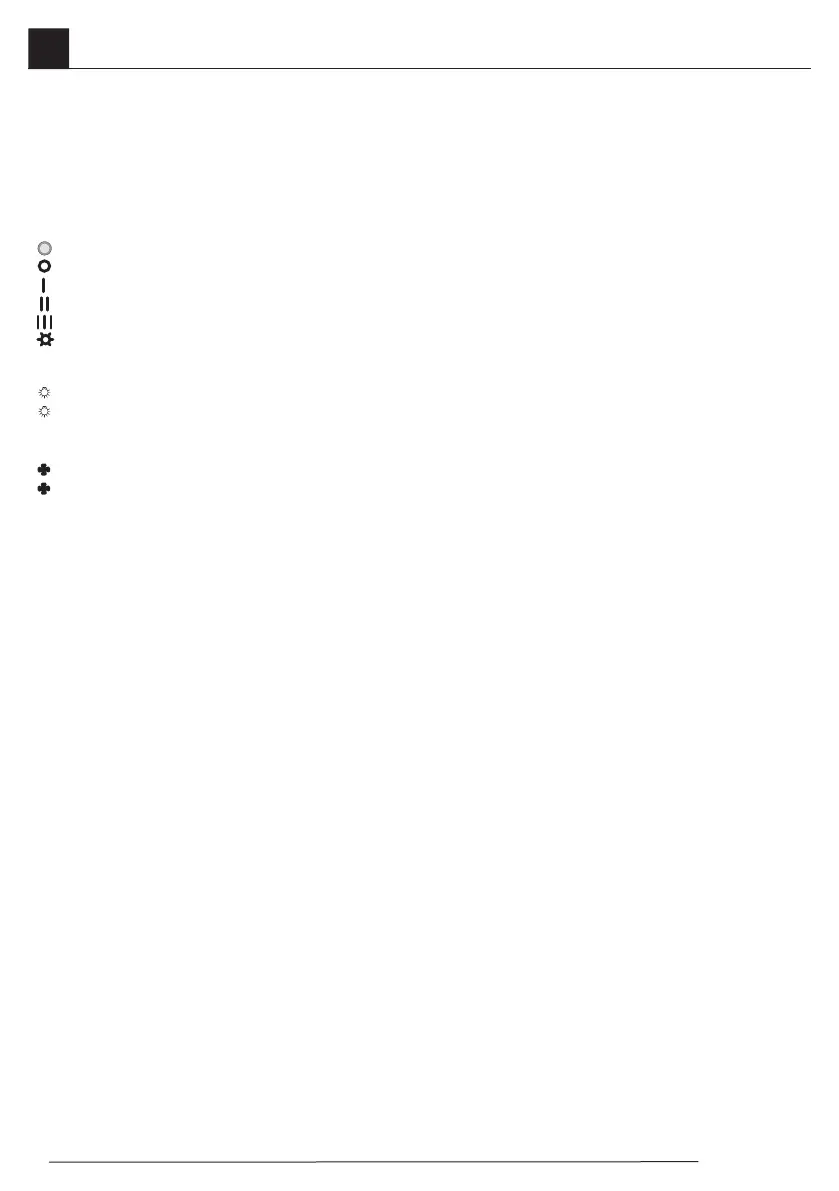
CONTROL PANEL (Fig.2)
TYPE “A”
- Pilot light
- Fan-off
- First speed (minimum)
- Second speed (medium)
- Third speed (maximum)
- Light ON/OFF
TYPE “B”
0 - Light OFF
1 - Light ON
3 - Third speed (maximum)
2 - Second speed (medium)
1 - First speed (minimum)
0 - Fan-off
2. INSTALLATION INSTRUCTIONS
This hood has been arranged to be installed above a
cook top. It can be used in 2 ways:
• EXHAUST MODE:thekitchenvapoursarepuriedby
themetalanti-greaseltersandcarriedoutsidethrough
a ducting system. (Fig. 3A; 3B)
• RECIRCULATING MODE: the kitchen vapours are
puriedbythemetalanti-greaseltersandanactivated
carbonlter(soldseparately),thenconveyedbackinto
the kitchen. (Fig. 3C)
We suggest to have installation carried out by
qualified personnel, in compliance with all the
current regulations and in particular with the ones
concerning air exhaust and electrical connection.
The manufacturer cannot be held liable for damages
caused by improper installation or if it has not been
carried out according to the state-of-the-art.
2.1 ELECTRIC CONNECTION
The appliance has been manufactured as a class II,
therefore no earth cable is necessary.
The connection to the mains is carried out as follows:
BROWN = L line
BLUE = N neutral
If not provided, connect a plug for the electrical load
indicated on the description label. Where a plug is
provided, the cooker hood must be installed in order
that the plug is easily accessible.
An omnipolar switch with a minimum aperture of
3 mm between contacts, in line with the electrical
load and local standards, must be placed between
the appliance and the network in the case of direct
connection to the electrical network.
2.2. INSTALLATION
The appliance must be installed at a minimum height of
650 mm from an electric cooker stove, or 750 mm from
gas or combined cooker stoves. (Fig.1)
If a connection tube composed of two parts is used, the
upper part must be placed outside the lower part.
Do not connect the cooker hood exhaust to the same
conductor used to circulate hot air or for evacuating
fumes from other appliances generated by other than
an electrical source.
2.3. MOUNTING THE COOKER HOOD TO THE WALL
Drill holes A-B-C according to indications quoted in
(g.1).
Use screws and screw anchors suitable for wall (e.g.
reinforced cement, plasterboard) for the mounting of
the cooker hood. Where screws and screw anchors
are supplied ensure that they are suitable for the type
of wall where the cooker hood is to be mounted.
AfxthebracketZ to the wall via the drill holes C
Hang the cooker hood on the wall using the drill holes
A.
Fasten the cooker hood using the fastening drill holes
B.
2.4. EXHAUST VERSION
ConnecttheangeY to the discharge opening with
a connecting tube Fig.5 (do not carry out for lter
version) .
Thread the upper connector E to the inside of the
lower connector F; hang the two connectors inserting
them vertically on the cooker hood, unthread the
upper connector E towards the top, locking it in with
the appropriate screws in the drill holes G of the
bracket Z(g.7)previouslyafxedtothewallviathe
drill holes C(g.1).
2.5 RE-CIRCULATING VERSION
In order to transform your cooker hood from the
exhaust version to the re-circulating version, ask your
local retailer for active carbon lters and then carry
out the following instructions.
Theltersmustbeapplied tothesuctionkitlocated
inside the cooker hood (g. 6). The air is replaced
in the environment via the eyelets impressed on the
connector E.
2.6. OPERATING CHECKS
Check lights and motor start-up on all speeds.
USE AND MAINTENANCE
It is recommended to switch on the appliance before
cooking. It is also recommended to leave the appliance
in operation for 10 minutes after cooking is terminated
in order to completely eliminate cooking vapours and
EN Use and maintenance instructions
Bekijk gratis de handleiding van Bompani BOCP424/E, stel vragen en lees de antwoorden op veelvoorkomende problemen, of gebruik onze assistent om sneller informatie in de handleiding te vinden of uitleg te krijgen over specifieke functies.
Productinformatie
| Merk | Bompani |
| Model | BOCP424/E |
| Categorie | Afzuigkap |
| Taal | Nederlands |
| Grootte | 1752 MB |
Caratteristiche Prodotto
| Soort bediening | Knoppen |
| Kleur van het product | Haver |
| Ingebouwd display | Nee |
| Breedte | 900 mm |
| Diepte | 460 mm |