Handleiding
Je bekijkt pagina 9 van 20
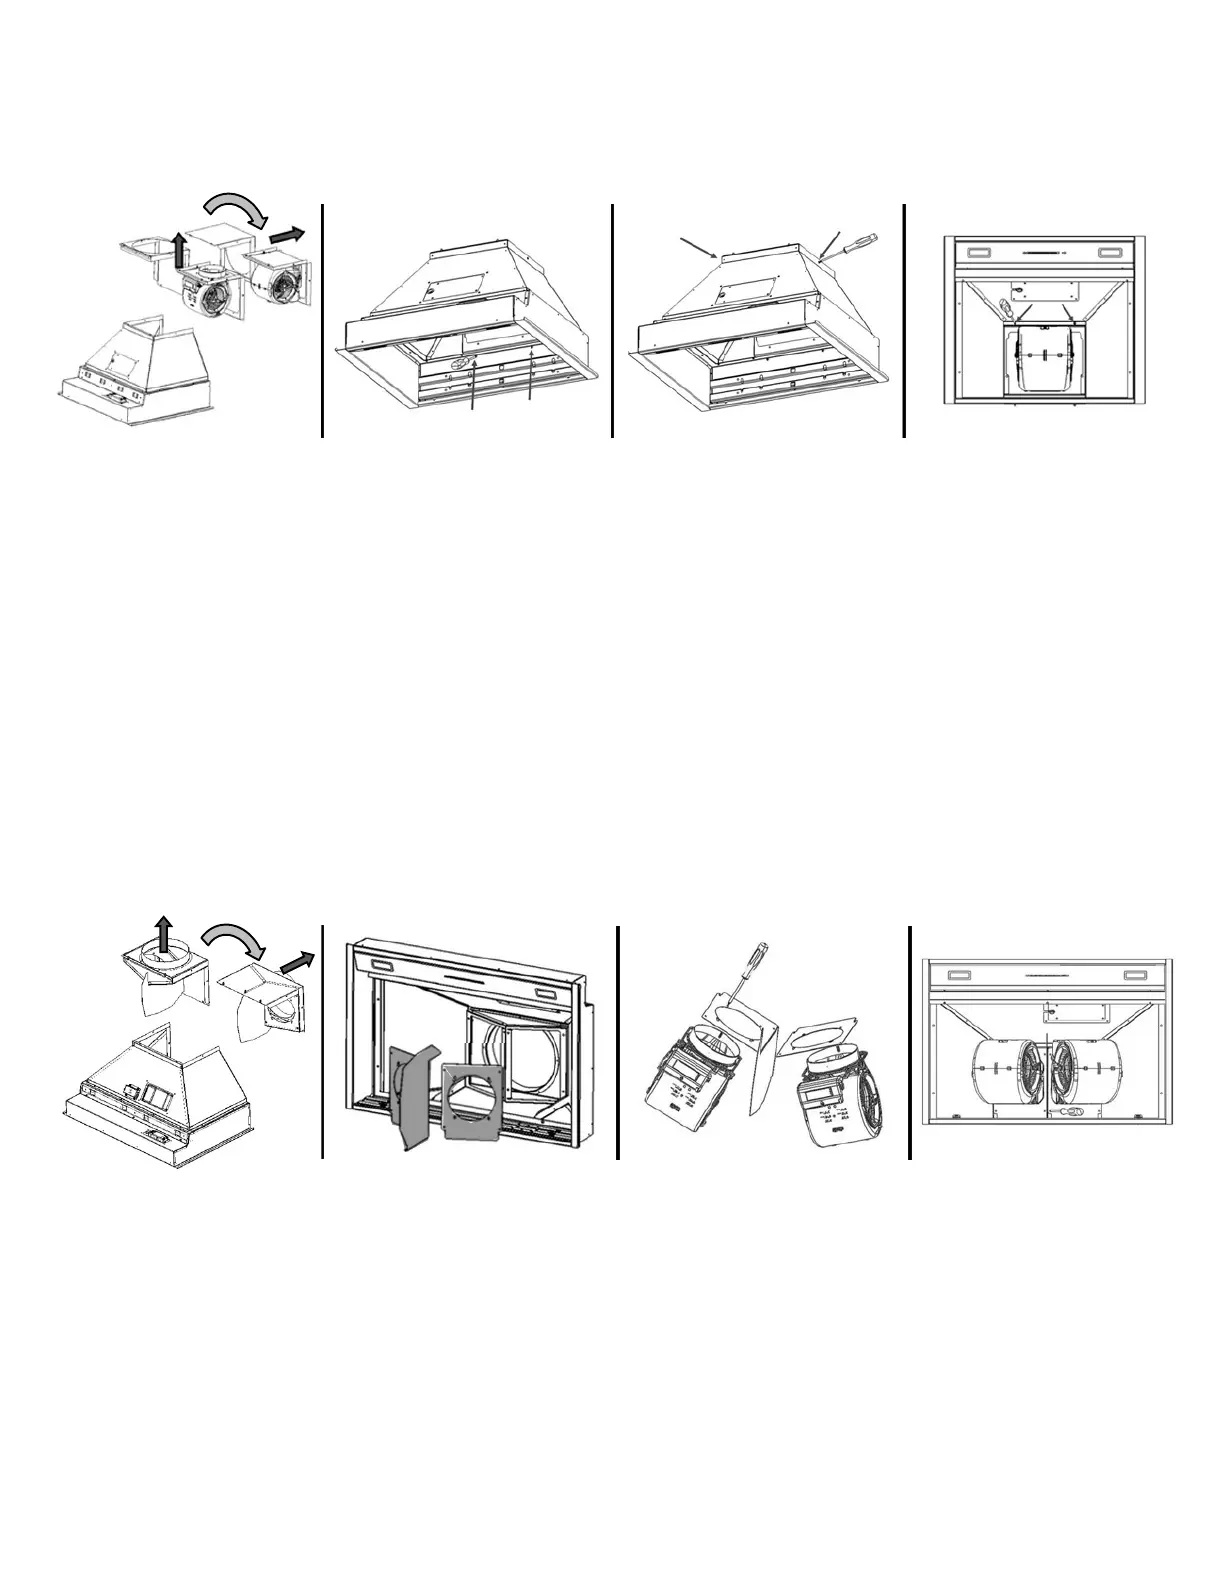
Step 4-1: Installing an In-hood 600 CFM Blower. Duct connection detail: 6” round
Recommended duct size: 6” – 8”
Figure A:
Set Discharge Direction,
Attach Blower
Unscrew blower plate and
set to top or rear discharge if
not already set correctly.
Screw blower to plate with
included hardware
Figure B:
Connect Plate Internally
Re-install all mounting
screws inside of liner.
Figure C:
Connect Plate Externally
Re-install all mounting
screws outside of liner.
Figure D:
Connect Power Supply
Plug 6-pin connector from
one of the control harnesses
to blower. Unused harness
may be tied securely to
other harness to prevent
vibration
Step 4-2: Installing an In-hood 1200 CFM Blower kit. Duct connection detail: 10” round
Required duct size: 10”
INSTALLATION INSTRUCTIONS
Figure A:
Set Discharge Direction.
If not already set correctly,
remove fasteners for top/rear
bracket and rotate to set to
top or rear discharge.
Reinstall all fasteners.
Figure B:
Remove Inner Plates
Remove all screws
securing blower mounting
plates and pull plates from
liner.
Figure C:
Connect Blowers
Install dual 600 CFM
blowers onto mounting
plates with included
hardware.
Figure D:
Install Blowers in Hood
and Connect to Power.
Reinstall blowers and
mounting plates to liner.
Plug 6-pin connectors from
control harness to each
blower.
9
Bekijk gratis de handleiding van BlueStar WR066MLPLTDC, stel vragen en lees de antwoorden op veelvoorkomende problemen, of gebruik onze assistent om sneller informatie in de handleiding te vinden of uitleg te krijgen over specifieke functies.
Productinformatie
| Merk | BlueStar |
| Model | WR066MLPLTDC |
| Categorie | Afzuigkap |
| Taal | Nederlands |
| Grootte | 3523 MB |


