Berner Architectural Elite 8 handleiding
Handleiding
Je bekijkt pagina 5 van 16
-5-
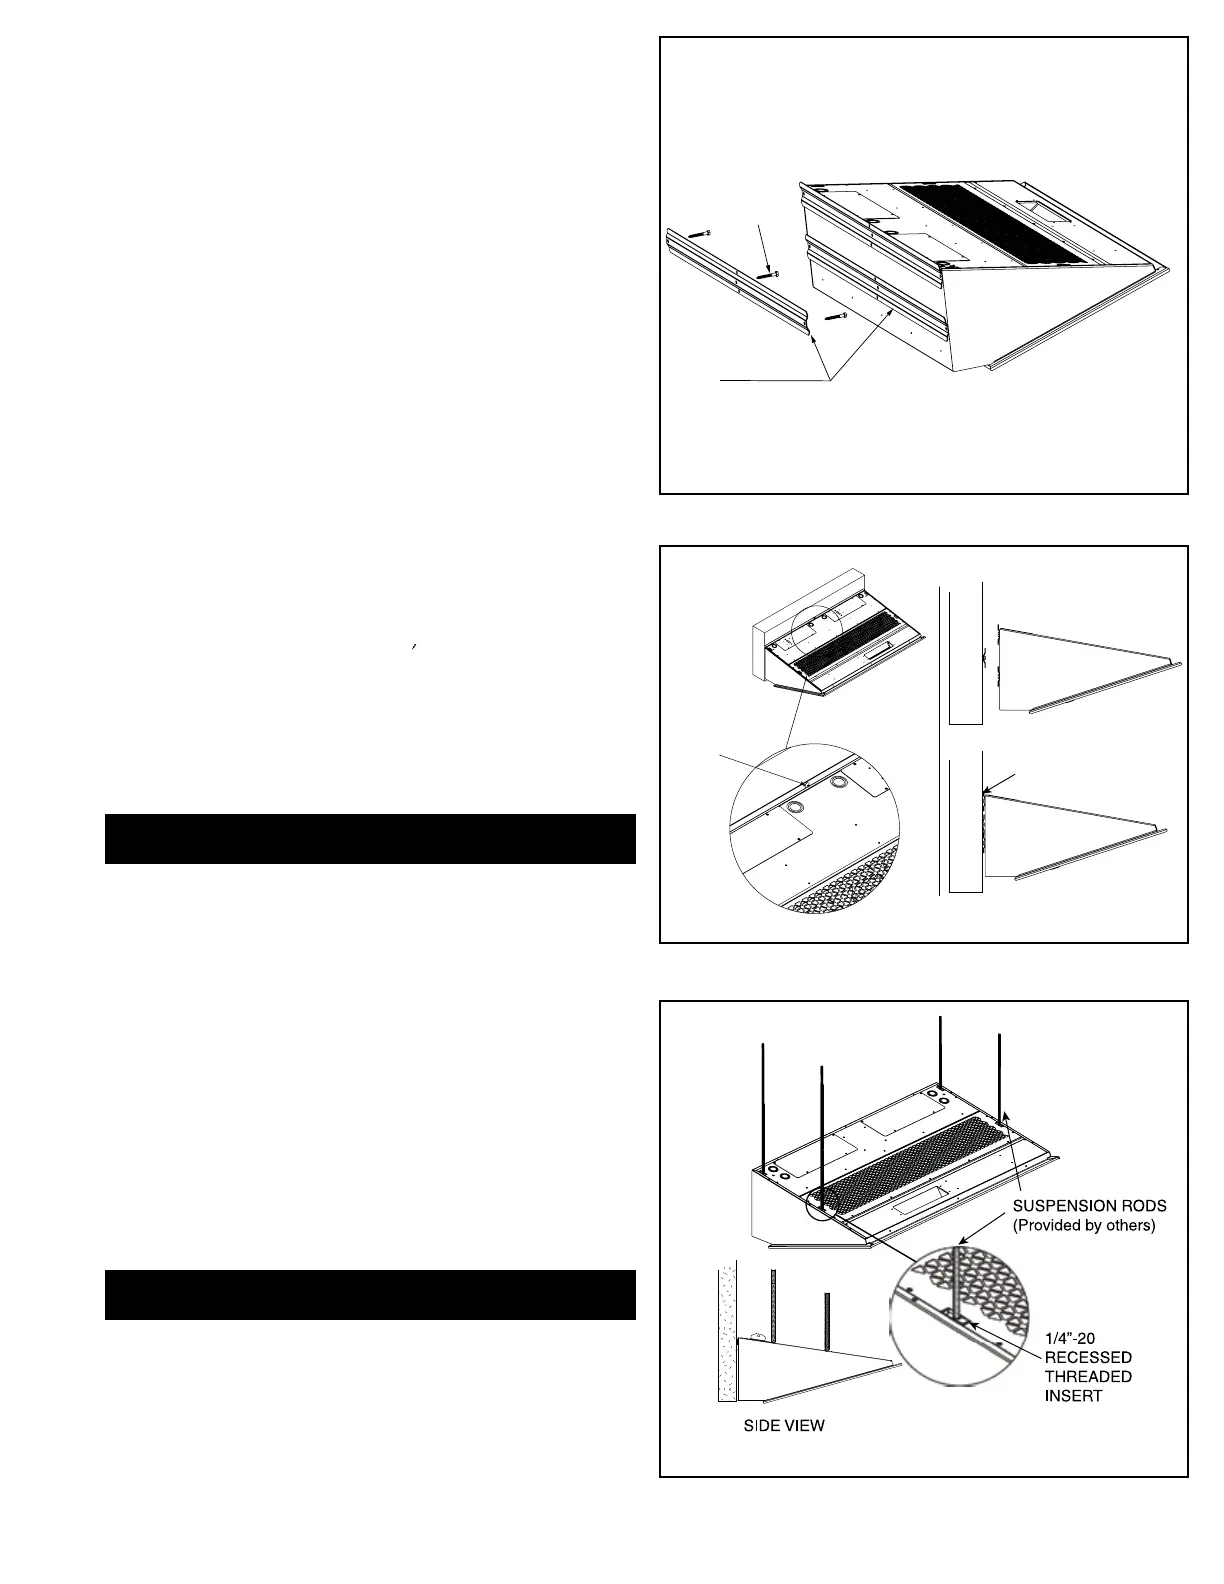
Figure 6 - Suspended Mounting
For units over 120", there are six wall mounting
brackets (four are pre-attached to the air curtain,
and two are loose in the carton). NOTE: The
wall mounting brackets are identical.
2. The mounting hardware (supplied by others) must
be capable of supporting a minimum of three times
the net weight of the Air Curtain. See Table 1.
B. MOUNTING WALL BRACKETS
1. Position one wall mounting bracket over the door
opening as shown in Figure 3. The bracket should be
centered over the door opening. NOTE: For units
longer than 120”, install two wall mounting brackets
in tandem across the door opening.
2. Using minimum ¼" fasteners (supplied by others),
secure the wall mounting bracket to the supporting
structure.
3. NOTE: It is acceptable to drill holes through the
bracket mounted to the wall to allow fasteners to
hit a wall stud. Fasteners must be placed within 8" of
the ends of the air curtain cabinet.
C. ATTACHING THE AIR CURTAIN TO THE WALL
MOUNTING BRACKETS
1. Raise the unit over the door (air discharge nozzle
facing down) and onto the wall mounted brackets.
See Figure 5.
2. Position the unit against the wall, slide it down so
the top wall mounting bracket (attached to the unit)
interlocks with the wall mounting bracket that is
attached to the wall. Add one locking screw in the
top middle of the wall mounting bracket.
See Figure 5.
3. Proceed to Section V - ELECTRICAL CONNECTIONS
NOTE: if the unit was ordered with a decorative rear
cover, the air curtain will arrive with the cover already
installed, and the wall mounting brackets will not be included in
the shipment. Contact Berner if they are required.
A. For top mounting using suspension rods, four (4) factory
installed 1/4"-20 threaded inserts are located on the top of
the unit. See Figure 6.
B. Install 1/4"-20 threaded rods, or other suitable hardware at
a location sucient to support the air curtain. The
mounting hardware (supplied by others) must be capable
of supporting a minimum of three times the net weight of
the Air Curtain. See Weight Chart, Table 1.
C. Attach 1/4"-20 threaded rods, or other suitable hardware
to the top mounted threaded inserts. Secure threaded rods
with locking nuts.
D. Proceed to Section V – ELECTRICAL CONNECTIONS
All electrical wiring and connections MUST be performed by qualified
personnel in accordance with the latest edition of the National
Electrical Code ANSI/NFPA No. 70 or, in Canada, the Canadian Electrical
Code, Part 1-C.S.A. Standard C22.1, Regional National Electrical Codes,
and local codes and regulations.
MAKE SURE THE CORRECT VOLTAGE AS MARKED
ON THE UNIT IS USED.
Figure 4 - Wall Mounting Preparation
Figure 5 - Wall Mounting Installation
IV. SUSPENDED MOUNTING
V. ELECTRICAL CONNECTIONS
LOCKING
SCREW
LOCKING
SCREW
D
WALL
MOUNTING
BRACKETS
1/4” -20 BOLTS
Bekijk gratis de handleiding van Berner Architectural Elite 8, stel vragen en lees de antwoorden op veelvoorkomende problemen, of gebruik onze assistent om sneller informatie in de handleiding te vinden of uitleg te krijgen over specifieke functies.
Productinformatie
| Merk | Berner |
| Model | Architectural Elite 8 |
| Categorie | Niet gecategoriseerd |
| Taal | Nederlands |
| Grootte | 3406 MB |


