Barazza 1DSEC1 handleiding
Handleiding
Je bekijkt pagina 10 van 32
Electric connection
All models are preset to operate at 220-240V/50 Hz.
See to it that the feeding tension corresponds to the said value.
Make sure that a proper socket is installed under the sink. If not, fit it up.
HOW TO FIT THE PNEUMATIC SWITCH KIT
The kit consists of:
• One (chromium-plated) folded switch
• One angular metal bracket
• One meter long PVC connecting tube
How to fit the switch:
1.
Either make a 35mm diameter hole on
the
top
of
the sink or fix t
he bracket
by
means of the screws in the proper position.
2. Unscrew the fastening ring nut of the folded switch.
3. Insert the switch into the hole or the bracket. Fit the gasket
from underneath and fasten it by screwing again the plastic
ring nut.
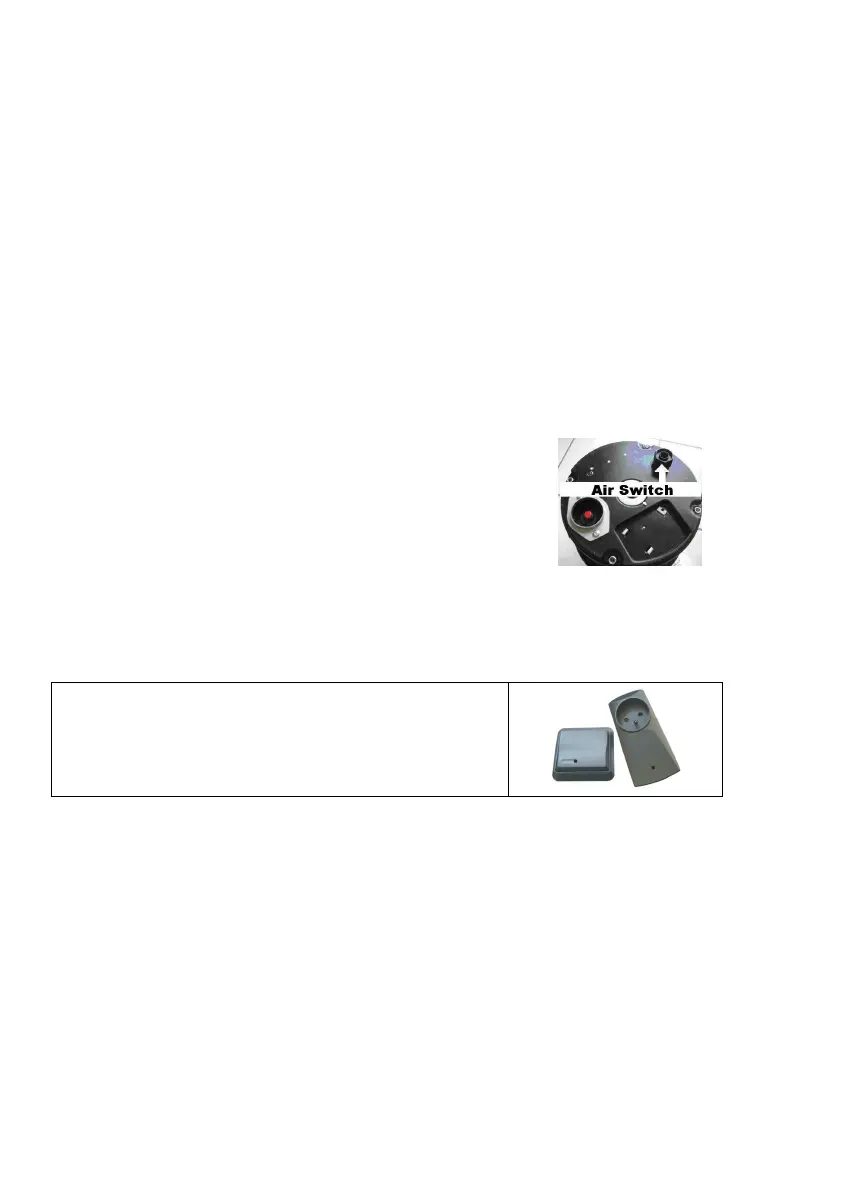
4. Insert one end of the PVC connecting tube into the beak of
the folded switch and connect the other end to the beak of
the air switch placed on the base of the disposer (see the
side picture) after having unscrewed its guard nut. Finally
screw again the guard nut.
The disposer is now ready to be used.
Press only once the folded switch to carry out the switching on and the turning off.
It is alternatively possible to install one REMOTE CONTROL
Before carrying out the connection make sure that:
• The feeeding plant is provided with an efficient earth connection as per the rules and the
provisions of the law in force.
• The socket and the switch being utilized can be easily reached by the installed appliance. See to
it they cannot be reached by children.
•
Into the electric plant there is one differential switch having a nominal value of minale
10A/0.03A to prevent any indirect contact (automatic circuit breaker).
IN CASE OF NON COMPLIANCE WITH THE ACCIDENT PREVENTION RULES WE WOULD DECLINE ANY
RESPONSIBILITY
Pag. 10
Fig. G
MODE D’EMPLOI :
1. Détacher le bouchon.
2. Laisser couler un abondant jet d’eau froide et
allumer le dissipateur. (Fig. G-H)
3. Introduire les restes alimentaires dans la
chambre de broyage. (Fig. I L)
4. Laisser fonctionner le dispositif quelques
secondes à vide après le broyage.
5. Éteindre le broyeur et laisser couler l’eau
encore quelques secondes. (Fig. M-N)
Fig. H
Fig. I
Fig. L
Fig. M
ATTENTION
:
• S’assurer que l’installation de l’appareil soit
autorisée par les autorités compétentes.
• Assurez vous que le bouton de réarmement
reste accessible lors de l’installation du
broyeur.
• Utiliser le broyeur seulement pour les restes
alimentaires.
• Ne pas utiliser l’appareil pour traiter les
matériaux durs comme le verre et le métal.
• Éteindre l’appareil ou enlever la fiche de la
prise avant de chercher à débloquer un rotor
bloqué en se servant d’un ustensile.
• Utiliser seulement de l’eau froide durant
l’emploi du broyeur.
NE PAS METTRE :
• Des solutions chimiques pour le nettoyage
de la décharge.
• D’excessives quantités de graisse et d’
huile.
• Des matières plastiques
• Feuilles d’artichaut ou d’ananas,
asperges, céleri, viande crue ou eau
de oulet cru.
• Les résidus filamenteux doivent être
réalablement déchiquetés et
introduits progressivement ensemble
avec un mélange homogène de
déchets alimentaire.
Autrement ils pourraient boucher votre évier !
Fig. N
Pag. 23
Bekijk gratis de handleiding van Barazza 1DSEC1, stel vragen en lees de antwoorden op veelvoorkomende problemen, of gebruik onze assistent om sneller informatie in de handleiding te vinden of uitleg te krijgen over specifieke functies.
Productinformatie
| Merk | Barazza |
| Model | 1DSEC1 |
| Categorie | Niet gecategoriseerd |
| Taal | Nederlands |
| Grootte | 8677 MB |
Caratteristiche Prodotto
| Kleur van het product | Roestvrijstaal |
| Soort | Afvalverwerkingssysteem voor gootstenen |
| Materiaal behuizing | Roestvrijstaal |
| Reset button | Ja |
| Inhoud | - ml |