Baby Trend Smart Steps Trend EZ Bouncer handleiding
Handleiding
Je bekijkt pagina 8 van 14
1211
Copyright © 2023, Baby Trend Inc., All Rights Reserved. Todos los derechos reservados.
Copyright © 2023, Baby Trend Inc., All Rights Reserved. Todos los derechos reservados.
ASSEMBLY ASAMBLEA ASSEMBLY ASAMBLEA
Baery Installaon • Instalación de las Baterias
The music/vibraon unit requires two size C baeries (not included). It is recommended
that you use alkaline baeries for longer baery life.
CAUTION: To prevent battery leaks, which can
burn skin and eyes:
• Remove batteries when storing product for a long time.
• Dispose of used batteries immediately.
• Always replace the entire set of batteries at one time.
• Never mix old and new batteries, or batteries of different
brands or types.
WARNING: Keep batteries out of
children's reach. Old and new batteries should not be
mixed. Alkaline, standard carbon-zinc, and rechargeable
nickel-cadium batteries should not be mixed. Remove
batteries before storing music center for a long period of
time.
La unidad de música/vibración requiere dos pilas tamaño C (no están incluidas). Se
recomienda que use pilas alcalinas para que duren más.
PRECAUCIÓN: Para evitar fugas de la batería,
que pueden quemar la piel y los ojos:
• Retire las pilas cuando guarde el producto durante
mucho tiempo.
• Deseche las baterías usadas inmediatamente.
• Siempre reemplace todo el juego de baterías a la vez.
• Nunca mezcle baterías viejas y nuevas, o baterías de
diferentes marcas o tipos.
ADVERTENCIA: Mantenga las pilas fuera del
alcance de los niños. Las pilas viejas y nuevas no deben
mezclarse. Las pilas alcalinas, estándar de carbón y zinc,
y las recargables de níquel-cadmio no deben mezclarse.
Retire las pilas antes de guardar el centro musical por un
largo período.
INSTALLING THE BATTERIES
INSTALACIÓN DE PILAS
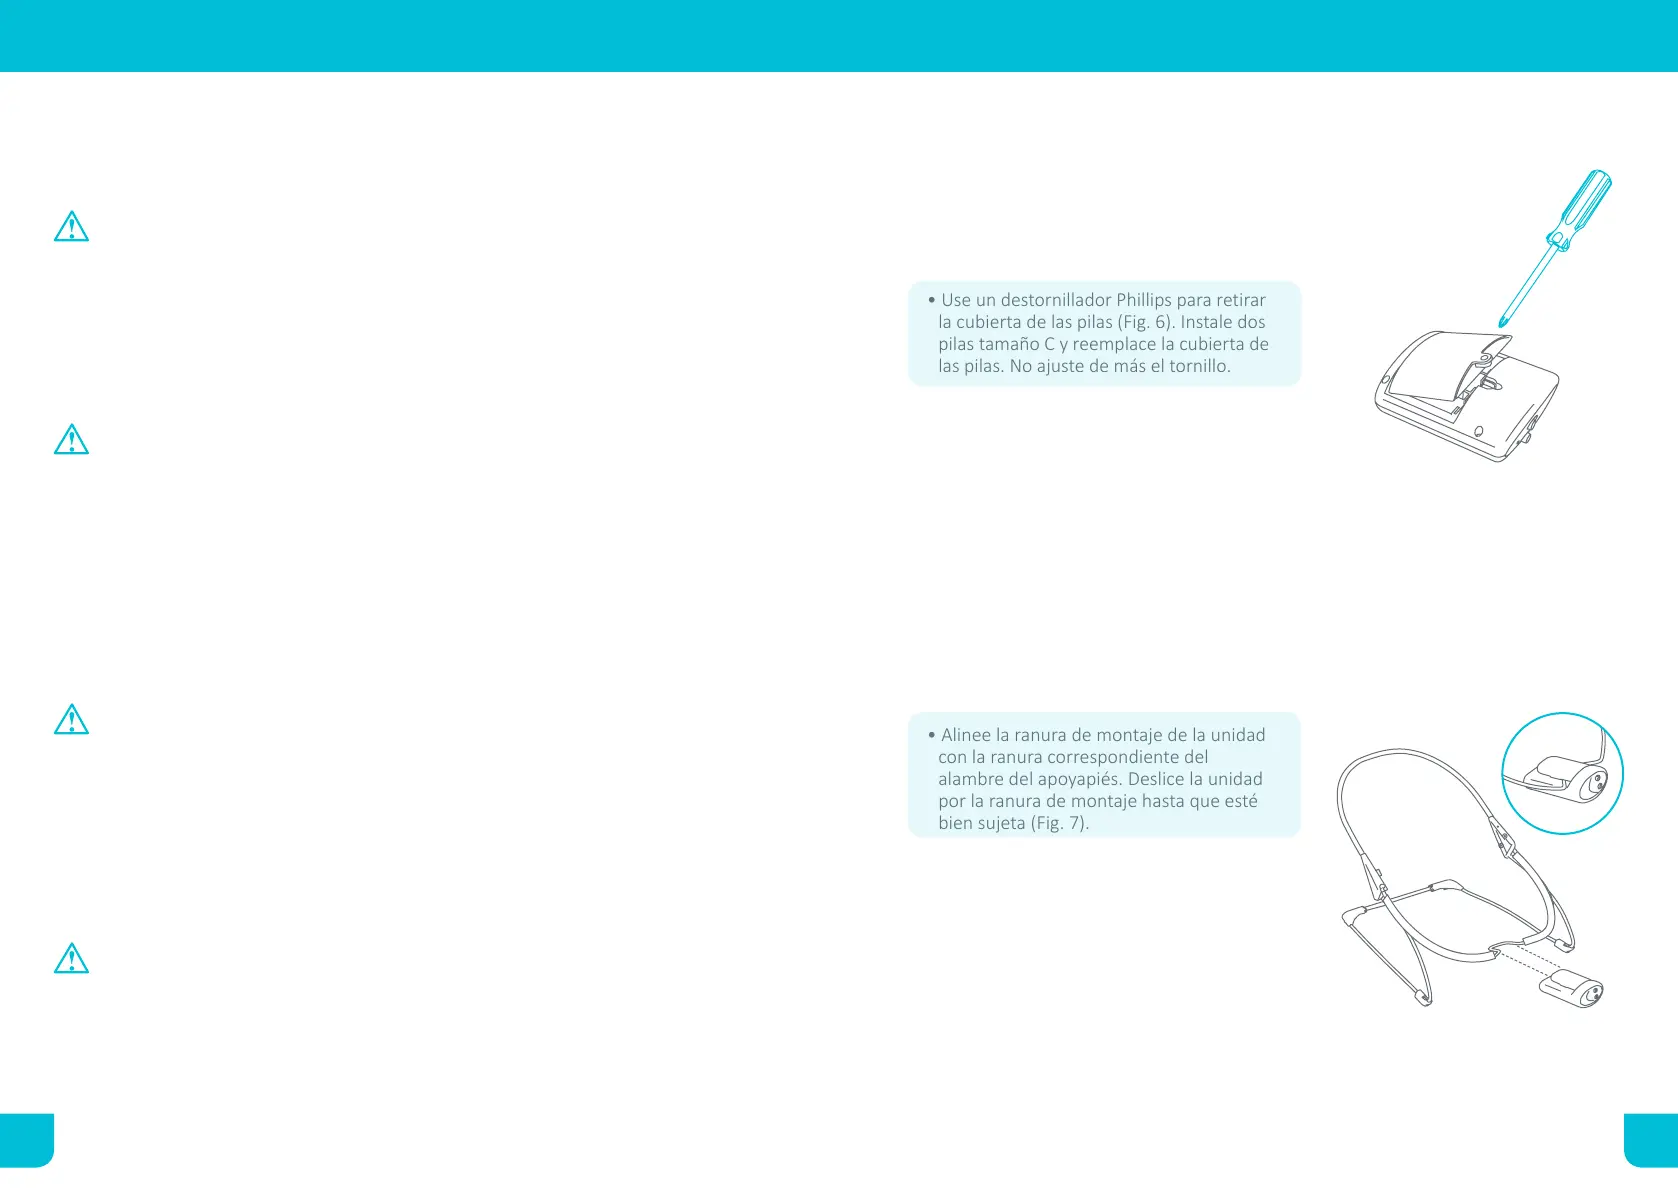
6) • Remove the battery cover using a Philips
screwdriver (Fig. 6). Install two size C
batteries and replace the battery cover.
Do not overtighten the screw.
•
Use un destornillador Phillips para retirar
la cubierta de las pilas (Fig. 6). Instale dos
pilas tamaño C y reemplace la cubierta de
las pilas. No ajuste de más el tornillo.
INSTALLING MUSIC/VIBRATION UNIT
INSTALACIÓN DE LA UNIDAD DE MÚSICA/
VIBRACIÓN
7) • Align the mounting groove on the unit to
the corresponding slot on Footrest wire.
Slide the unit onto the mounting groove
until it is securely in place
(Fig. 7).
• Alinee la ranura de montaje de la unidad
con la ranura correspondiente del
alambre del apoyapiés. Deslice la unidad
por la ranura de montaje hasta que esté
bien sujeta (Fig. 7).
Fig. 6
Fig. 7
Bekijk gratis de handleiding van Baby Trend Smart Steps Trend EZ Bouncer, stel vragen en lees de antwoorden op veelvoorkomende problemen, of gebruik onze assistent om sneller informatie in de handleiding te vinden of uitleg te krijgen over specifieke functies.
Productinformatie
| Merk | Baby Trend |
| Model | Smart Steps Trend EZ Bouncer |
| Categorie | Niet gecategoriseerd |
| Taal | Nederlands |
| Grootte | 2816 MB |


