Baby Trend Quest PLUS 2-in-1 handleiding
Handleiding
Je bekijkt pagina 6 van 18
8
9
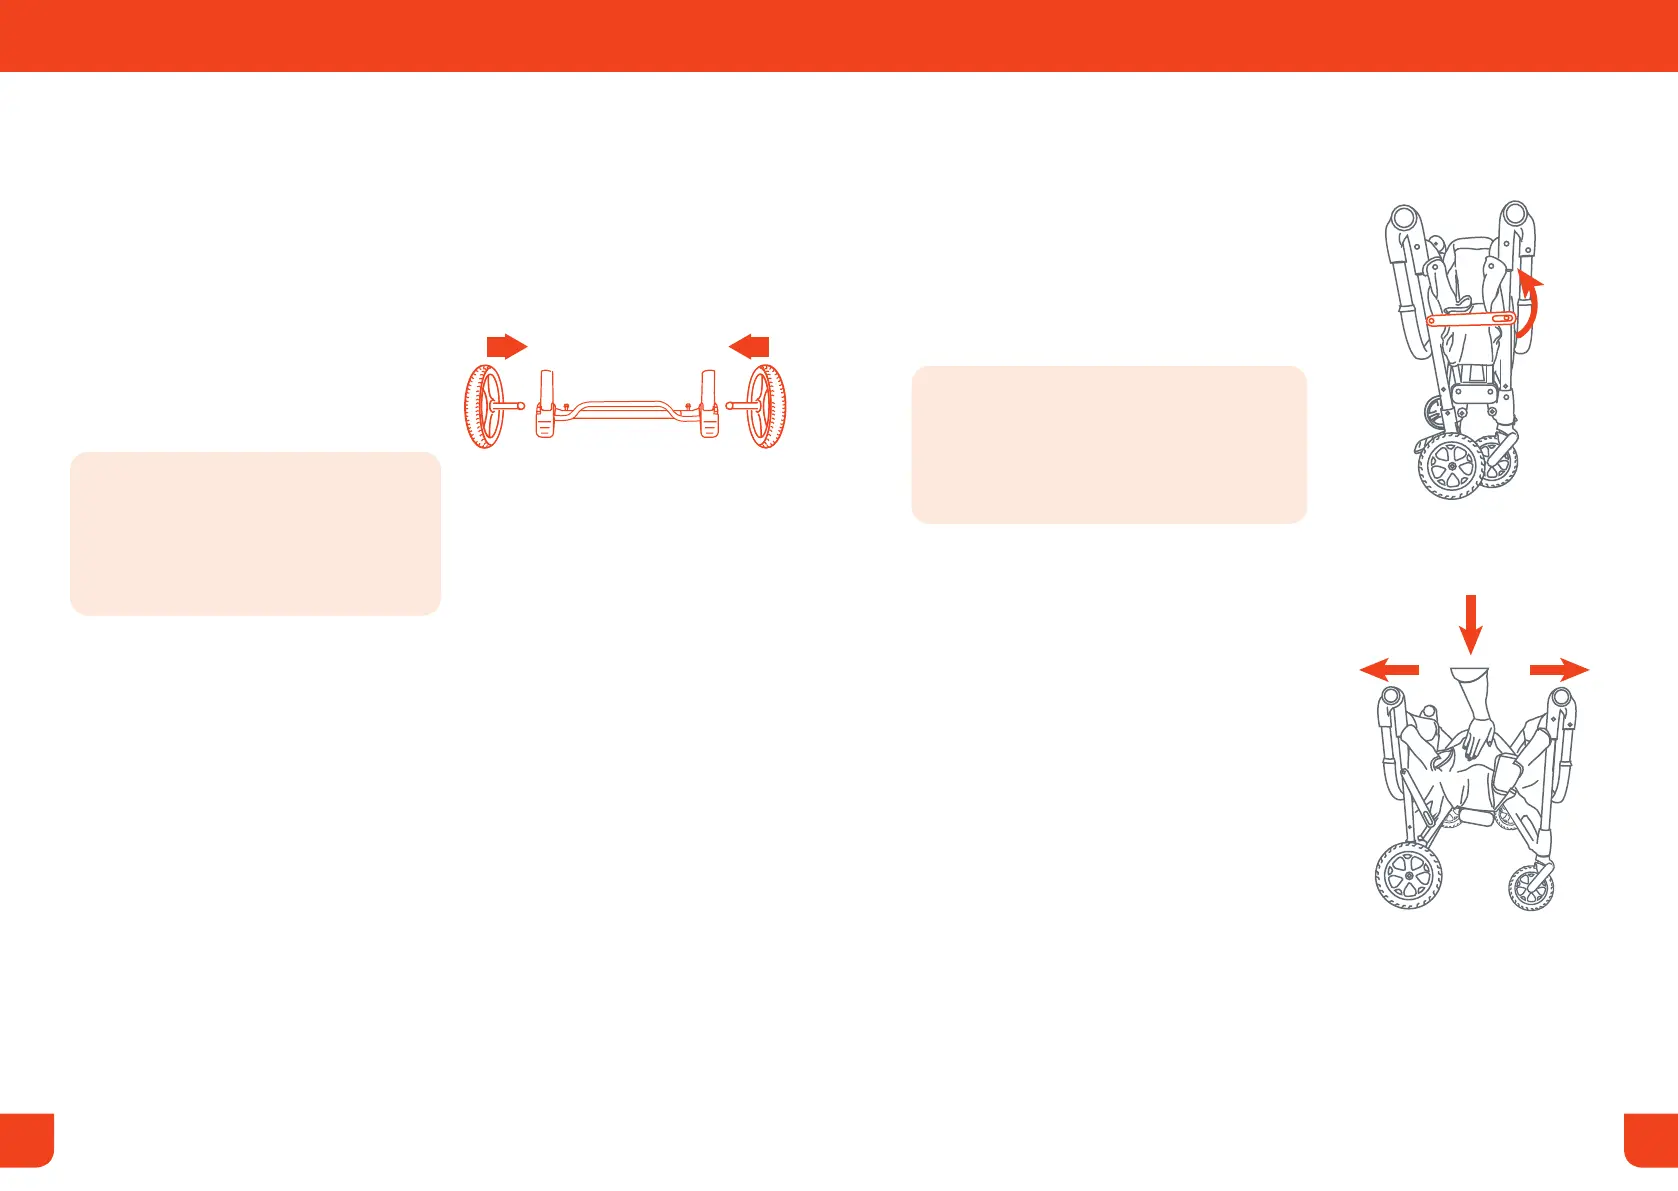
ASSEMBLY MONTAJE ASSEMBLY MONTAJE
Attach the rear wheels as follows:
Coloque las ruedas traseras de la
siguiente manera:
3) • Place the rear wheel over hole on the
side of the rear axel. Push the wheel
into the rear axel until there is a click.
Ensure both sides lock into place
(Fig. 3).
• Coloque la rueda trasera sobre el
oricio ubicado en el costado del
eje trasero. Empuje la rueda hacia
el eje trasero hasta que escuche un
clic. Asegúrese de que ambos lados
encajen en su lugar (Fig. 3).
REAR AXLE-WHEELS
EJE TRASERO-RUEDAS TRASERAS
NOTE: NEVER use wagon if wheels do not lock into place. If you need
assistance, please contact our customer service department at 1-800-328-7363,
M-F, between 8am and 4:30pm, PST.
NOTA: NUNCA use el vagón si las ruedas no se traban correctamente. Si
necesita ayuda, comuníquese con nuestro departamento de servicio al cliente
al 1-800-328-7363, de lunes a viernes, en el horario de 8 a.m. a 4:30 p.m., Hora
Estándar del Pacíco.
Fig. 3
Always push in each
rear wheel into position
Siempre empuje cada rueda
trasera a su posición
“Click”
“Clic”
FRAME SETUP
INSTALACIÓN DE MARCO
4) • Release the fold latch (Fig. 4a).
• Unfold the wagon by pushing the middle
of the frame down until there is a click
(Fig. 4b).
• Suelte el pestillo de pliegue (Fig. 4a).
• Despliegue el vagón empujando el
centro del marco hacia abajo hasta que
escuche un clic (Fig. 4b).
Fig. 4b
Fig. 4a
Bekijk gratis de handleiding van Baby Trend Quest PLUS 2-in-1, stel vragen en lees de antwoorden op veelvoorkomende problemen, of gebruik onze assistent om sneller informatie in de handleiding te vinden of uitleg te krijgen over specifieke functies.
Productinformatie
| Merk | Baby Trend |
| Model | Quest PLUS 2-in-1 |
| Categorie | Niet gecategoriseerd |
| Taal | Nederlands |
| Grootte | 2917 MB |


