AVMATRIX EAGLE P20 4K handleiding
Handleiding
Je bekijkt pagina 39 van 44
38
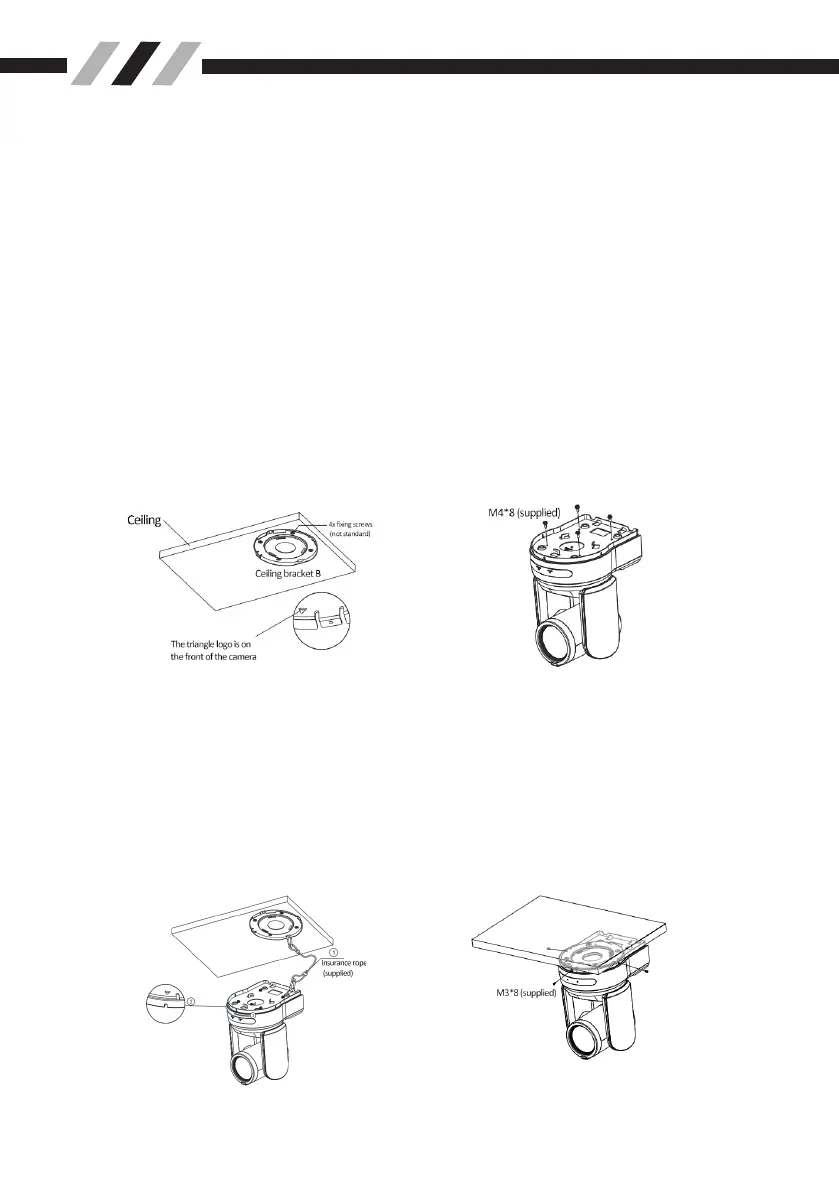
1.
Attach the ceiling bracket (B) to the
attachment materials (not supplied) to
mount the camera on the ceiling. Be
sure to attach it so that the triangle sign
hole of the ceiling bracket (B) is placed
where the front of the camera will face.
3.
Fasten the safety wires to the ceiling
brackets A and B respectively. Make sure
that the triangle marks of ceiling bracket
A and bracket B are aligned as shown in
the figure, and then rotate the camera
clockwise so that ceiling bracket A and
bracket B are fully locked.
4.
Fix ceiling brackets A and B using the
three screws provided (M3 X 8).
2.
Mount the ceiling bracket A to the
bottom of the camera using the 4 screws
provided (M4 X 8) as shown cam.
The camera can be mounted on a ceiling or on a shelf or stand located at a
high spot using the supplied ceiling bracket. The surface on which the camera will
be mounted should be level. If you have to mount the camera on a tilted surface,
make sure that the angle is less than 15 degrees to ensure the camera can pan/tilt
properly.
5.3 Installing the camera at a high spot (ceiling)
◆
Mounting the camera on the ceiling (example)
4K Ultra HD PTZ Camera
ceiling bracket A
Bekijk gratis de handleiding van AVMATRIX EAGLE P20 4K, stel vragen en lees de antwoorden op veelvoorkomende problemen, of gebruik onze assistent om sneller informatie in de handleiding te vinden of uitleg te krijgen over specifieke functies.
Productinformatie
| Merk | AVMATRIX |
| Model | EAGLE P20 4K |
| Categorie | Bewakingscamera |
| Taal | Nederlands |
| Grootte | 5998 MB |


